
I once tried to convince my kitchen that I had magically run out of groceries and therefore deserved a pastry. The jury (a very unimpressed roommate) demanded evidence, so I mashed three shriveled bananas, grabbed a single egg, and rummaged until I found a bag labeled “self-rising flour” like a tiny culinary miracle. Ten minutes later the apartment smelled like warm caramel and childhood, and the roommate ate two slices before polishing off their protest. This 3-ingredient banana bread feels a little like cheating — in the best possible way. It’s goofy-simple, reliably cozy, and forgiving enough for the kind of mornings when you only have one sock and unlimited optimism.
Quick Facts
- Yield: Serves 8
- Prep Time: 10 minutes
- Cook Time: 50 minutes
- Total Time: 60 minutes
Why This Recipe is Awesome
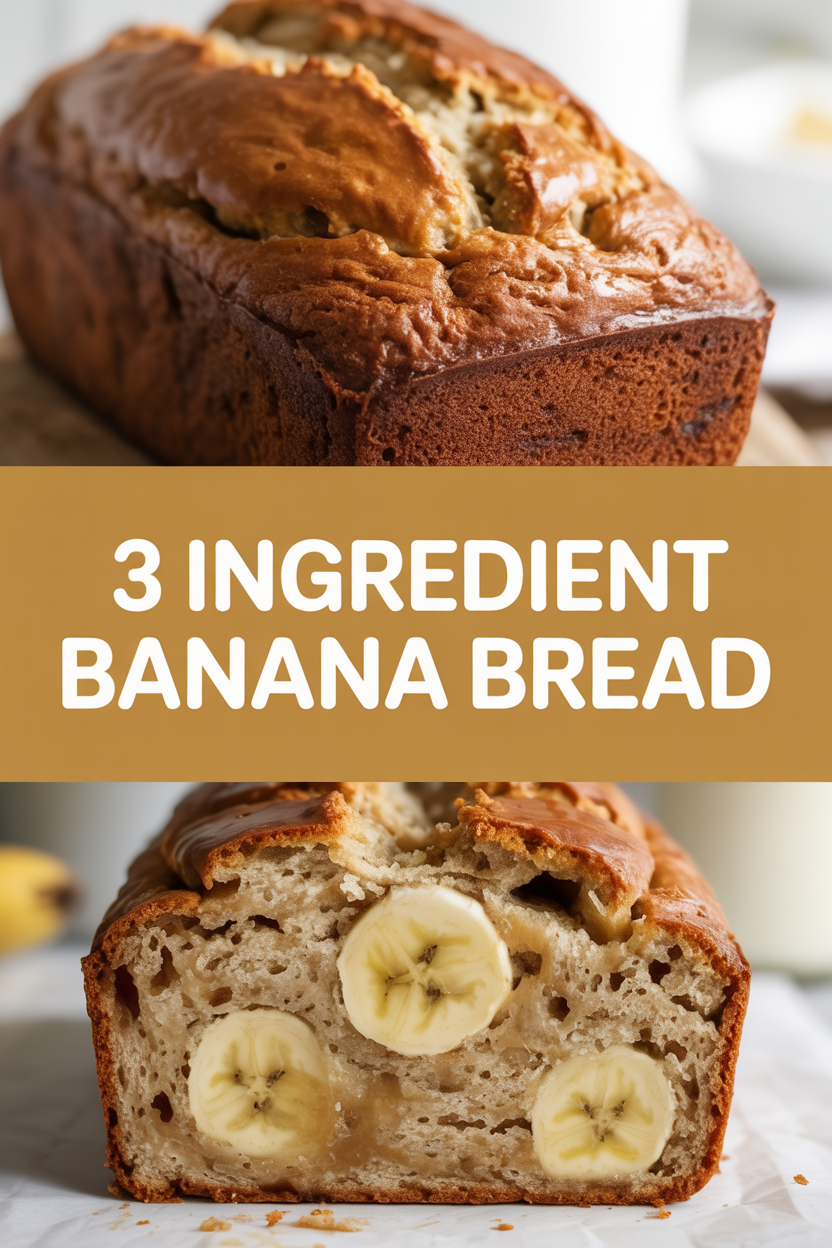
This loaf refuses to be fussy. With only three pantry-friendly ingredients you get a tender, slightly caramelized crumb, crisp golden edges, and that sweet banana aroma that makes the whole house sigh. It’s so easy even your oven can’t mess it up — and it pairs beautifully with coffee, yogurt, or your grand escape plan for breakfast-on-the-go. Texture? Soft center, delicate crust. Taste? Warm, sweet, and comfortingly familiar.
Ingredients
For the Main Dish:
- 3 large very ripe bananas (about 1 1/2 cups mashed; the blacker the spots, the sweeter the bread)
- 1 3/4 cups self-rising flour
- 1 large egg
For the Sauce / Garnish (if applicable):
- Optional: sprinkle of coarse sugar or a handful of chocolate chips or chopped walnuts — these count as garnishes, not ingredients for the “3” rule.
How I Make It
Step 1:
I preheat the oven to 350°F and grease an 8×4-inch loaf pan with a little butter or nonstick spray. Then I peel those sad, spotted bananas and mash them in a bowl with a fork until the texture looks lumpy-smooth — about 1 1/2 cups. You should hear a little squish and smell the sweet, almost caramel scent of the fruit.
Step 2:
In a second bowl I crack in the egg and whisk it lightly, just enough to combine whites and yolk. I fold the egg into the mashed bananas with a spatula — no electric mixer, no drama — until the mixture looks glossy and a little airy. This step helps trap pockets of air for a tender crumb.
Step 3:
Now I sprinkle in the self-rising flour and gently fold until the batter comes together. Watch for streaks of dry flour and stop once you don’t see them; overmixing makes a tough loaf. The batter will be thick, yellow-cream with flecks of banana. At this point I might fold in a handful of chocolate chips or nuts for crunch — that satisfying clink when walnuts hit the pan always makes me grin.
Step 4:
I scrape the batter into the prepared pan, smooth the top with a spatula, and slide it into the oven. I bake at 350°F for about 45–55 minutes. Start checking at 45 minutes: look for golden-brown edges, a slightly domed top, and a toothpick that comes out with a few moist crumbs (not raw batter). If the top browns too fast, tent with foil.
Step 5:
I let the loaf rest in the pan for 10 minutes so the crumbs settle, then run a knife around the edges and flip it onto a rack to cool the rest of the way. Slice when warm or room temperature. I like a slab with a smear of butter that melts into the nooks — heaven.
Pro Tips
- Use very ripe bananas. They bring natural sweetness and moisture — the riper, the better.
- If your self-rising flour feels old, add a pinch of extra baking powder (about 1/2 tsp) to boost lift.
- Don’t overmix the batter; stop folding once dry streaks disappear to keep the crumb tender.
- For even baking, place the loaf on the middle rack and rotate once halfway through if your oven runs hot.
Common Mistakes to Avoid
- Skipping preheating: Classic rookie move. It changes texture and bake time.
- Overmixing: Leads to dense or chewy results. Mix until just combined.
- Guessing cook time: Always use visual cues or a timer, not just vibes.
- Overcrowding pans: Give your food some breathing room to crisp properly.
Alternatives & Substitutions
- If you don’t have self-rising flour, use 1 3/4 cups all-purpose flour + 2 tsp baking powder + 1/2 tsp salt. That keeps the rise but adds two extra pantry items.
- For dairy-free, this recipe naturally contains no dairy; use oil to grease the pan or a dairy-free spread for serving.
- For gluten-free, swap in a 1:1 gluten-free baking flour blend that contains xanthan gum (use the same amount).
Variations & Tips
- Add 1/2 cup chocolate chips for an indulgent twist — kids will love this version.
- Stir in 1/2 cup chopped walnuts or pecans for nutty crunch and a toasty flavor.
- Swirl in 2 tbsp of peanut butter before baking for a salty-sweet surprise.
- For a citrus lift, fold in 1 tbsp grated orange zest and a pinch of cinnamon.
- Make mini loaves or muffins: bake at 350°F for 18–22 minutes for muffins, 30–35 minutes for mini loaves.
- Creative twist: sprinkle flaky sea salt on top before baking to highlight the banana’s sweetness.
FAQ (Frequently Asked Questions)
- Can I make this ahead of time?
- Yes! Bake the loaf, let it cool completely, then wrap tightly in plastic wrap and refrigerate up to 3 days or freeze for up to 2 months. Reheat slices in a 350°F oven for 8–10 minutes or microwave for 20–30 seconds.
- Can I double the recipe?
- Sure thing. Use two loaf pans and monitor baking times; larger volume might need an extra 5–10 minutes. If you bake in one large pan, add 10–15 minutes and test doneness with a toothpick.
- Can I substitute butter with oil?
- Technically yes, but you’ll miss that buttery magic. Use ¾ the amount of oil.
- How do I know it’s done?
- Look for golden-brown edges, a firm top that springs back when pressed lightly, and a toothpick inserted in the center that emerges with a few moist crumbs but no raw batter.
- What if I don’t have ingredient X?
- If you lack self-rising flour, use all-purpose + baking powder. If you lack an egg, try a flax egg (1 tbsp ground flaxseed + 3 tbsp water) though texture shifts slightly.
How I Like to Serve It
I slice this warm with a pat of butter and a hot cup of coffee for lazy weekend mornings. For lunchbox magic, I wrap a slice in parchment and toss it into a tote. At potlucks I cut into small squares and let people choose toppings — nutella, cream cheese, or good old peanut butter. It also shines in late-summer breakfasts when bananas taste like sunshine.
Notes
- Store cooled banana bread wrapped at room temperature up to 2 days, refrigerated up to 5 days, or frozen up to 2 months.
- If reheating, warm at 350°F for a few minutes or microwave briefly for a buttery-melted effect.
Final Thoughts
Closing: This tiny-ingredient loaf packs big comfort. Now go impress someone — or just yourself — with your homemade masterpiece!

Hi, I’m Lina, the creator of Lina Easy Recipes.Cooking has always been my passion, and I love sharing simple, homemade dishes that anyone can prepare.
Love What You See?
Join me on Pinterest and Facebook for daily cooking inspiration, new recipe ideas, and behind-the-scenes kitchen stories. Let’s cook something wonderful together!


