
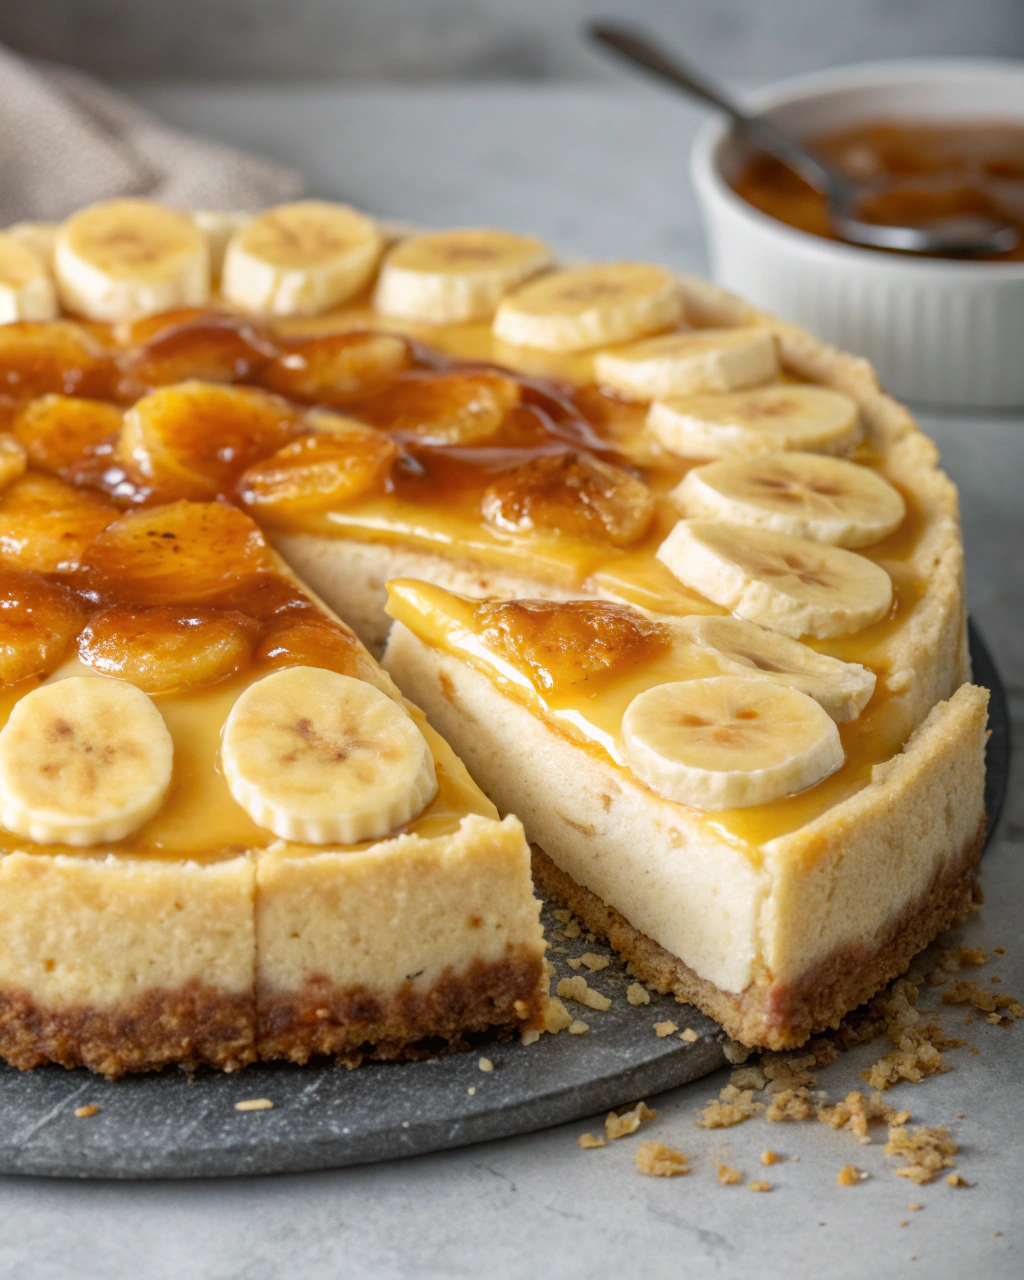
No Bake Banana Pudding Cheesecake
Okay, I have a confession: every time I make this No Bake Banana Pudding Cheesecake, I feel like a dessert magician. Seriously, no oven needed, yet it comes together looking and tasting like a showstopper! The creamy layers with that perfect banana sweetness feel like an extra-special treat without the fuss. Plus, the silky texture gives you all those cozy pudding vibes in cheesecake form. If you love banana pudding (and who doesn’t?), this dessert is basically a love letter to that nostalgic flavor—but so much more luxe and indulgent. I can’t wait to walk you through how to whip it up at home—trust me, you’ll want seconds (and maybe thirds!).
Quick Facts
- Yield: Serves 8
- Prep Time: 20 minutes
- Cook Time: 0 minutes (plus chill time)
- Total Time: 4 hours (including chilling)
Ingredients
For the Main Dish:
- 2 ½ cups vanilla wafer crumbs (about 40 wafers)
- 6 tbsp unsalted butter, melted
- 3 ripe bananas, sliced
- 16 oz cream cheese, softened
- 1 cup powdered sugar
- 1 tsp vanilla extract
- 2 cups heavy whipping cream
- 1 (5.1 oz) package instant vanilla pudding mix
- 2 cups cold milk
For the Garnish:
- Extra banana slices
- Vanilla wafers or crushed crumbs
- Whipped cream (optional)
How I Make It
Step 1:
First, let’s build that crust. Combine the vanilla wafer crumbs with melted butter in a bowl until everything resembles damp sand. Press the mixture evenly into the bottom of a 9-inch springform pan to form a solid, sturdy base. Pop it in the fridge to chill—it helps the crust firm up nicely while you prep the filling.
Step 2:
In a large bowl, beat the cream cheese until smooth and creamy. Add the powdered sugar and vanilla extract, mixing until fully combined and silky.
Step 3:
In a separate bowl, whisk together the instant vanilla pudding mix with the cold milk until it thickens (this usually takes about 2 minutes). Once set, fold this pudding gently into the cream cheese mixture. It gives the filling that dreamy banana pudding texture.
Step 4:
Now whip the heavy cream to stiff peaks—this means when you lift your whisk, the peaks hold firm without drooping. Fold the whipped cream carefully into your pudding-cream cheese blend, keeping it light and airy.
Step 5:
With everything ready, start assembling: spread a thin layer of filling on the crust, layer sliced bananas on top, then add the rest of the filling, smoothing it out. Cover and refrigerate for at least 4 hours, or overnight if you can wait—this resting time lets all the flavors mingle beautifully.
Step 6:
Before serving, garnish with extra banana slices, vanilla wafers, or a dollop of whipped cream. Slice slowly with a warm knife for clean, perfect pieces!
Variations & Tips
- Swap vanilla wafers for graham crackers or digestive biscuits for a different crust flavor.
- For an extra tropical twist, add a splash of rum or banana liqueur to the filling mix.
- If bananas brown quickly, brush slices lightly with lemon juice before layering.
- Use a hand mixer or stand mixer for the whipped cream to save time and get perfect peaks.
- Need it gluten-free? Use gluten-free cookies for the crust.
- Chill your mixing bowls beforehand to help the cream whip faster and fluffier.
How I Like to Serve It
This cheesecake shines at summer BBQs or any warm-weather gathering—its cool, creamy texture is a real crowd-pleaser. It’s just perfect paired with a cup of strong coffee or a chilled glass of sparkling wine. When bananas are in-season, I love adding fresh-sliced bananas on top for extra freshness and that *wow* factor.
Notes
- Store leftovers tightly covered in the fridge for up to 3 days. It’s even better after a day!
- This cheesecake doesn’t freeze well due to the fresh bananas and whipped cream.
Closing: This No Bake Banana Pudding Cheesecake is one of those recipes that feels like a hug on a plate—simple, sweet, and absolutely foolproof every single time.

Hi, I’m Lina, the creator of Lina Easy Recipes.Cooking has always been my passion, and I love sharing simple, homemade dishes that anyone can prepare.
Love What You See?
Join me on Pinterest and Facebook for daily cooking inspiration, new recipe ideas, and behind-the-scenes kitchen stories. Let’s cook something wonderful together!


