
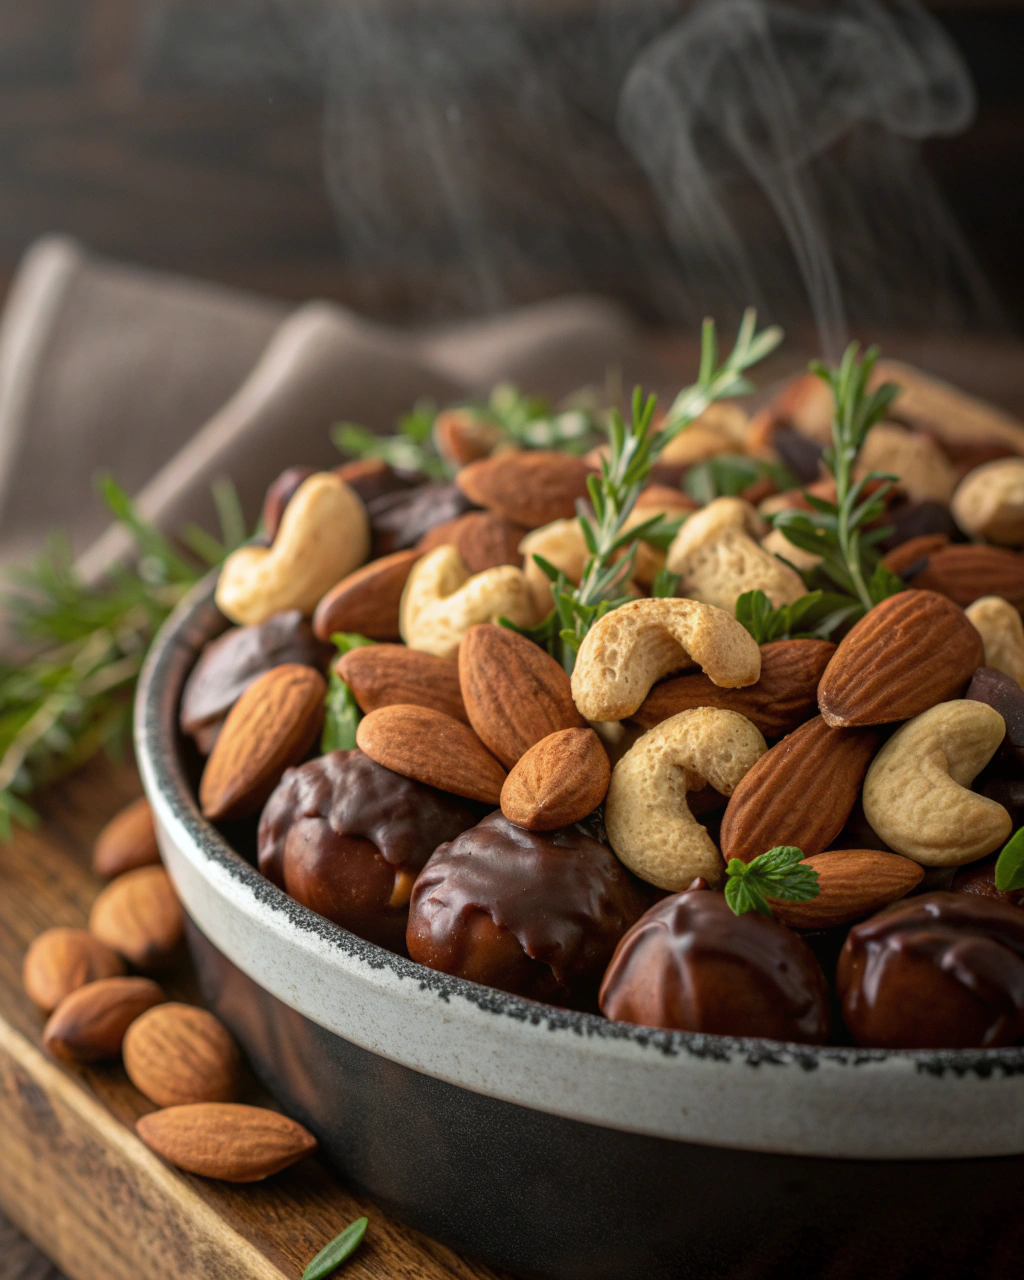
Chocolate-covered almonds and cashews
Okay, picture this: me as a kid, sneaking into the kitchen late at night, eyes wide with excitement because the candy drawer held these irresistibly crunchy, chocolate-covered almonds and cashews. The moment I popped one into my mouth, the smooth chocolate melted perfectly around the nut’s satisfying snap—pure magic! Fast forward to today, and making these at home has become my go-to treat whenever I want to feel a little nostalgic (and a lot indulgent). Honestly, homemade chocolate-covered nuts feel like a tiny celebration with every bite. Plus, they’re so easy to whip up, you’ll be wondering why you ever bought the store-bought versions. Ready to dive in and create your own batch of this crunchy, chocolaty goodness? Let’s go!
Quick Facts
- Yield: About 2 cups
- Prep Time: 10 minutes
- Cook Time: 15 minutes (chilling time separate)
- Total Time: 1 hour
Ingredients
For the Main Dish:
- 1 cup whole almonds (raw or roasted)
- 1 cup whole cashews (raw or roasted)
- 8 ounces semi-sweet or dark chocolate chips
- 1 teaspoon coconut oil or vegetable oil (optional, for shinier chocolate)
- Pinch of sea salt (optional, for finishing)
How I Make It
Step 1:
Start by prepping your nuts: if they aren’t already roasted, toast them in a dry skillet over medium heat for about 5–7 minutes, tossing every couple of minutes until they’re golden and smelling toasty. This brings out the best flavor and crunch.
Step 2:
Next, melt your chocolate gently. I like to use a double boiler setup or microwave in short 20-second bursts, stirring in between. When almost melted, stir in the 1 teaspoon of coconut oil to add shine and smoothness to the chocolate coating.
Step 3:
Once melted, quickly toss the almonds and cashews into the chocolate, using a spoon or spatula to coat every nut evenly. Work fast here so the chocolate doesn’t set before you’re ready!
Step 4:
Using a fork or slotted spoon, transfer the chocolate-coated nuts onto a parchment-lined baking sheet. Spread them out so they’re not clumped together and let them cool slightly.
Step 5:
Sprinkle a tiny pinch of sea salt over the nuts while the chocolate is still soft for a sweet-salty pop that ramps up the flavor.
Step 6:
Pop them in the refrigerator for about 30 minutes until the chocolate is firm and glossy. Then, break apart any clusters, store in an airtight container, and enjoy!
Variations & Tips
- Swap out half the nuts for pecans or hazelnuts for a mixed nut variety.
- Use milk chocolate or white chocolate if you prefer a sweeter, creamier coating.
- Add a dash of cinnamon or chili powder to the melted chocolate for a spicy twist.
- Don’t have coconut oil? Butter or a neutral vegetable oil works well to smooth the chocolate.
- If chocolate seizes or becomes grainy, add a tiny splash of warm oil and stir vigorously to rescue it.
- For extra crunch, sprinkle crushed freeze-dried berries or chopped toffee bits on top right after coating.
How I Like to Serve It
I love packing these chocolate-covered almonds and cashews into cute little jars as gifts during the holidays or bringing them along to potlucks—they’re always a crowd-pleaser! They also make for a fantastic afternoon pick-me-up with a hot cup of coffee or tea, especially on a crisp fall afternoon. Honestly, they’re such a perfect snack when you want something fancy but fuss-free.
Notes
- Store in an airtight container at room temp for up to a week, or refrigerate to keep longer.
- If chocolate blooms (white streaks) over time, it’s still tasty—just not as glossy.
Closing: Homemade chocolate-covered nuts are a little delicious batch of comfort and crunch, and once you try this recipe, you’ll wonder how you ever lived without making them yourself!

Hi, I’m Lina, the creator of Lina Easy Recipes.Cooking has always been my passion, and I love sharing simple, homemade dishes that anyone can prepare.
Love What You See?
Join me on Pinterest and Facebook for daily cooking inspiration, new recipe ideas, and behind-the-scenes kitchen stories. Let’s cook something wonderful together!

 - spooky Halloween popcorn snack")


