
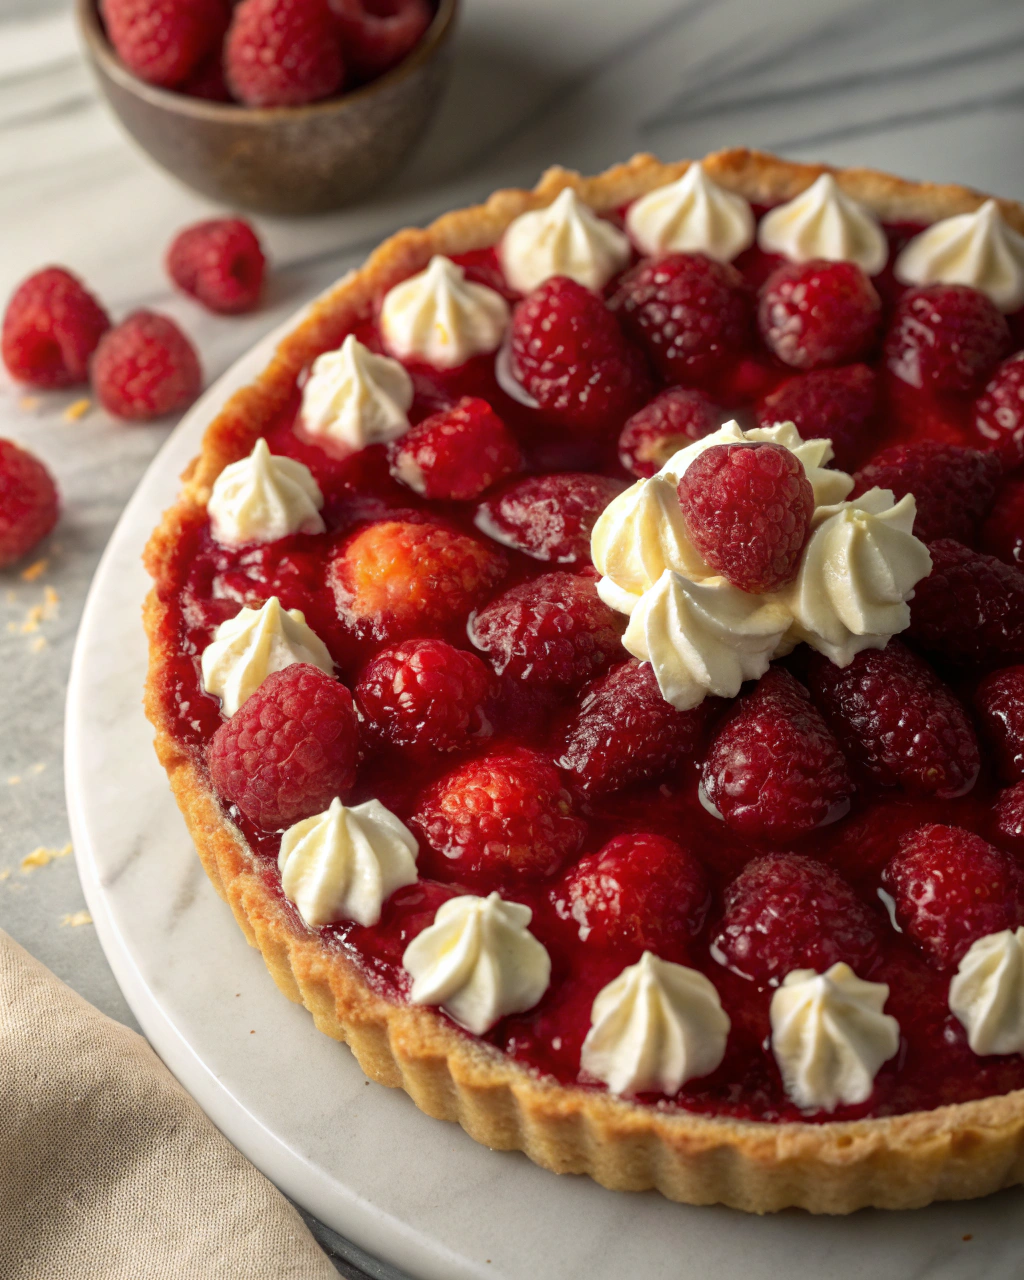
Raspberry Tart That Looks Straight From a Bakery
Okay, picture this: a golden, flaky crust hugging a creamy, dreamy filling topped with the brightest, juiciest raspberries you’ve ever seen—all glistening like they just walked out of a fancy bakery window. Sound intimidating? It’s not! I stumbled upon this recipe after a few “practice runs” (read: lots of taste tests) and finally nailed a tart that’s as stunning as it is delicious. The best part is, it’s surprisingly simple to make at home—no complicated pastry chef moves required. Let me show you how to create this show-stopping raspberry tart that’ll have your guests asking for your secret!
Quick Facts
- Yield: Serves 8
- Prep Time: 25 minutes
- Cook Time: 30 minutes
- Total Time: 1 hour (including chilling)
Ingredients
For the Main Dish:
- 1 1/4 cups all-purpose flour
- 1/4 cup granulated sugar
- 1/2 teaspoon salt
- 8 tablespoons (1 stick) unsalted butter, cold and cubed
- 1 large egg yolk
- 2 tablespoons ice-cold water (more if needed)
- 8 ounces cream cheese, softened
- 1/4 cup powdered sugar
- 1 teaspoon vanilla extract
- 1 cup heavy cream, cold
- 2 cups fresh raspberries
- 1/4 cup apricot jam (for glaze)
How I Make It
Step 1:
Let’s start with the crust—combine flour, sugar, and salt in a bowl. Then, toss in your cold cubed butter. Use a pastry cutter or your fingers to mix until it resembles coarse crumbs with pea-sized bits. Next, add the egg yolk and ice water a tablespoon at a time, stirring just until the dough comes together. Don’t overwork it! Wrap in plastic and chill for at least 30 minutes.
Step 2:
Roll out the chilled dough on a floured surface to fit a 9-inch tart pan. Press the dough gently into the pan and prick the bottom with a fork. Chill again for 10 minutes before blind baking at 375°F for 15-18 minutes until golden brown. Pro tip: Use pie weights or dried beans to keep the crust from puffing up.
Step 3:
While the crust cools, make your filling. Beat the softened cream cheese with powdered sugar and vanilla until smooth. In a separate bowl, whip the cold heavy cream to stiff peaks, then gently fold it into the cream cheese mixture for a fluffy, silky texture.
Step 4:
Spread the cream cheese filling evenly into the cooled tart shell. Take a moment to admire that base—it’s the perfect canvas for raspberries!
Step 5:
Arrange the fresh raspberries on top in a beautiful pattern. I love lining the outer edge first, then filling in the center—it’s like painting with fruit!
Step 6:
Finally, warm the apricot jam in a small saucepan or microwave until it’s runny, then brush it lightly over the raspberries for a shiny glaze. Chill the tart for at least an hour before slicing to set everything nicely.
Variations & Tips
- Swap raspberries for blueberries, blackberries, or sliced strawberries depending on what’s fresh.
- Add a layer of lemon curd or raspberry jam under the filling for an extra zing.
- Use a food processor to make the crust dough faster—but don’t overprocess!
- If your crust cracks while rolling, pinch it back together gently and chill before baking.
- For a gluten-free take, try almond flour crust with a touch of coconut oil.
- Brush the tart shell with an egg wash before baking for a golden shine.
How I Like to Serve It
This raspberry tart is my go-to dessert for weekend brunches or casual dinner parties. It pairs beautifully with a dollop of whipped cream or a scoop of vanilla ice cream on the side. I especially love making this when fresh summer berries flood the market—there’s nothing quite like that burst of color and natural sweetness on a warm day.
Notes
- Store leftovers covered in the fridge for up to 3 days—best enjoyed fresh!
- If you want to prep ahead, bake the crust and keep it chilled separately until ready to assemble.
Closing: This raspberry tart always impresses, combining simple ingredients into a stunning dessert that tastes just as good as it looks!

Hi, I’m Lina, the creator of Lina Easy Recipes.Cooking has always been my passion, and I love sharing simple, homemade dishes that anyone can prepare.
Love What You See?
Join me on Pinterest and Facebook for daily cooking inspiration, new recipe ideas, and behind-the-scenes kitchen stories. Let’s cook something wonderful together!


