Classic breaded chicken cutlet with garlic butter sauce
Spread the love
Okay, lean in—this is a little chef’s secret I love to share at dinner parties when people ask why my chicken tastes like it belongs in a bistro. The trick? Respect the basics: thin, evenly pounded cutlets, a triple-dip breading that clings, and a quick pan fry finished with a bright garlic-butter sauce that you’ll want to drizzle on everything. I’ll walk you through the whole thing like I’m standing next to you at the stove—no intimidating jargon, just sensible steps and a couple of sneaky tips I picked up after too many chewy chicken experiments. Expect crackling oil, golden edges, and the smell of warm garlic and lemon that will make your kitchen smell like a cozy weekend café.
Quick Facts
Yield: Serves 4
Prep Time: 20 minutes
Cook Time: 15 minutes
Total Time: 35 minutes
Why This Recipe is Awesome
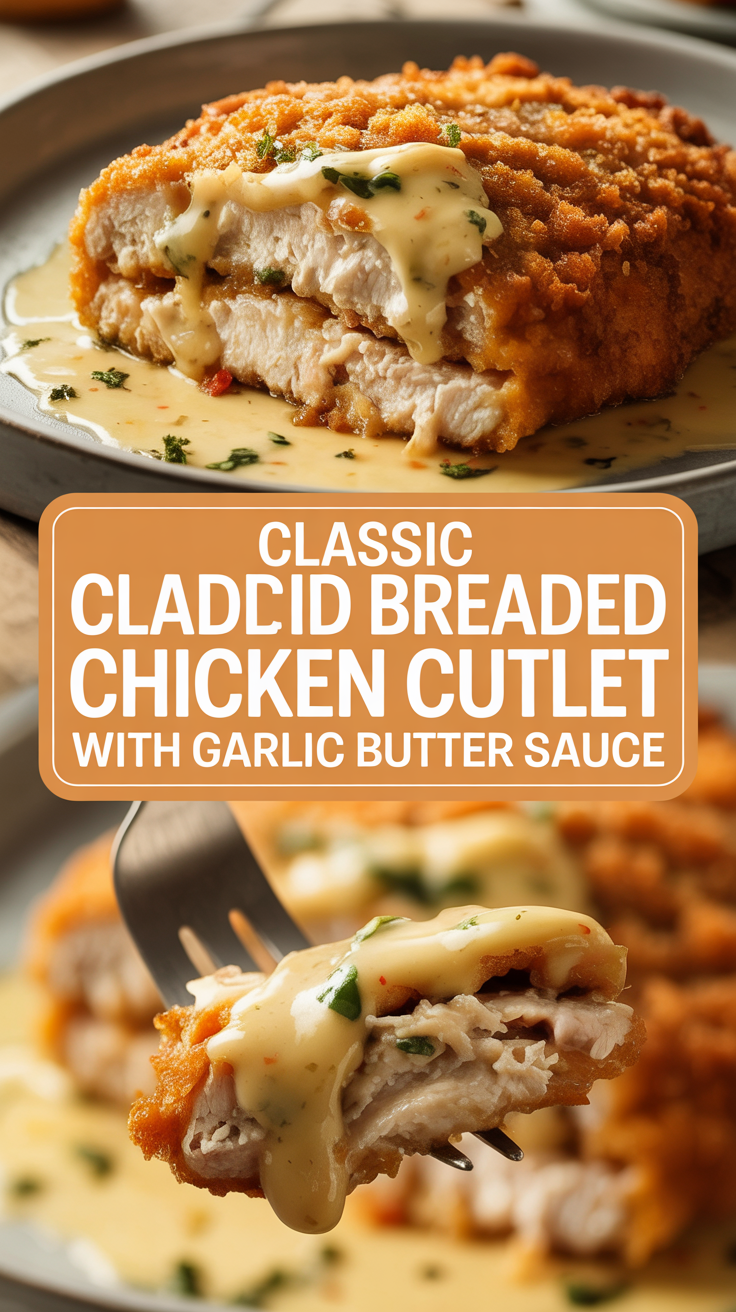
This recipe gives you a satisfyingly crispy crust and a juicy center every time. The breading stays crunchy because you pound the chicken thin and let the crumb bind. The garlic-butter sauce brightens the whole dish with a hit of lemon and fresh parsley — it’s like a warm, savory hug on a plate. It’s simple, quick, and impressive; perfect for a weeknight or a casual dinner that looks fancier than it is. Who doesn’t love crispy edges and that buttery, garlicky shine?
Ingredients
For the Main Dish:
1.5 lbs boneless, skinless chicken breasts (about 4 small breasts; slice in half horizontally or pound to 1/4 inch)
Slice the chicken breasts in half horizontally or place each between plastic wrap and pound them to 1/4 inch thickness with a meat mallet or rolling pin. Season both sides with salt and pepper. You’ll feel the difference when the chicken hits the pan—thin cutlets crisp up and cook evenly, so don’t skip the pounding.
Step 2:
Set up a dredging station: one shallow bowl with 1/2 cup flour (seasoned lightly), one with beaten 2 eggs + 2 tbsp milk, and one with the breadcrumb mix (1 1/2 cups panko + 1/3 cup Parmesan + garlic powder + paprika). Dredge each cutlet in flour, shake off excess, dip into egg, then press into breadcrumbs. Press firmly so the crumbs really cling; the texture should feel compact, not loose.
Step 3:
Heat a large skillet over medium-high heat and add 3 tbsp olive oil + 2 tbsp butter. When the fat shimmers and the butter stops foaming, add cutlets. You should hear a satisfying sizzle—don’t crowd the pan; cook in batches. Fry until the bottom turns golden, about 2–3 minutes per side, then flip. The crust should sound crisp and look deeply golden.
Step 4:
After the last batch, lower heat to medium. Add 4 tbsp butter to the skillet and melt, then add 3 cloves minced garlic. Cook for about 30–45 seconds until fragrant (you’ll smell that warm, toasty garlic). Stir in 1 tbsp lemon juice and 1 tbsp chopped parsley, then spoon the sauce over the cutlets. The sauce will gloss the crust and add that irresistible buttery aroma.
Step 5:
Transfer cutlets to a platter and let them rest for 5 minutes. Resting keeps juices locked in and makes slicing prettier. Finish with an extra sprinkle of parsley, cracked black pepper, and lemon wedges. Slice on the bias and serve immediately while the crust still sings when you bite it.
Pro Tips
Pound to an even thickness so every cutlet cooks in the same time — no overcooked edges, no raw centers.
Keep the oil hot between batches; if it cools too much, the crust soaks up fat instead of crisping.
Use panko for extra crunch; mix in Parmesan for a savory depth.
Want to bake instead? Brush with oil and bake at 425°F for about 12–15 minutes, flipping halfway.
Common Mistakes to Avoid
Skipping preheating: Classic rookie move. It changes texture and bake time.
Overmixing: Leads to dense or chewy results. Mix until just combined.
Guessing cook time: Always use visual cues or a timer, not just vibes.
Overcrowding pans: Give your food some breathing room to crisp properly.
Alternatives & Substitutions
Swap chicken for thin turkey cutlets or pork cutlets — cook times stay similar.
Make it vegetarian: use 1/2-inch thick eggplant slices or firm tofu slabs, press and bread the same way (pan-fry or bake).
Gluten-free option: use gluten-free panko or crushed gluten-free cereal for crumbs.
Dairy-free: skip butter and use extra olive oil or a plant-based spread; flavor will change slightly but stay delicious.
Variations & Tips
Spicy: add 1/2 tsp cayenne to the breadcrumb mix and sprinkle with hot honey at the end.
Herb-crust: stir 1 tbsp chopped fresh thyme and rosemary into the breadcrumbs.
Parmesan-lemon: add lemon zest to the breadcrumb mix for a bright twist.
Kid-friendly: omit red pepper flakes and serve with ketchup or a simple lemon-mayo dip.
Baked version: oven-bake at 425°F on a wire rack for even crisping (12–15 minutes).
Creative twist: top each cutlet with a thin slice of prosciutto, crisp it in the pan for a salty crunch.
FAQ (Frequently Asked Questions)
Can I make this ahead of time?
Yes! Bread the cutlets and keep them on a tray covered in the fridge for up to 24 hours. Fry or bake just before serving for the best crisp. Reheat gently in a 350°F oven on a wire rack so the crust stays crunchy.
Can I double the recipe?
Sure thing. Work in batches and keep finished cutlets on a warm rack (not piled) while you finish. You may need to refill the oil between batches.
Can I substitute butter with oil?
Technically yes, but you’ll miss that buttery magic. Use ¾ the amount of oil.
How do I know it’s done?
Look for a deep golden crust and a gentle spring when you press the center. The internal temperature should reach 165°F for chicken. If you don’t have a thermometer, cut the thickest piece to check that juices run clear and the meat looks opaque.
What if I don’t have ingredient X?
Substitute Parmesan with pecorino or extra breadcrumbs. If you lack panko, blitz regular breadcrumbs for a lighter texture. No lemon? Use a splash of white wine vinegar for tang.
How I Like to Serve It
I love this with a simple arugula salad dressed in lemon and olive oil, roasted baby potatoes, or over a pile of buttery pasta for a heartier meal. For casual nights, tuck the cutlets into soft buns with slaw for a crunchy sandwich. It works for weeknight dinners, weekend guests, or a picnic where everyone fights over the last piece.
Notes
Store leftovers in an airtight container in the fridge for up to 3 days. Reheat in a 350°F oven on a wire rack to keep the crust crisp.
Safe cooking temp for chicken: 165°F.
Final Thoughts
Closing: Now go impress someone — or just yourself — with your homemade masterpiece! There’s nothing like the crunch of a perfect cutlet and that buttery-garlic finish to make a simple meal feel special.
Hi, I’m Lina, the creator of Lina Easy Recipes.Cooking has always been my passion, and I love sharing simple, homemade dishes that anyone can prepare.
Spread the love
Love What You See?
Join me on Pinterest and Facebook for daily cooking inspiration, new recipe ideas, and behind-the-scenes kitchen stories. Let’s cook something wonderful together!