
If you’ve ever bought a gourmet caramel, stared at the price, and whispered “nope” to your wallet, this recipe is your delicious revenge—without turning your kitchen into a sticky crime scene.
Why This Recipe Is Awesome
This version nails the sweet-but-salty, chewy-but-not-sticky balance like it’s got a PhD in candy. It relies on a short ingredient list and a candy thermometer—no mysterious bags of powdered magic. The corn syrup keeps sugar crystals from staging a mutiny, brown sugar adds depth, and the timing gives you caramels that cut clean and taste like you actually planned ahead.
Ingredients You’ll Need
- 1 cup granulated sugar
- 1 cup light brown sugar, packed
- 1/2 cup light corn syrup (yes, it’s worth it)
- 1/4 cup water (helps dissolve the sugar)
- 1 cup heavy cream, room temperature
- 6 tablespoons unsalted butter, cut into pieces
- 1 teaspoon vanilla extract
- 1/2 teaspoon fine sea salt, plus extra for finishing
- 1 tablespoon butter for the pan or parchment (keeps things civilized)
- Optional: 4 oz dark chocolate, chopped (for dipping)
Step-by-Step Instructions
-
Step 1
Line an 8×8 inch pan with parchment and butter it lightly. Combine granulated sugar, brown sugar, corn syrup, and water in a heavy-bottomed saucepan over medium heat and stir only until the sugars dissolve; then stop stirring and let the mixture come to a boil. Clip a candy thermometer to the pan and cook to 245–250°F (firm-ball stage) — this usually takes 8–12 minutes depending on your stove. If crystals form on the sides, brush them down with a wet pastry brush; resist the urge to stir wildly.
-
Step 2
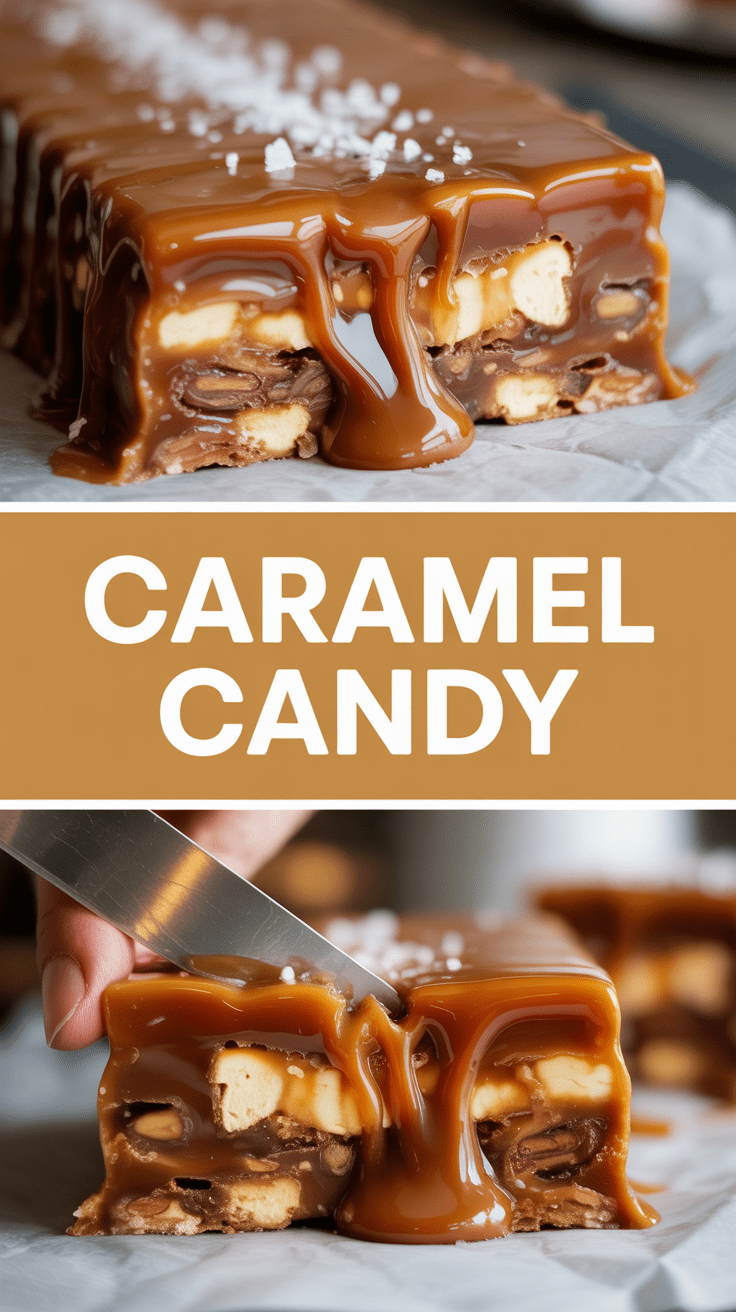
Remove the pan from heat, then carefully whisk in the butter a few pieces at a time; the mixture will bubble like it’s offended, and that’s normal. Slowly stir in the warm cream, then return the pan to low heat for 30–60 seconds to stabilize the temperature; add vanilla and 1/2 teaspoon salt and mix until glossy. Pour the caramel into your prepared pan, smooth the top, and sprinkle a tiny pinch of flaky sea salt if you like contrast. Let the caramel cool at room temperature until set, about 3 hours, then lift from the pan, cut into squares, and wrap individually in wax paper.
Common Mistakes to Avoid
People overcook because they panic about softness; cook to temperature, not look. If you stir while the sugar is boiling, you’ll invite grainy texture—let the heat do its job and only brush the sides. Using cold cream straight from the fridge will shock the caramel and cause splattering; bring it to room temp. Finally, skip cheap thermometers — a good one is cheap insurance for not turning your batch into crunchy shards or a hot gooey mess.
Alternatives & Substitutions
If you hate corn syrup, use 3/4 cup maple syrup plus 1/4 cup granulated sugar and reduce the water slightly; the texture changes but the flavor sings. For a dairy-free route, swap heavy cream with full-fat coconut milk and use vegan butter—expect a coconut note but still great chew. Want deeper flavor? Replace half the brown sugar with dark muscovado. If you can’t be bothered with a thermometer, cook until the mixture makes a firm ball in cold water (classic test), but honestly, the thermometer saves time and anxiety.
FAQ
Question 1?
Can I skip the corn syrup and still get good caramels? Yes, but with caveats. Corn syrup helps prevent crystallization and keeps caramels smooth; if you replace it, pick a hygroscopic liquid like glucose or maple syrup and accept a slightly different texture and flavor. Stir less and watch temperatures closely.
Question 2?
How long do homemade caramels last? Wrapped tightly, caramels keep at room temperature for about two weeks and stay lovely in the fridge for a month. If you want them longer, freeze individually wrapped pieces for up to 3 months and thaw at room temperature when needed.
Question 3?
My caramels are too hard or too soft — what went wrong? Too hard means you overcooked past the firm-ball stage; lower the target temperature by 5°F next time. Too soft usually means undercooking or too much cream; give it more time on the thermometer or reduce the cream by a tablespoon and try again.
Final Thoughts
If you make one batch of caramels this season, do it with confidence and the right tools: a sturdy pan and a reliable thermometer. They make fantastic gifts, better snacks, and a great excuse to show off without gluing your kitchen shut. Wrap them up, share them, or hide them in a secret drawer—no judgement. Go on, caramelize your life a little.

Hi, I’m Lina, the creator of Lina Easy Recipes.Cooking has always been my passion, and I love sharing simple, homemade dishes that anyone can prepare.
Love What You See?
Join me on Pinterest and Facebook for daily cooking inspiration, new recipe ideas, and behind-the-scenes kitchen stories. Let’s cook something wonderful together!


")
