
If your idea of a rom-com happy ending involves molten cheddar exploding out of a pastry shell and smacking a pickle into your face, these Cheeseburger Garlic Bombs are your soulmate — dramatic, reliable, and oddly satisfying to clean up.
Why This Recipe Is Awesome
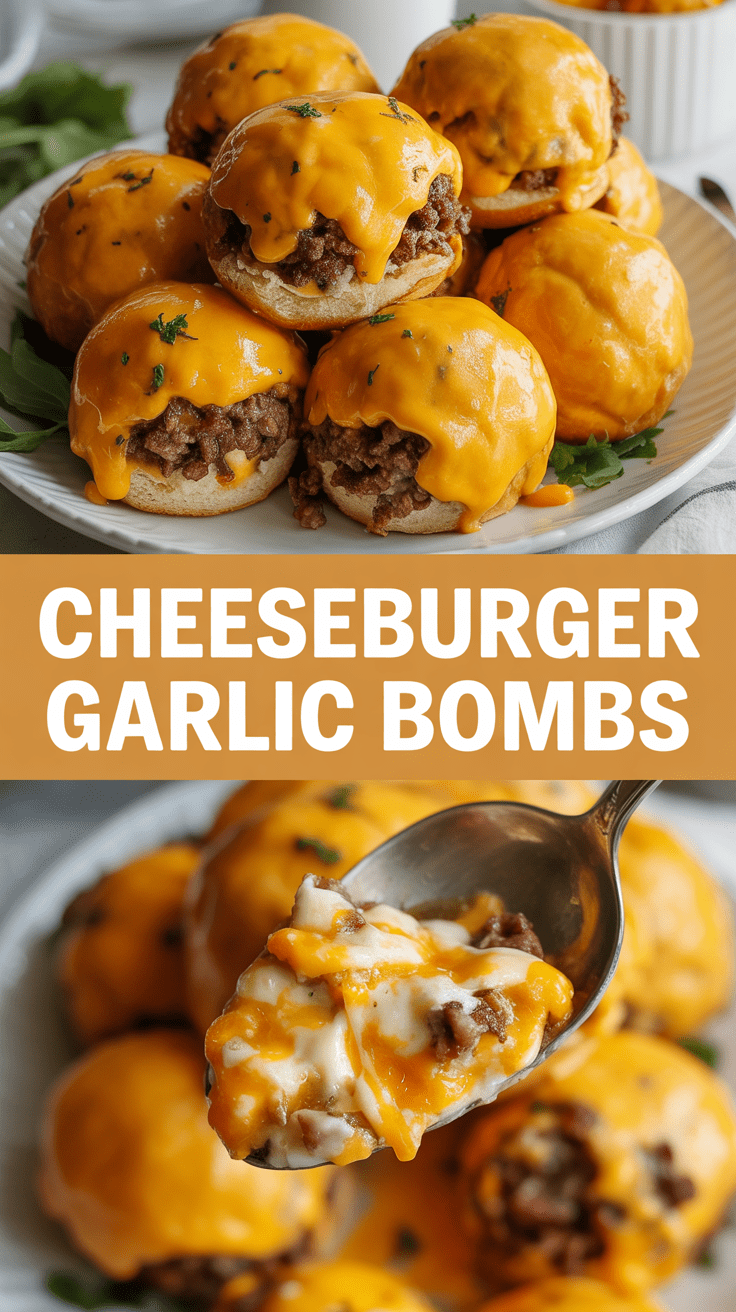
This works because it hits the burger checklist without the bun drama: seasoned beef, melty cheese, that garlicky butter kiss, and a dough wrapper that crisps up like it actually tried. You’re getting concentrated cheeseburger flavor in a tidy handheld package, which means no utensils, no negotiations over condiments, and an excuse to double-dip your favorite sauce. Also, wrapping everything in dough keeps the juices in where they belong — inside the bomb, not your countertop.
Ingredients You’ll Need
- 1 pound ground beef (80/20 is ideal — fat = flavor)
- 1 teaspoon kosher salt
- 1/2 teaspoon black pepper
- 1/2 teaspoon garlic powder (we’ll add fresh garlic later; this just layers flavor)
- 1 small onion, finely chopped (or 2 tablespoons scallions if you’re lazy but classy)
- 4 ounces sharp cheddar, cut into 12 small cubes (or shredded if you like shortcuts)
- 12 dinner-roll sized dough rounds or 1 tube of crescent/pizza dough (your call)
- 3 tablespoons butter, melted
- 2 cloves garlic, minced (or 1/2 teaspoon garlic paste)
- 1 tablespoon finely chopped dill pickles or 12 thin pickle slices (for crunch and that burger vibe)
- 1 tablespoon mustard or 1 teaspoon mustard powder (optional, but life-changing)
- 1 tablespoon ketchup (again optional — we’re building a classic flavor)
- 1 tablespoon sesame seeds (optional, for that burger-bun look)
- Cooking spray or a little extra butter for the sheet pan
Step-by-Step Instructions
-
Step 1
Preheat the oven to 400°F (204°C). Brown the ground beef in a skillet over medium-high heat with salt, pepper, garlic powder, and the chopped onion, stirring and breaking it up until there’s no pink and the onions are soft; drain excess fat if your beef was ambitious. Stir in mustard, ketchup, and chopped pickles, then taste — adjust salt and pepper — and let the mixture cool slightly so it won’t melt the cheese when you assemble.
-
Step 2
On a lightly floured surface, divide dough into 12 rounds or unroll crescent dough and separate into sections; place a spoonful of beef mixture and a cheddar cube in the center of each, fold and pinch edges to seal tightly into balls, and place seam-side down on a buttered or sprayed baking sheet. Mix melted butter with minced garlic, brush the bombs generously, sprinkle sesame seeds if using, and bake for 15–20 minutes until golden brown and glorious; let sit 2–3 minutes before biting because molten cheese is not a toy.
Common Mistakes to Avoid
Sealing poorly: if the dough isn’t pinched tight, you’ll have a sad cheesy puddle on your pan instead of a bomb. Overfilling: stuffing a dough round like it’s a luggage compartment leads to explosions and emotional strain. Skipping the garlic butter: technically fine, emotionally devastating — it’s the difference between “yeah” and “holy heck.” And finally, eating immediately: molten dairy will win every argument with your mouth.
Alternatives & Substitutions
No ground beef? Use ground turkey or plant-based crumbles — they soak up seasoning well, just add a touch more fat (a splash of olive oil) for mouthfeel. Swap cheddar for American for that classic diner melt, or try pepper jack if you like a little attitude. Short on dough? Use pre-made biscuit dough or pillow rolls; you’ll lose the classic seam but gain time and freedom. Pickles can become caramelized onions if you prefer sweetness, and if garlic makes you nervous, roast it first for a mellow, sweet version. Personally, I’ll always choose extra pickles over extra ketchup — the crunch wins.
FAQ
Question 1?
How long do leftover Cheeseburger Garlic Bombs last? Store them airtight in the fridge for up to 3 days; reheat in a 350°F oven for 8–10 minutes to revive the crisp, or zap in the microwave for 45–60 seconds if you’re impatient and emotionally fragile.
Question 2?
Can I make these ahead and freeze them? Absolutely. Assemble the bombs, freeze them on a tray until solid, then transfer to a freezer bag. Bake straight from frozen — add about 8–10 minutes to the baking time and brush with garlic butter halfway through for best results.
Question 3?
Are these kid-friendly? Yes — just leave out the mustard or swap to a milder cheese if you have picky eaters. Cut into halves for younger kids so you can check temperature and portion size; they’ll still think they’re eating something very grown-up and dangerously delicious.
Final Thoughts
These Cheeseburger Garlic Bombs are the culinary equivalent of a high-five: they look impressive, taste like comfort on steroids, and require almost zero etiquette. They’re perfect for game night, a lazy dinner, or proving to someone that you can both cook and be heroic with melted cheese. Make a big batch, hide a few from your family, and enjoy the tiny triumph of turning classic flavors into something unexpectedly fun.

Hi, I’m Lina, the creator of Lina Easy Recipes.Cooking has always been my passion, and I love sharing simple, homemade dishes that anyone can prepare.
Love What You See?
Join me on Pinterest and Facebook for daily cooking inspiration, new recipe ideas, and behind-the-scenes kitchen stories. Let’s cook something wonderful together!


