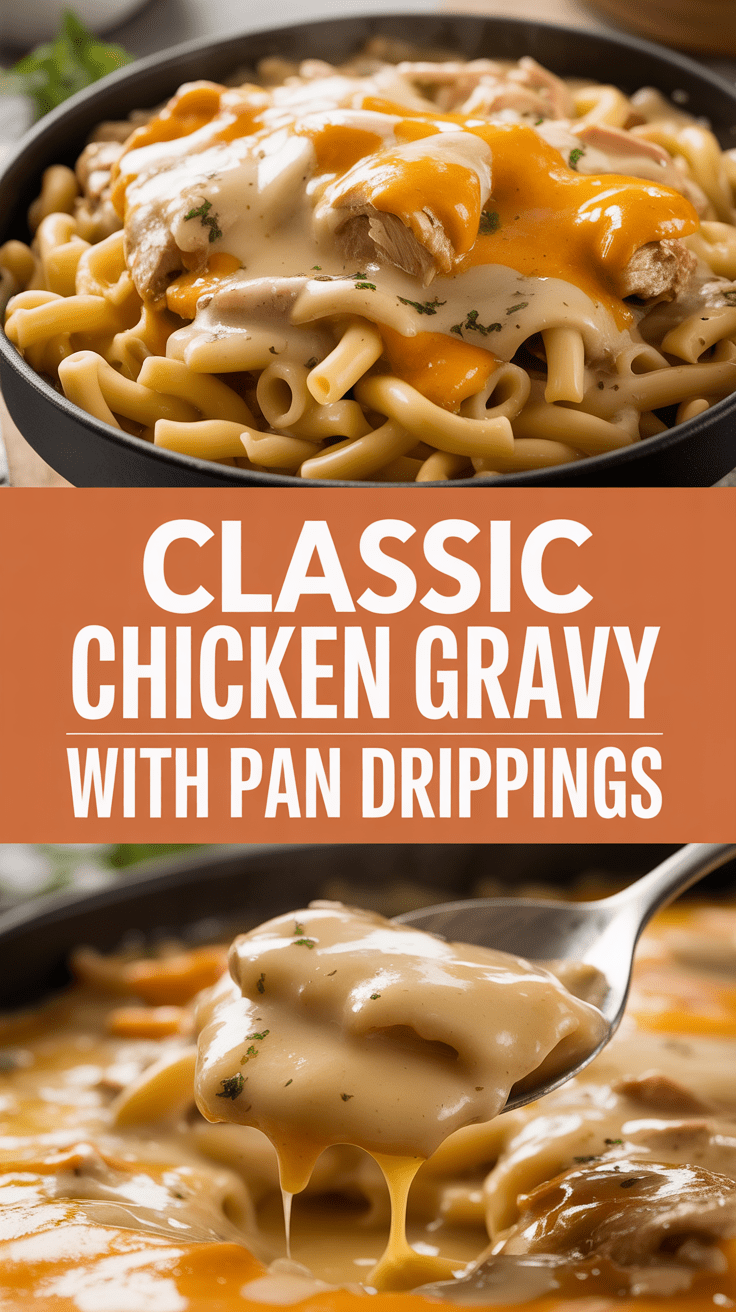
Here’s a little chef’s secret I stole from a mentor years ago: the best gravy doesn’t come from a packet — it comes from the sticky, brown goodness left in your roasting pan. I’ll show you how to turn those pan drippings into a silky, savory gravy that tastes like a hug in a bowl. Keep a wooden spoon handy for scraping browned bits, and don’t panic if it looks too thin at first — a quick whisk and a little patience will give you velvet-thick sauce in minutes. This method works whether you roasted a whole bird or pan-seared breasts; the flavor always sings louder when you use what the chicken already gave you.
Quick Facts
Yield: Serves 6
Prep Time:5 minutes
Cook Time:12 minutes
Total Time:17 minutes
Why This Recipe is Awesome
This gravy turns humble pan drippings into something magnificent — glossy, savory, and deeply flavorful. It has a nice body from a roux, a little brightness from a splash of acid, and a finish that melts in your mouth. It’s so easy even your most distracted dinner guest can’t mess it up. The aroma of browning bits, the hiss when you deglaze the pan, and the gentle thicken as you whisk will make your kitchen smell like Sunday dinner.
Ingredients
For the Main Dish:
Pan drippings from a roasted chicken (about 3–4 tbsp fat + browned bits)
2 tbsp unsalted butter
1/4 cup all-purpose flour
2 cups low-sodium chicken stock (preferably hot)
1/2 cup water (adjust for consistency)
1 tsp Worcestershire sauce or 1 tsp soy sauce
1/2 tsp fresh thyme leaves or 1/4 tsp dried thyme
Salt and freshly ground black pepper to taste
1 tsp apple cider vinegar or lemon juice (optional, for brightness)
Optional: 1–2 tbsp heavy cream for extra silkiness
For the Sauce / Garnish (if applicable):
Chopped fresh parsley for serving (optional)
How I Make It
Step 1:
Right after you pull your roasted chicken from the pan, transfer the bird to a cutting board to rest. Place the roasting pan over two burners or onto the stovetop (careful, it will be hot). Spoon out about 3–4 tablespoons of the pan fat into a heatproof bowl and pour off any excess juices to save for gravy flavor. You want roughly a couple tablespoons of fat left with all the browned bits clinging to the bottom — that’s pure gold. Hear that sizzle? That’s flavor calling your name.
Step 2:
Return the pan to medium heat and add the reserved fat plus 2 tablespoons of butter. Once the butter melts and foams, sprinkle in 1/4 cup flour and whisk constantly to make a roux. Cook it about 2 minutes until it smells toasty and turns a light caramel color — don’t let it burn. If the pan looks stubborn, scrape with a wooden spoon to lift those brown bits; that’s where the savory depth lives.
Step 3:
Slowly add 2 cups hot chicken stock in a steady stream while you whisk; you’ll hear the gravy change from thin to velvety as it smooths out. Add up to 1/2 cup water if you need more volume. Bring the mixture to a simmer and let it bubble gently for 3–5 minutes until it thickens. Taste for seasoning, then stir in 1 teaspoon Worcestershire sauce and 1/2 teaspoon thyme. The smell will go from roasted to downright irresistible — think caramelized onions meets Sunday roast.
Step 4:
Watch the texture as it simmers. If you see thick glossy ribbons when you drag your spoon across the surface, you’re there. If it’s too thin, simmer another minute; if it gets too thick, whisk in a splash of warm stock or water. For a silky finish, whisk in 1–2 tablespoons heavy cream off the heat. Add a tiny splash of apple cider vinegar or lemon juice to brighten the flavors — it makes the gravy pop without tasting acidic.
Step 5:
Give it a final taste and adjust salt and pepper. If you prefer an ultra-smooth sauce, pour the gravy through a fine-mesh sieve into a serving boat, pressing with the back of a spoon to extract flavor. Spoon the warm gravy over carved chicken, mashed potatoes, or roasted vegetables and sprinkle with chopped parsley for color. Let leftovers cool before storing in the fridge.
Pro Tips
Save drippings: Freeze excess pan juices in ice cube trays for instant future gravies or soups.
Hot liquid rule: Always add hot stock to your roux — cold liquid causes lumps. Keep your stock at a gentle heat on the stove or microwave 30 seconds.
Fixing lumps: If lumps form, whisk vigorously or strain; an immersion blender on low will smooth it in a pinch.
Salt slowly: Pan drippings concentrate salt. Season at the end so you don’t overdo it.
Common Mistakes to Avoid
Skipping preheating: Classic rookie move. It changes texture and bake time.
Overmixing: Leads to dense or chewy results. Mix until just combined.
Guessing cook time: Always use visual cues or a timer, not just vibes.
Overcrowding pans: Give your food some breathing room to crisp properly.
Alternatives & Substitutions
Use turkey drippings instead of chicken — flavor gets deeper, no other changes needed.
For gluten-free gravy, swap 1/4 cup flour for 2 tbsp cornstarch mixed with 2 tbsp cold water, then whisk into simmering stock.
Dairy-free option: skip the butter and cream; use extra pan fat and a touch of olive oil for richness.
Heavy cream substitute: Greek yogurt thinned with a bit of warm stock (add off heat to prevent curdling).
Variations & Tips
Spicy twist: Add a pinch of cayenne or a splash of hot sauce for heat.
Herbed: Stir in chopped rosemary or sage for a more earthy, holiday-style gravy.
Sherry or wine: Deglaze the pan with 2 tbsp dry sherry or white wine before adding stock for a nutty, complex flavor.
Mushroom gravy: Sauté 1 cup sliced mushrooms in the pan before making the roux for an umami punch.
Kid-friendly: Keep it smooth and mild; skip Worcestershire and vinegar.
Creative twist: Add roasted garlic paste for a caramelized, mellow garlic note.
FAQ (Frequently Asked Questions)
Can I make this ahead of time?
Yes! Make the gravy, cool to room temperature, then store in an airtight container in the fridge for up to 3 days. Reheat gently over low heat, whisking in a splash of stock or water to loosen it.
Can I double the recipe?
Sure thing. Double all ingredients and use a wider pan so the roux cooks evenly. You may need an extra minute or two of simmering to reach desired thickness.
Can I substitute butter with oil?
Technically yes, but you’ll miss that buttery magic. Use ¾ the amount of oil and consider adding a tiny knob of butter at the end for flavor if not dairy-free.
How do I know it’s done?
Look for a gravy that coats the back of a spoon and leaves a clear ribbon when you drag your finger through it. Texture should be glossy and smooth, not gluey.
What if I don’t have ingredient X?
If you lack Worcestershire, use a splash of soy sauce. No fresh thyme? Use 1/4 tsp dried or a pinch of dried herbes de Provence. No pan drippings? Brown 2 tbsp butter and 2 tbsp flour, then add stock and season — still tasty, just less roasty.
How I Like to Serve It
I ladle this gravy over carved roast chicken and a mountain of mashed potatoes, with steamed green beans on the side. It also dresses up simple weeknight chicken breasts and turns leftover turkey into a feast. Pair with a crisp white wine or a cozy mug of cider in fall — this gravy fits holiday tables and Tuesday nights equally well.
Notes
Store gravy in the fridge up to 3 days or freeze up to 3 months. Thaw in the fridge overnight and reheat gently.
Safe internal temp for cooked chicken: 165°F — always check your roast before carving.
Final Thoughts
Closing: Now go impress someone — or just yourself — with your homemade masterpiece! Remember: the best gravies start with a little patience and a lot of love (and the pan drippings you almost tossed).
Hi, I’m Lina, the creator of Lina Easy Recipes.Cooking has always been my passion, and I love sharing simple, homemade dishes that anyone can prepare.
Spread the love
Love What You See?
Join me on Pinterest and Facebook for daily cooking inspiration, new recipe ideas, and behind-the-scenes kitchen stories. Let’s cook something wonderful together!