
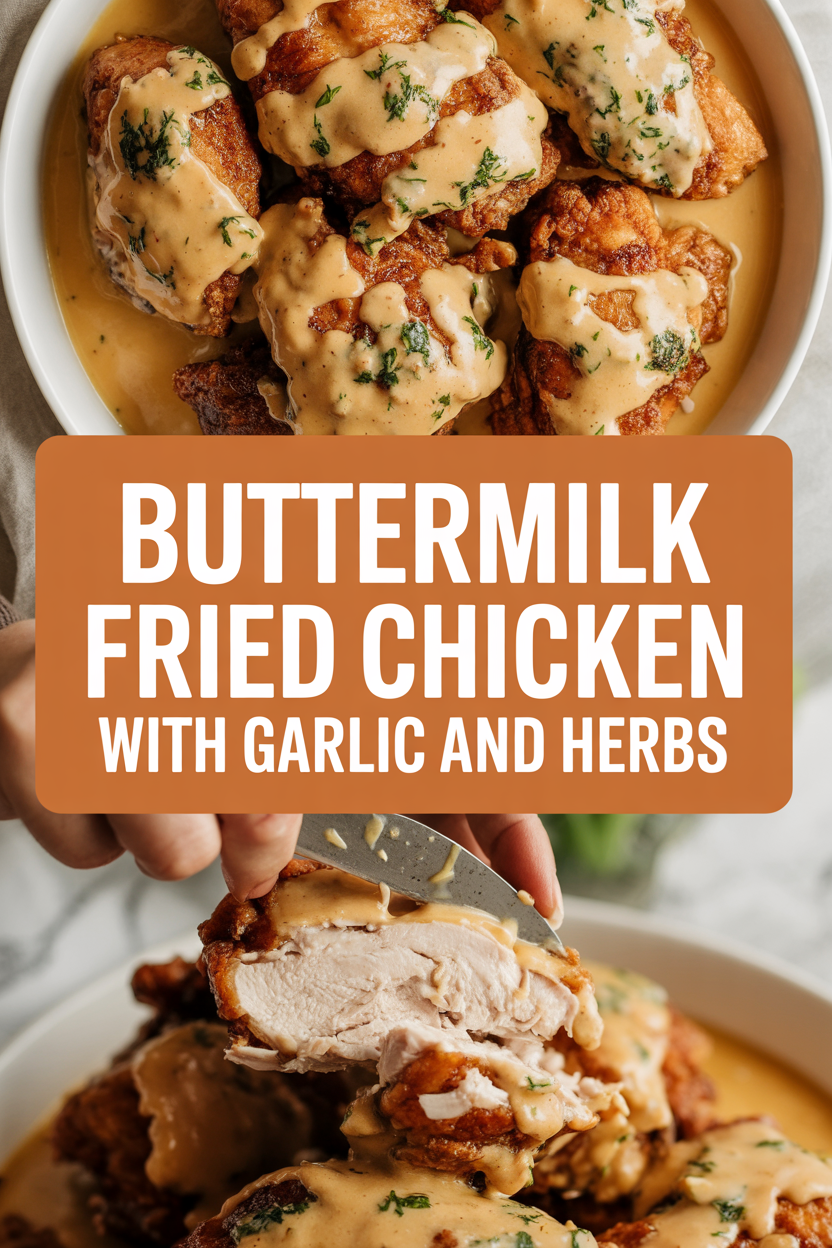
When I was a kid, my grandmother used to fry chicken on Sundays and the whole house turned into a warm, golden cloud of garlic and herbs — the kind of smell that made you drop everything and hover in the kitchen. I still remember the thrill of peeking under the paper towel to find perfectly craggy crusts and steam puffing off the meat as she handed me a drumstick. This buttermilk fried chicken recipe channels that same comfort, but with a few modern tricks I stole from kitchens I’ve worked in: a tangy buttermilk soak, a crisping duo of flour and cornstarch, and a hit of fresh garlic and herbs. It’s crunchy, juicy, and makes the house smell like Sunday all week long.
Quick Facts
- Yield: Serves 4
- Prep Time: 15 minutes (plus 8 hours marinating)
- Cook Time: 25 minutes
- Total Time: 8 hours 40 minutes (including marinate)
Why This Recipe is Awesome
This version gives you the classic crunchy, craggy crust and a super-tender interior thanks to a long buttermilk soak. The garlic and fresh herbs brighten the savory richness, and the little pop of cornstarch in the breading makes the crust sing. It’s homey, impressive, and — dare I say — so reliable even a busy weeknight can handle it. Plus, who doesn’t love that satisfying crackle when you bite into golden skin?
Ingredients
For the Main Dish:
- 3 pounds bone-in, skin-on chicken (thighs and drumsticks work best)
- 2 cups buttermilk
- 2 cloves garlic, finely minced (or 1 tsp garlic powder if in a hurry)
- 1 tbsp hot sauce (optional — I use Frank’s)
- 2 tsp kosher salt, divided
- 1 tsp black pepper, divided
- 1 tbsp fresh thyme leaves, chopped (or 1 tsp dried thyme)
- 1 tbsp fresh parsley, chopped
- 2 cups all-purpose flour
- 1/2 cup cornstarch
- 1 tbsp paprika (smoked or sweet)
- 1 tsp garlic powder
- 1 tsp onion powder
- Vegetable oil or canola oil for frying (enough for a 3–4 inch deep fry, about 1.5–2 quarts)
For the Sauce / Garnish (optional):
- 4 tbsp butter, melted and mixed with 1 tbsp chopped parsley and juice of 1/2 lemon (optional finishing butter)
- Lemon wedges and extra chopped parsley for serving
How I Make It
Step 1:
In a large bowl, whisk together 2 cups buttermilk, minced garlic, 1 tbsp hot sauce (if using), 1 tsp black pepper, 1 tsp salt, and the chopped herbs. Pat the chicken dry with paper towels, then place it into the buttermilk mixture, submerging pieces so they soak up the tangy liquid. I always cover and refrigerate for at least 4 hours, but overnight (about 8 hours) gives the juiciest results. You’ll smell that garlicky, herby tang as soon as you open the fridge — irresistible.
Step 2:
When you’re ready to fry, set up a dredging station: in a shallow dish, whisk together 2 cups flour, 1/2 cup cornstarch, 1 tbsp paprika, 1 tsp garlic powder, 1 tsp onion powder, and the remaining 1 tsp salt and 1 tsp pepper. Remove the chicken from the buttermilk, letting excess drip back in (don’t wipe it off). Dredge each piece in the flour mix, pressing so the coating clings — that’s the trick for those craggy edges we love.
Step 3:
Heat a deep, heavy skillet or Dutch oven with about 1.5–2 quarts oil to 350°F (use a thermometer). Add the chicken skin-side down in batches so the pan doesn’t overcrowd — the oil should sizzle and whisper, not scream. Fry for about 7–9 minutes per side for thighs and drumsticks, turning once or twice so the crust browns evenly. You’ll see a deep golden color and hear a satisfying crackle as the crust firms up.
Step 4:
Use a thermometer to check the thickest part of the meat: pull the chicken when it reaches 165°F
Brush the hot chicken lightly with the optional lemon-herb butter for glossy, savory finish and sprinkle with fresh parsley. Serve with lemon wedges. Watch everyone dive in — the crust shatters, the meat stays tender, and the garlic-herb aroma fills the room. I serve this with buttery mashed potatoes, quick-pickled slaw, and cold lemonade for a perfect summer picnic vibe. For cozy nights, pair with creamy mac and cheese and a crisp green salad. It also travels well to potlucks — keep a warming tray set to 200°F and let guests help themselves. Closing: Now go impress someone — or just yourself — with your homemade masterpiece! This chicken rewards patience with buttery, garlicky goodness and a crunch that makes the whole house smile. Hi, I’m Lina, the creator of Lina Easy Recipes.Cooking has always been my passion, and I love sharing simple, homemade dishes that anyone can prepare.
Join me on Pinterest and Facebook for daily cooking inspiration, new recipe ideas, and behind-the-scenes kitchen stories. Let’s cook something wonderful together!
Step 5:
Pro Tips
Common Mistakes to Avoid
Alternatives & Substitutions
Variations & Tips
FAQ (Frequently Asked Questions)
How I Like to Serve It
Notes
Final Thoughts

Love What You See?
Related Recipes:


