
Cheesecake Stuffed Baked Apples
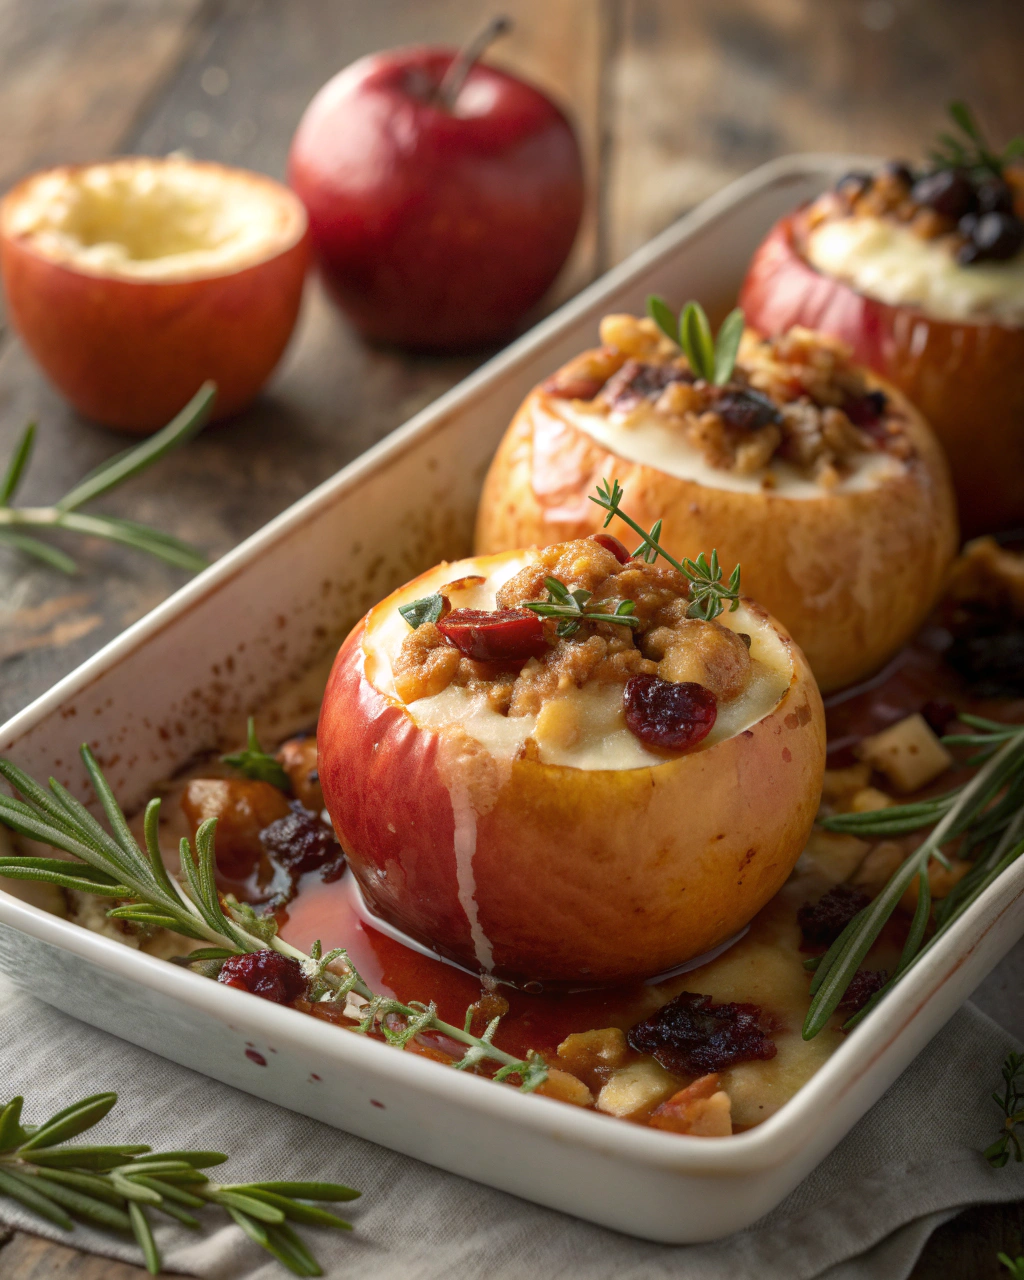
Okay, imagine this: warm apples, soft and tender, with a creamy cheesecake surprise tucked right in the center. These Cheesecake Stuffed Baked Apples are like a little edible hug on a chilly afternoon. Whenever the crisp fall air starts to sneak in, I find myself craving this cozy, comforting dessert that’s just sweet enough without being over the top. Plus, the best part? It’s so easy to make, even if you’re just a casual kitchen adventurer. The smell of cinnamon and baking apples will instantly make your kitchen feel like a warm, welcoming spot where memories are made, and maybe a sneaky second helping is totally justified.
Quick Facts
- Yield: Serves 4
- Prep Time: 15 minutes
- Cook Time: 30 minutes
- Total Time: 45 minutes
Ingredients
For the Main Dish:
- 4 large apples (I like Fuji or Honeycrisp for sweetness and firmness)
- 8 oz cream cheese, softened
- 1/4 cup granulated sugar
- 1 tsp vanilla extract
- 1/2 tsp ground cinnamon
- 1/4 cup chopped nuts (optional; walnuts or pecans work great)
- 2 tbsp brown sugar
- 1 tbsp butter
- 1/4 tsp salt
For the Sauce / Garnish (optional):
- Vanilla ice cream or whipped cream
- Honey or caramel sauce
How I Make It
Step 1:
Start by preheating your oven to 350°F. While it warms up, core each apple carefully using an apple corer or a small paring knife—leave about a 1/2-inch border at the bottom to keep the filling from leaking out. You want each apple to look like a little hollow cup ready to be stuffed.
Step 2:
In a bowl, mix together the softened cream cheese, sugar, vanilla extract, cinnamon, and salt until smooth and creamy. If you’re adding nuts, fold them in now for a nice crunch contrast.
Step 3:
Spoon the cheesecake mixture into each hollowed apple, packing it in evenly but not overflowing. It’s okay if the apples look generous and inviting—this dessert is all about indulgence!
Step 4:
Sprinkle the tops of each filled apple with brown sugar and place a small dab of butter on top to help things caramelize in the oven.
Step 5:
Arrange the apples in a baking dish and add just a splash of water to the bottom. This helps keep everything moist and prevents burning. Pop the dish into the oven and bake for around 30 minutes, or until the apples are soft when pierced with a fork and the tops are bubbling and golden.
Step 6:
Allow your masterpiece to cool slightly before serving. A scoop of vanilla ice cream or a drizzle of caramel sauce on top turns these warm apples into the ultimate cozy dessert!
Variations & Tips
- Swap out cream cheese for mascarpone for a richer, silkier filling.
- Add a handful of dried cranberries or raisins to the cheesecake mix for a festive touch.
- Use different apple varieties depending on your sweetness preference; Granny Smith for tartness.
- Drizzle maple syrup over the finished apples instead of caramel sauce for a natural sweetness.
- If you don’t have an apple corer, use a melon baller or a small spoon carefully.
- For an extra cinnamon kick, dust some cinnamon powder just before serving.
How I Like to Serve It
These stuffed apples are perfect for a cozy weekend brunch or as a comforting finish to an autumn dinner with friends. I love pairing them with coffee or tea for a little afternoon treat that feels special. They also make a charming dessert for holiday gatherings—warm, inviting, and sure to bring smiles around the table.
Notes
- Store leftovers in an airtight container in the fridge for up to 2 days. Reheat gently in the oven or microwave.
- If you want to prep ahead, stuff the apples and refrigerate overnight, then bake just before serving.
Closing: This recipe always feels like a little slice of cozy comfort, easily turning simple apples into a dessert everyone will rave about.

Hi, I’m Lina, the creator of Lina Easy Recipes.Cooking has always been my passion, and I love sharing simple, homemade dishes that anyone can prepare.
Love What You See?
Join me on Pinterest and Facebook for daily cooking inspiration, new recipe ideas, and behind-the-scenes kitchen stories. Let’s cook something wonderful together!


