
If your inner pastry nerd wants cheesecake and your lazy Sunday self wants cake pops that don’t require a tiny PhD in tempering chocolate, this is your lifehack: cheesecake stuffed cake pops. They look like effort, taste like indulgence, and honestly, take about the time it takes to watch one good sitcom episode. You’re welcome.
Why This Recipe Is Awesome
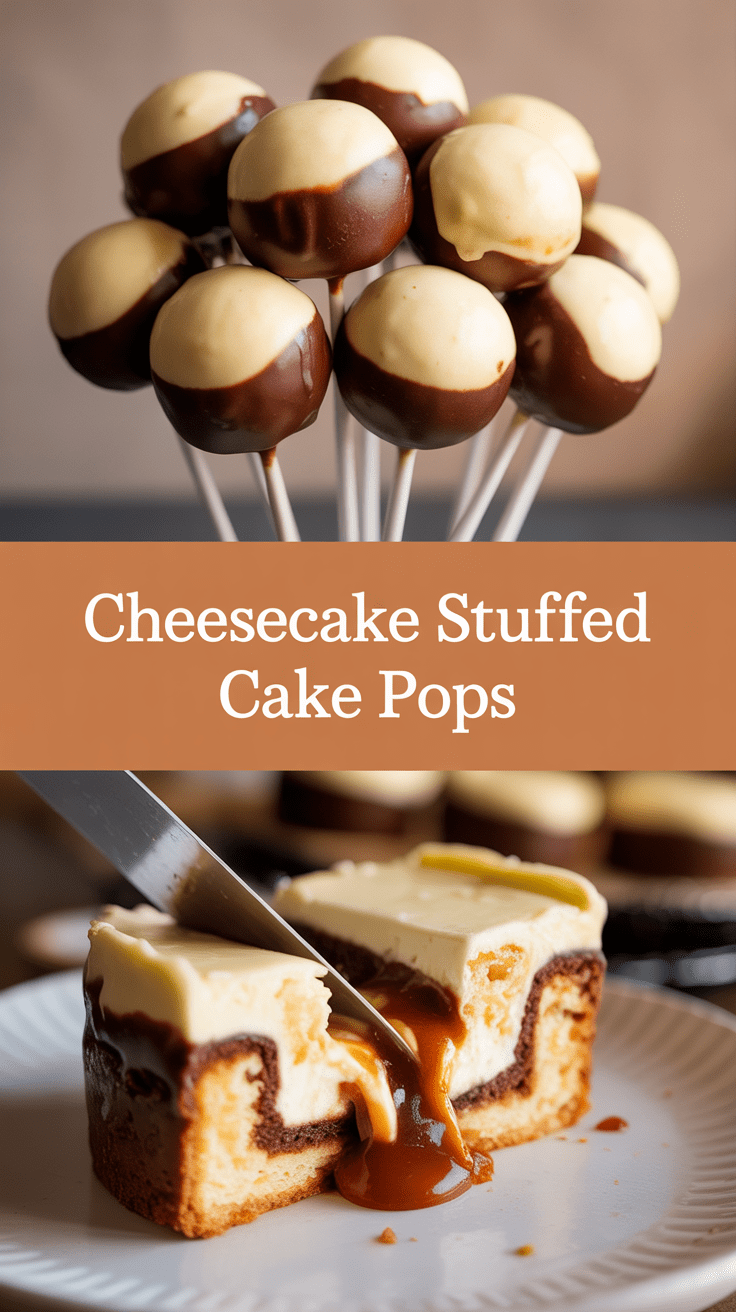
This recipe hits both the “fancy party” and “I-scraped-the-bottom-of-the-fridge” registers. The trick is contrast: moist cake plus a little tangy cheesecake center equals a bite that feels like it has layers of thought behind it, even if you made it while wearing sweatpants. It works because the cheesecake center keeps things creamy and avoids the dry, crumbly trap most cake pops fall into, while the cake-frosting binder gives structure so nothing explodes mid-dip. Also, no tempering gymnastics — candy melts or simple chocolate do the heavy lifting.
Ingredients You’ll Need
- 1 boxed cake mix plus ingredients called for on the box (or one 9-inch baked cake, cooled and crumbled) — pick your favorite flavor
- 1 cup frosting (store-bought is fine; vanilla or cream cheese frosting works great)
- 8 oz cream cheese, softened (this is for the cheesecake center)
- 1/3 cup powdered sugar for the cheesecake center (adjust to taste)
- 1/2 tsp vanilla extract for the cheesecake center
- 1–2 tbsp heavy cream or sour cream (to loosen the cheesecake mix if needed)
- 12–16 oz candy melts or chocolate for dipping (white, milk, or dark — choose happiness)
- Lollipop sticks or sturdy wooden skewers
- Sprinkles, crushed cookies, or chopped nuts for decoration (optional but strongly encouraged)
- Nonstick spray or a small bowl of hot water (for stick prep)
- Pinch of salt (trust me)
Step-by-Step Instructions
-
Step 1
Make the cheesecake centers: beat the softened cream cheese with powdered sugar and vanilla until smooth, add a tablespoon of cream if it’s too stiff, then scoop tiny 1/2–3/4 teaspoon mounds onto a parchment-lined tray and freeze for 20–30 minutes until firm. Meanwhile, bake the cake per box directions or break apart your leftover cake and crumble it into a big bowl, then mix in about 3/4 cup frosting (add more if needed) until it holds together like playdough. Take the frozen cheesecake dollops and wrap them in cake mixture, rolling quickly into neat balls about 1–1.25 inches across; pop again in the fridge for 10–15 minutes so they’re firm but not rock hard.
-
Step 2
Insert sticks through a little melted chocolate dab into each ball, chill briefly so they set, then dip the pops into warmed candy melts or tempered chocolate, tapping off excess and decorating before the coating sets. Chill upright in a styrofoam block or shallow glass until firm, and store refrigerated (cheesecake filling) for up to 4 days or freeze for longer — allow to come to cool room temperature before serving for the best texture.
Common Mistakes to Avoid
1) Trying to assemble warm cake: it turns into a sticky mess and your life will be full of regret. Let the cake cool, or chill the mixture so it’s manageable. 2) Skipping the freezing step for the cheesecake centers: you need those frozen so the center stays intact when dipping. 3) Dipping when the coating is too hot: it will melt the cake and cause sagging or holes; let the candy melt cool slightly so it’s smooth but not steaming. 4) Overworking the cake-frosting mix: if you add too much frosting you’ll end up with floppy pops; if you add too little they’ll crumble — aim for pliable, not sticky.
Alternatives & Substitutions
No fresh-baked cake? Use a store-bought cupcake or even chocolate sandwich cookies pulsed into crumbs (adult brownie crumbs are phenomenal). For the cheesecake center, you can make it lighter by folding in whipped cream instead of heavy cream for a mousse-like filling — just chill longer. If you hate candy melts, use chopped chocolate and add a little vegetable oil for a smoother dip; or coat in white chocolate for a canvas to paint with melted dark chocolate. Need gluten-free? Use a gluten-free cake mix and GF crumbs. Short on time? Skip the cheesecake dollops and use a small spoonful of cream cheese frosting instead; still great, just less dramatic.
FAQ
Question 1?
Can I make these ahead of time? Yes. Make them up to 3–4 days in the fridge. For longer storage, freeze them individually on a tray, then bag them once solid — thaw in the fridge before serving so the texture isn’t icy.
Question 2?
My coating keeps cracking. What gives? Two usual culprits: temperature shock and thin coating. If the pops are too cold straight from the freezer, warm them briefly in the fridge before dipping to reduce cracking. Also, don’t double-dip a thin coat twice too quickly; let the first layer set a bit so the next layer adheres without tension.
Question 3?
Can kids help? Absolutely. Let them roll plain cake balls and add their own decorations. For safety, handle the hot dipping yourself, or use melted almond bark at a lower temp so there’s less risk. Kids love inserting sticks and sprinkling — it’s the part that makes them feel like pastry pros.
Final Thoughts
These cheesecake stuffed cake pops are a small-stakes baking flex: impressive, tasty, and genuinely not difficult once you know the cooling and assembly choreography. They travel well, play nicely at parties, and feel handcrafted without the marathon time investment. Make a batch, call someone over, and watch people pretend they never noticed you skipped a step. If you get creative with flavors, tell me which combo made you a hero — I want to steal your idea next time.

Hi, I’m Lina, the creator of Lina Easy Recipes.Cooking has always been my passion, and I love sharing simple, homemade dishes that anyone can prepare.
Love What You See?
Join me on Pinterest and Facebook for daily cooking inspiration, new recipe ideas, and behind-the-scenes kitchen stories. Let’s cook something wonderful together!


