
If you’ve ever wanted dinner that says “I tried” without actually trying that hard, meet Cheesy Garlic Stuffed Chicken — the meal that makes people think you woke up at dawn to perfect culinary artistry when really you barely lifted a whisk.
Why This Recipe Is Awesome
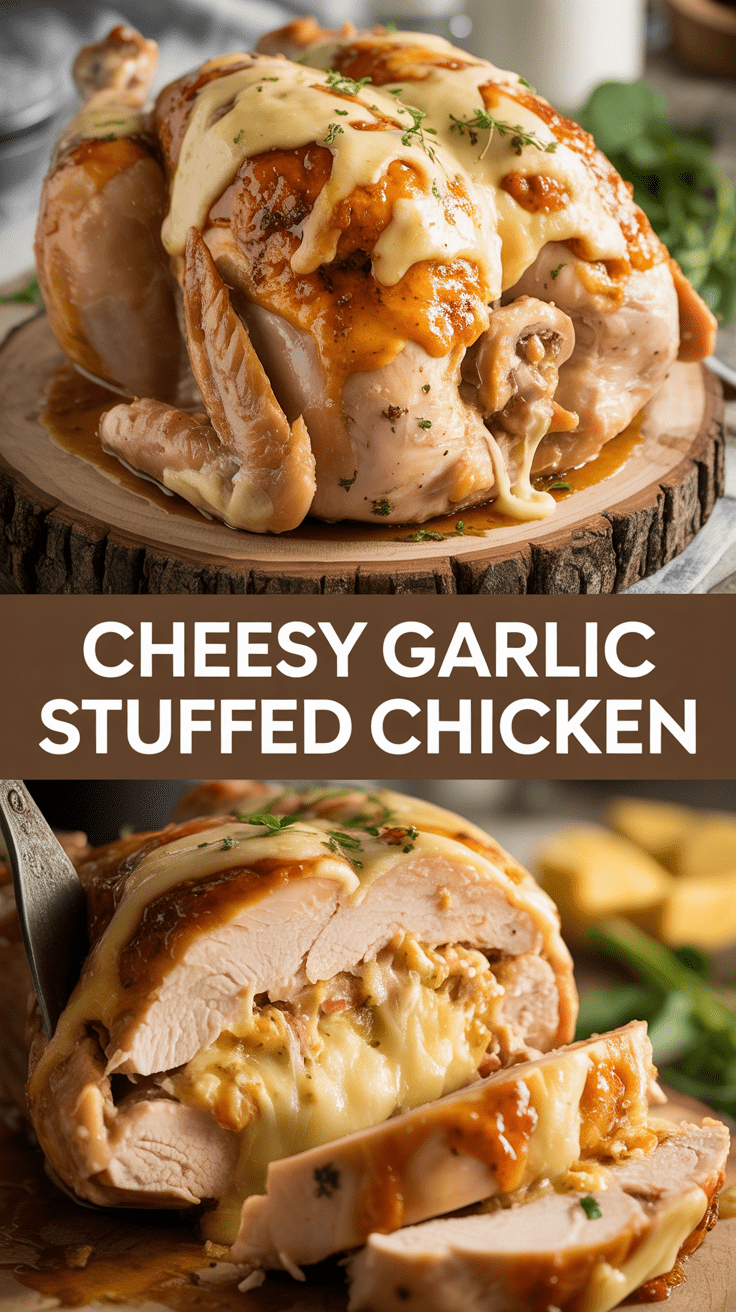
This recipe works because it cheats physics in the best possible way: melty cheese inside moist chicken with a garlicky butter hug on the outside. You get restaurant-level flavor without the restaurant-level drama — only a little slicing, spooning, and the satisfying pop of a toothpick coming out. The filling keeps the chicken juicy, the breadcrumbs give it a tiny bit of crunch, and the garlic-herb butter builds flavor fast. In short: more flavor per minute than most dinner options, and it plays well with sides you probably already own.
Ingredients You’ll Need
- 4 boneless, skinless chicken breasts (about 6–8 oz each)
- 4 oz cream cheese, softened (helps glue everything together)
- 1 cup shredded mozzarella (or your favorite melty cheese)
- 1/4 cup grated Parmesan (for salty punch)
- 3 cloves garlic, minced (or more if you’re honest about garlic)
- 2 tbsp fresh parsley, chopped (or 1 tsp dried)
- 1 tsp dried oregano or Italian seasoning
- 1 cup panko breadcrumbs (or regular breadcrumbs)
- 2 tbsp olive oil + 2 tbsp butter (for browning and flavor)
- Salt and freshly ground black pepper
- 1 lemon (zest and a little juice, optional but nice)
- Toothpicks or kitchen twine to seal pockets
- Optional: prosciutto slices, chopped sun-dried tomatoes, or spinach for extra personality
Step-by-Step Instructions
-
Step 1
Preheat your oven to 400°F (200°C). Butterfly each chicken breast by slicing horizontally almost through, open it like a book, season inside with salt and pepper, then spread a layer of the cream cheese mixed with garlic, parsley, mozzarella, Parmesan, and lemon zest; add optional fillings if using. Fold or roll the chicken, secure with toothpicks, coat lightly with olive oil, and dust with panko mixed with a pinch of salt and oregano for a little exterior crisp.
-
Step 2
Heat butter and a splash of oil in an ovenproof skillet over medium-high heat, sear the stuffed breasts 2–3 minutes per side until golden, then transfer the skillet to the preheated oven and bake 15–20 minutes until the internal temperature reaches 165°F (74°C). Let the chicken rest 5 minutes so the juices redistribute and the cheese stops doing the lava thing, then remove toothpicks and slice or serve whole with a squeeze of lemon.
Common Mistakes to Avoid
Overstuffing like you’re building a culinary skyscraper will prevent the chicken from closing and cook unevenly — keep the filling modest. Skipping the sear is a rookie move; that quick brown crust adds flavor and texture you won’t get from baking alone. Under-seasoning the filling is subtle sabotage — taste the cheese mixture before stuffing and adjust. And whatever you do, don’t slice into hot chicken straight from the oven; resting time is the difference between juicy and disappointingly dry.
Alternatives & Substitutions
Short on cream cheese? Ricotta works fine but will be a bit looser — add a sprinkle of Parmesan to firm it up. Swap mozzarella for fontina, provolone, or gouda for different melting personalities; sharp cheddar will be tangy and fun. Use gluten-free breadcrumbs or crushed pork rinds for a low-carb crust. No ovenproof skillet? Sear in a regular pan and finish on a baking sheet. If you want to skip breading, just brush with olive oil and roast — still great, just less crunch. Personally, I love adding a thin slice of prosciutto around the breast before searing for a salty, hands-off upgrade.
FAQ
Question 1?
How do I know the chicken is cooked through? Use a meat thermometer; 165°F (74°C) in the thickest part is the safe, non-negotiable number. If you don’t have a thermometer, slice the thickest piece: the juices should run clear and the meat should be opaque, not translucent.
Question 2?
Can I prepare this ahead of time? Absolutely. Assemble and refrigerate up to 24 hours before cooking — bring the chicken to room temperature for 20 minutes before searing so it cooks evenly. You can also freeze the assembled breasts (wrap tightly) and bake from frozen with an extra 10–15 minutes of oven time, but expect slightly softer cheese texture.
Question 3?
Want to make this healthier? Use low-fat cream cheese and skip the panko or use whole-wheat breadcrumbs; bake instead of searing in butter. You’ll lose a touch of richness, but you’ll keep the core idea: cheesy filling equals happiness. Adding sautéed spinach or roasted red peppers boosts veggies without complicating things.
Final Thoughts
This is one of those recipes that impresses without turning your kitchen into a war zone. It’s flexible, forgiving, and genuinely good on a weeknight or when you’ve got friends to impress (or trick into thinking you’re a chef). Keep the steps loose, taste the filling, don’t be stingy with garlic, and remember: if the cheese pulls dramatically when you slice it, you’ve done something very right. Now go make dinner — and take the credit.

Hi, I’m Lina, the creator of Lina Easy Recipes.Cooking has always been my passion, and I love sharing simple, homemade dishes that anyone can prepare.
Love What You See?
Join me on Pinterest and Facebook for daily cooking inspiration, new recipe ideas, and behind-the-scenes kitchen stories. Let’s cook something wonderful together!


