
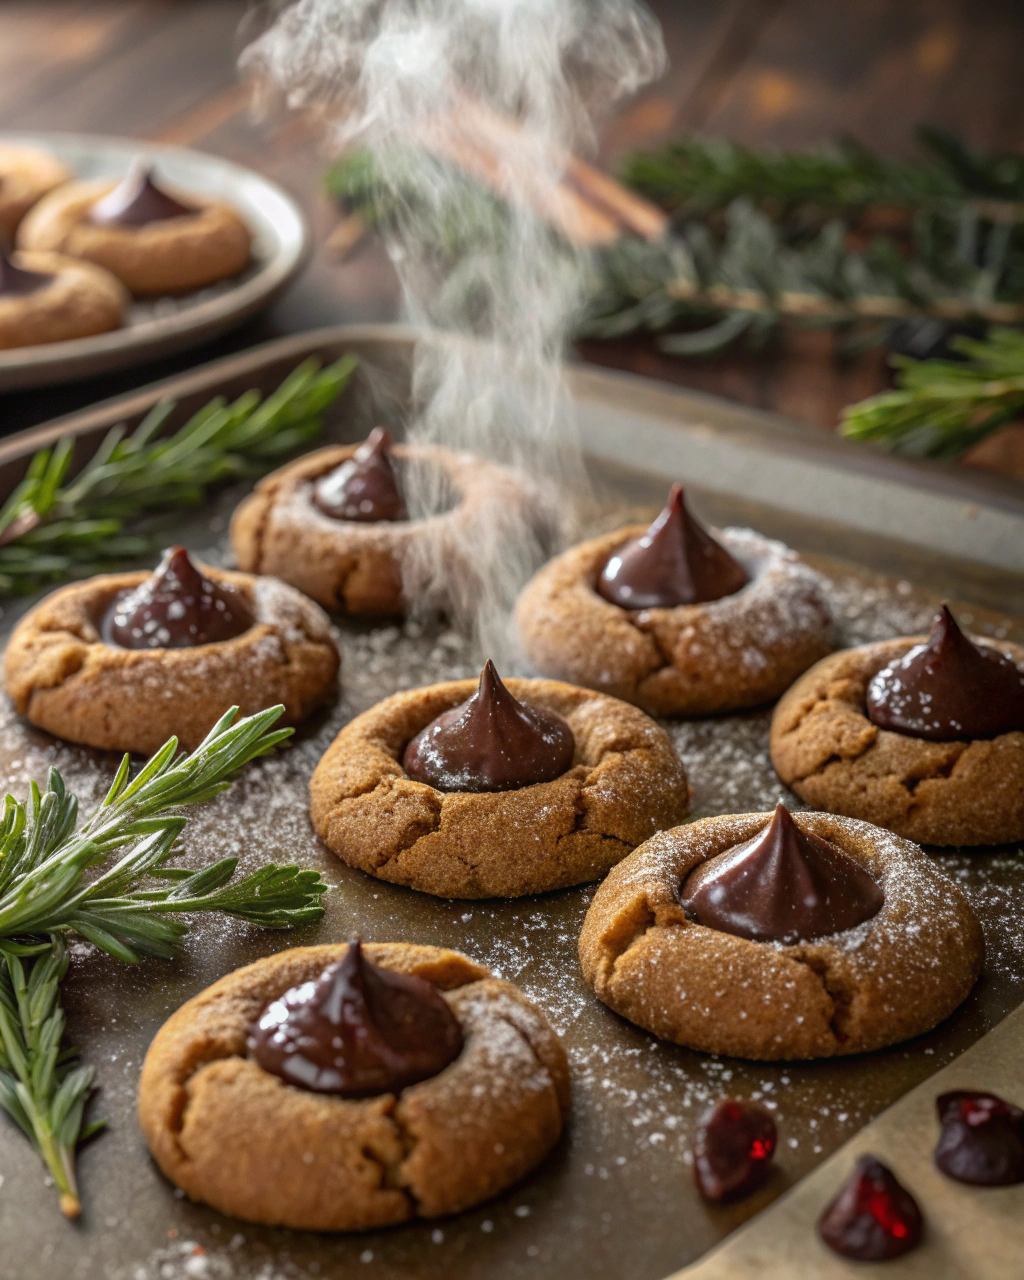
Chocolate Sugar Kiss Cookies
Okay, I have to admit—these Chocolate Sugar Kiss Cookies might just be my new obsession, and I can’t wait to spill all the delicious secrets behind them! Imagine a cookie that’s perfectly soft and pillowy with just the right hint of sugary crunch, hugging a melty, rich chocolate kiss right in the center. It’s like a little pocket of happiness with every bite. These cookies bake up with that golden-brown edge, while the chocolate gently melts to a dreamy goo. Trust me, once you try this recipe, you’ll be sneaking back for “just one more” cookie way too often. Ready to make your kitchen smell like chocolate heaven? Let’s do this!
Quick Facts
- Yield: About 24 cookies
- Prep Time: 15 minutes
- Cook Time: 10-12 minutes
- Total Time: 27-30 minutes
Ingredients
For the Cookies:
- 2 ¼ cups all-purpose flour
- 1 tsp baking soda
- ½ tsp salt
- ¾ cup unsalted butter, softened
- 1 cup granulated sugar
- ½ cup brown sugar, packed
- 1 large egg
- 1 tsp vanilla extract
- About 24 chocolate kisses (regular size)
- Additional granulated sugar (for rolling)
How I Make It
Step 1:
Start by preheating your oven to 350°F and lining two baking sheets with parchment paper. In a medium bowl, whisk together the flour, baking soda, and salt. This dry mix will give your cookies that perfect rise and tender crumb.
Step 2:
In a large bowl, beat the softened butter with both sugars until the mixture is fluffy and pale—about 2-3 minutes. This is where the magic starts: fluffy butter and sugar equals light, tender cookies!
Step 3:
Add the egg and vanilla extract to the butter mixture, beating just until combined. Then, gradually mix in the flour blend until you have a soft, slightly sticky dough. If it’s too sticky to handle, a quick chill in the fridge for 15 minutes helps a lot.
Step 4:
Roll your dough into 1 ½-inch balls. Before placing them on the baking sheet, roll each ball in a small bowl of granulated sugar to give the cookies a delicate crunch and sparkle on the outside.
Step 5:
Arrange the sugar-coated dough balls on the prepared sheets, spacing them about 2 inches apart. Bake for 8-9 minutes until the edges are set but the centers look soft. This is key to keeping them tender.
Step 6:
As soon as your timers go off, quickly press one chocolate kiss into the center of each warm cookie. Don’t worry if the cookies crack a little around the edges—that’s just their charming way of saying they’re perfect! Let them cool on the baking sheet for 5 minutes before transferring to a wire rack to cool completely.
Variations & Tips
- Swap milk chocolate kisses for dark, white, or even peanut butter-filled for different flavor profiles.
- Dip the finished cookies halfway in melted chocolate and sprinkle with crushed nuts or sea salt.
- Use cake flour instead of all-purpose for an even softer, more delicate crumb.
- If your dough is too sticky, chill it for 30 minutes or add a bit more flour, 1 tbsp at a time.
- For extra festive flair, roll the dough balls in colored sanding sugar instead of plain granulated sugar.
How I Like to Serve It
I love pulling these cookies out for cozy winter nights with a tall glass of cold milk, or wrapping them up in little cellophane bags for holiday gifting. They’re great for after-school treats, weekend baking parties, and always show up at birthday celebrations to big smiles. Bonus: they pair beautifully with a scoop of vanilla ice cream if you want to dress them up!
Notes
- Store cookies in an airtight container at room temperature for up to 5 days; they’re just as tasty day 2 or 3.
- If you want the kisses to stay more solid, chill the cookies briefly in the fridge after adding the kiss.
Closing: These Chocolate Sugar Kiss Cookies are a simple, joyful way to turn any day around, proving that a little chocolate and sugar really do go a long way!

Hi, I’m Lina, the creator of Lina Easy Recipes.Cooking has always been my passion, and I love sharing simple, homemade dishes that anyone can prepare.
Love What You See?
Join me on Pinterest and Facebook for daily cooking inspiration, new recipe ideas, and behind-the-scenes kitchen stories. Let’s cook something wonderful together!


