
Pssst — want the secret to restaurant-style lo mein with that addictive, crunchy bite? I’ll let you in: it’s all about searing the chicken separately so you lock in juiciness, then tossing everything together last minute so the noodles stay silky and the chicken stays crispy. I started doing this trick when I got tired of soggy takeout chicken, and now every weeknight feels like a tiny victory. The kitchen will smell like toasted sesame and garlic, the noodles will glisten, and you’ll hear that satisfying sizzle when the chicken hits the pan. Stick with me and I’ll show you how to make a quick, pantry-friendly, crispy chicken lo mein that looks fancy but comes together fast.
Quick Facts
- Yield: Serves 4
- Prep Time: 15 minutes
- Cook Time: 20 minutes
- Total Time: 35 minutes
Why This Recipe is Awesome
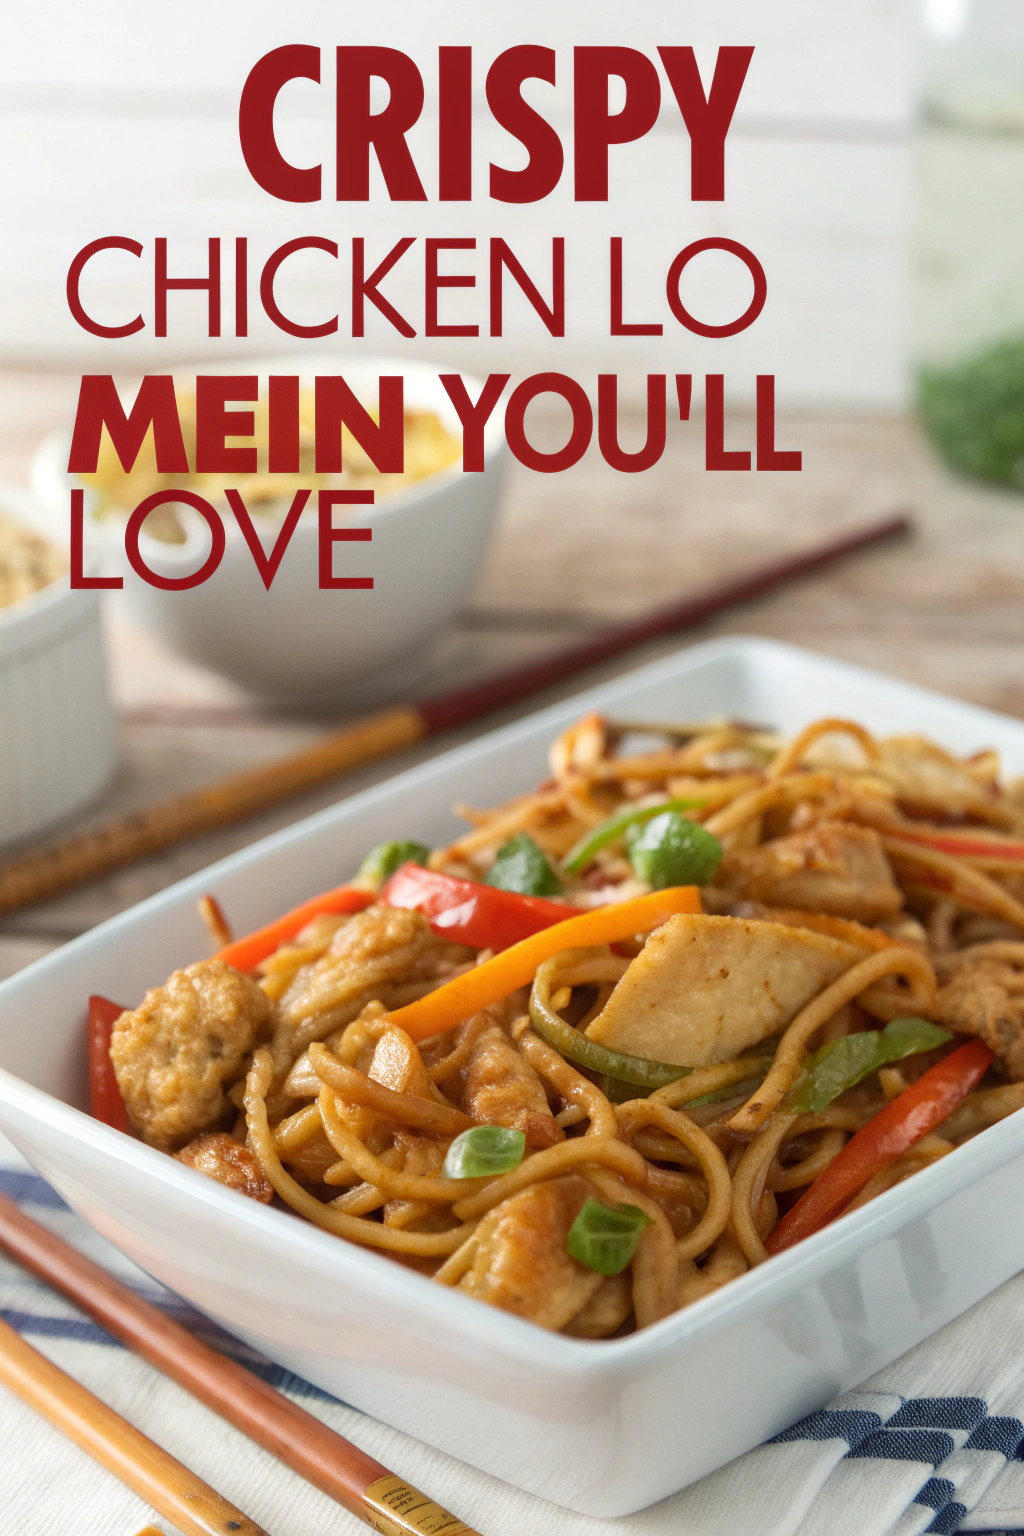
This recipe gives you the best of both worlds: tender, juicy chicken with a crispy crust and silky, saucy lo mein noodles. It’s fast, forgiving, and uses simple ingredients you probably already have. Who doesn’t love crunchy edges and glossy sauce? Plus, it’s so easy that even a rainy weeknight turns into a mini celebration — your kitchen will smell amazing and your family will ask for seconds.
Ingredients
For the Main Dish:
- 1 lb boneless, skinless chicken breasts, cut into 1/2-inch strips
- 8 oz lo mein noodles (or spaghetti/egg noodles)
- 2 tbsp vegetable oil (or canola)
- 1 tbsp sesame oil
- 3 cloves garlic, minced
- 1 tbsp fresh ginger, grated
- 1 medium carrot, julienned or thinly sliced
- 1 cup snow peas or snap peas, trimmed
- 3 green onions, sliced on a bias
- 1/2 cup shredded cabbage (optional for crunch)
- Salt and pepper to taste
- 1 tbsp cornstarch (for a light crisp on the chicken)
For the Sauce / Garnish (if applicable):
- 1/4 cup low-sodium soy sauce (or tamari for gluten-free)
- 2 tbsp oyster sauce (or mushroom sauce for vegetarian)
- 1 tbsp rice vinegar
- 1 tbsp brown sugar or honey
- 1/4 tsp red pepper flakes (optional for heat)
- 1 tbsp toasted sesame seeds for garnish
- Extra green onions for garnish
How I Make It
Step 1:
Bring a large pot of water to a boil and cook the lo mein noodles according to package directions until al dente. Drain the noodles, toss with a drizzle of sesame oil to keep them from sticking, and set aside. You’ll smell the wheat and the quick caramel note from the sesame — it’s a small preview of the final dish.
Step 2:
Pat the chicken dry and toss with 1 tbsp cornstarch, a pinch of salt, and pepper. Heat a large skillet over medium-high heat with 2 tbsp vegetable oil until it shimmers. Add the chicken in a single layer and let it sear without moving for 3–4 minutes so it develops a golden, crispy crust. Flip and sear the other side until cooked through and register 165°F on an instant-read thermometer. Transfer the chicken to a plate and rest — this keeps the juices locked in.
Step 3:
In the same skillet, lower the heat to medium, add a tiny splash more oil if needed, then toss in garlic and ginger. Stir until aromatic (about 20–30 seconds) — your kitchen will fill with a toasty, spicy scent. Add the carrots and snow peas and stir-fry for 2–3 minutes until bright and a little tender-crisp. Add the shredded cabbage and cook another minute; I like the little snap it gives.
Step 4:
Pour the sauce (soy, oyster sauce, rice vinegar, brown sugar, red pepper flakes) into the pan and bring it to a quick simmer. Return the chicken to the skillet and add the cooked noodles. Toss everything together vigorously for 1–2 minutes so the sauce coats each strand and the chicken keeps its crisp exterior. Listen for the sizzle and watch the sauce turn glossy — that’s your cue it’s ready.
Step 5:
Turn off the heat and finish with a drizzle of extra sesame oil, a sprinkle of toasted sesame seeds, and sliced green onions. Serve immediately while the chicken still crackles at the edges and the noodles stay silky. If something looks too saucy, toss in another handful of noodles or cook a touch longer to concentrate the sauce.
Pro Tips
- Pat the chicken very dry before cornstarch — moisture stops crisping. I keep paper towels nearby for quick dabbing.
- Don’t crowd the pan when searing the chicken; work in batches if needed so each piece browns nicely.
- Use an instant-read thermometer to hit 165°F without overcooking the chicken; it stays juicy and tender.
- If your noodles clump, rinse them briefly with hot water and toss with a teaspoon of oil to loosen strands.
Common Mistakes to Avoid
- Skipping preheating: Classic rookie move. It changes texture and bake time.
- Overmixing: Leads to dense or chewy results. Mix until just combined.
- Guessing cook time: Always use visual cues or a timer, not just vibes.
- Overcrowding pans: Give your food some breathing room to crisp properly.
Alternatives & Substitutions
- Swap chicken for firm tofu (press it dry and pan-fry) for a vegetarian option — the texture changes but the flavors stay great.
- Use tamari instead of soy sauce for a gluten-free version; the flavor stays similar but the sauce may taste slightly richer.
- Replace oyster sauce with a tablespoon of miso paste plus a little extra water for a vegetarian umami boost.
- For dairy-free: this recipe already avoids dairy — just skip any butter-based garnishes and use oil.
Variations & Tips
- Spicy: Add a teaspoon of chili-garlic sauce or a splash of sriracha to the sauce for heat.
- Kid-friendly: Omit red pepper flakes and serve with extra green onions on the side so kids can customize.
- Veggie-packed: Toss in bell peppers, shiitake mushrooms, or broccoli for extra color and nutrition.
- One-pan weeknight: Cook noodles first, then use the same pan for chicken and veggies to save cleanup time.
- Creamy twist: Stir in a tablespoon of peanut butter to the sauce for a Thai-inspired variation.
- Oven-finish: If you want ultra-crispy chicken, sear then finish in a 400°F oven for 6–8 minutes before tossing with noodles.
FAQ (Frequently Asked Questions)
- Can I make this ahead of time?
- Yes! Prep the sauce and slice the veggies a day ahead. Store chicken and noodles separately in airtight containers. Reheat in a skillet over medium heat so the chicken regains some crispness (add a splash of water if the sauce tightened).
- Can I double the recipe?
- Sure thing. Use a larger wok or cook in batches so you don’t overcrowd the pan; doubling in a small skillet leads to steaming instead of searing.
- Can I substitute butter with oil?
- Technically yes, but you’ll miss that buttery magic. Use ¾ the amount of oil.
- How do I know it’s done?
- Look for golden, crisp edges on the chicken and an internal temperature of 165°F. The noodles should look glossy and separate, not gluey.
- What if I don’t have ingredient X?
- Swap pantry staples: no oyster sauce? Use extra soy and a splash of Worcestershire or miso. No fresh ginger? Use ½ tsp ground ginger or grated jarred ginger.
How I Like to Serve It
I serve this lo mein straight from the pan onto warm plates and watch everyone dig in — it’s perfect for a busy weeknight or a casual dinner party. Pair it with steamed bok choy or a quick cucumber salad and an ice-cold beer or jasmine tea. It also packs well for lunch the next day; the chicken stays surprisingly good if you reheat gently in a skillet.
Notes
- Store leftovers in an airtight container up to 3 days. Reheat on the stove over medium to keep chicken crisp.
- Safe cooking temp for chicken: 165°F. Use an instant-read thermometer for best results.
Final Thoughts
Closing: Now go impress someone — or just yourself — with your homemade crispy chicken lo mein. Trust me, that crunchy-then-silky bite never gets old.

Hi, I’m Lina, the creator of Lina Easy Recipes.Cooking has always been my passion, and I love sharing simple, homemade dishes that anyone can prepare.
Love What You See?
Join me on Pinterest and Facebook for daily cooking inspiration, new recipe ideas, and behind-the-scenes kitchen stories. Let’s cook something wonderful together!


