
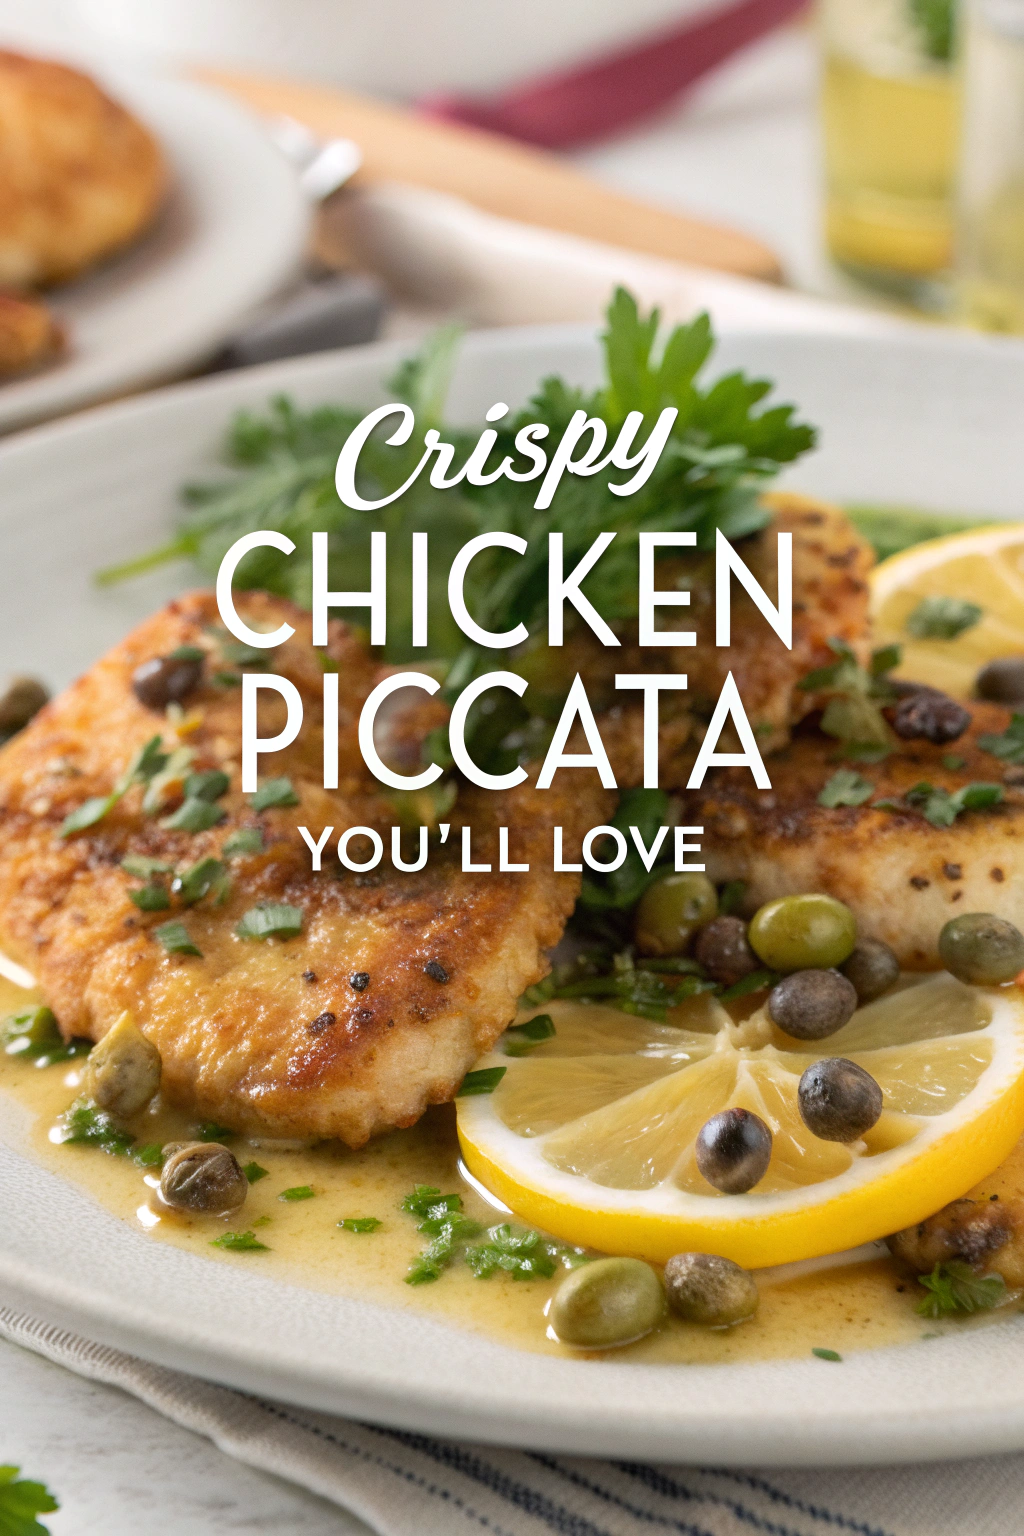
Okay, confession time: every time I make Crispy Chicken Piccata I feel like I’ve unlocked a secret level of dinner-dom. I’m not talking frou-frou restaurant plating — I’m talking bright lemon, punchy capers, and that irresistible crunchy edge that sings when you bite it. Tonight, I pounded a couple of chicken breasts (don’t worry, I used a plastic bag and my patience), and the whole kitchen smelled like sunny afternoons — sharp lemon, warm butter, and that toasty pan aroma that makes you drop whatever you were doing and stand watch. If you want dinner that looks impressive but plays nicely with weeknight life, this is your recipe.
Quick Facts
- Yield: Serves 4
- Prep Time: 15 minutes
- Cook Time: 12 minutes
- Total Time: 27 minutes
Why This Recipe is Awesome
This Crispy Chicken Piccata gives you golden, crunchy edges with a silky, tangy sauce — it’s bright, comforting, and actually fast. It’s so easy even your oven can’t mess it up. The contrast between the crisp exterior and juicy interior, plus the lemony, buttery sauce studded with capers, keeps you reaching for another forkful. Plus, it smells like someone went to culinary school but without the tuition bill.
Ingredients
For the Main Dish:
- 1 1/2 to 2 lb boneless, skinless chicken breasts (about 4 small/medium breasts)
- 1/2 cup all-purpose flour (or 1/2 cup GF 1:1 flour for gluten-free)
- 2 tbsp cornstarch (optional — extra crisp)
- 1 tsp kosher salt
- 1/2 tsp black pepper
- 3 tbsp olive oil
- 2 tbsp unsalted butter (use dairy-free spread for dairy-free)
- 1 lemon (zest and juice, about 3 tbsp juice)
- 3/4 cup low-sodium chicken broth (or use white wine)
- 2 tbsp capers, drained
- 2 tbsp chopped fresh parsley
- Optional: 1/4 cup panko breadcrumbs for extra crunch
For the Sauce / Garnish (if applicable):
- 2 tbsp cold unsalted butter, cut into small pieces (for finishing)
- Extra lemon wedges to serve
How I Make It
Step 1:
Slice the chicken breasts horizontally to make 8 cutlets, then lay each between two pieces of plastic wrap and gently pound to about 1/2 inch thickness with a rolling pin or meat mallet. Pat dry with paper towels — moisture fights crispiness. Mix the flour, cornstarch, salt, and pepper in a shallow dish. Dredge each cutlet in the flour mixture, shaking off excess. Hint: if you want extra crunch, press the cutlets into 1/4 cup panko after dredging.
Step 2:
Heat a large skillet over medium-high heat and add 3 tbsp olive oil and 2 tbsp butter. When the butter foams and the pan smells nutty, lay the cutlets in one at a time — you should hear a confident sizzle. Don’t overcrowd the pan; cook in batches if needed. Cook for about 3–4 minutes per side until each side turns a deep golden brown and the edges get crisp. Transfer to a plate and tent loosely with foil.
Step 3:
Lower the heat to medium. Add a splash of chicken broth or white wine to the hot pan and scrape up those golden bits (that’s flavor gold). Pour in the remaining 3/4 cup chicken broth, 3 tbsp lemon juice, and 2 tbsp capers. Let the sauce simmer and reduce for about 2–3 minutes until it slightly thickens and smells bright and tangy. You’ll notice the kitchen filling with a lemony perfume — pure comfort.
Step 4:
Turn off the heat and whisk in the remaining 2 tbsp cold butter a piece at a time to build a glossy sauce. Return the chicken to the pan for a quick dunk, spooning sauce over the pieces to coat. Check doneness: the chicken should reach an internal temperature of 165°F and feel springy, with no translucent pink in the center. The edges should look golden and crisp while the center stays juicy.
Step 5:
Plate the cutlets and spoon extra sauce over them. Sprinkle with zest and chopped parsley, and serve with lemon wedges. Let the sauce rest for a minute so it settles into a silky shine. I usually throw some roasted potatoes or a simple arugula salad on the side — the peppery greens cut the richness beautifully.
Pro Tips
- Pat chicken very dry before dredging — less moisture = crispier crust.
- Use a mix of oil and butter for flavor + higher smoke point. If your pan starts to smoke, turn the heat down a touch.
- Don’t overcrowd the pan. Give each cutlet room to form a crust; crowded meat steams, and you lose that crunch.
- If you want ultra-crisp edges, let the cutlets rest on a wire rack while you finish the sauce so steam doesn’t soften the crust.
Common Mistakes to Avoid
- Skipping preheating: Classic rookie move. It changes texture and bake time.
- Overmixing: Leads to dense or chewy results. Mix until just combined.
- Guessing cook time: Always use visual cues or a timer, not just vibes.
- Overcrowding pans: Give your food some breathing room to crisp properly.
Alternatives & Substitutions
- Swap chicken for firm tofu or thin turkey cutlets; both absorb the tangy sauce nicely.
- Use Greek yogurt mixed with a little lemon as a cold sauce on the side — tangy and creamy without extra butter.
- For gluten-free: use a 1:1 gluten-free flour or almond flour (almond flour browns faster; reduce heat slightly).
- Dairy-free option: skip the finishing butter and use extra olive oil or a vegan butter alternative (this keeps flavor but loses a touch of buttery magic).
Variations & Tips
- Spicy Piccata: add a pinch of red pepper flakes to the sauce for a warm tingle.
- Herby Twist: stir chopped basil or tarragon into the sauce at the end for freshness.
- Kid-friendly: leave out the capers and add a splash more lemon — still bright, less briny.
- One-pan meal: add sliced mushrooms and baby potatoes to the pan after the first sear and finish in the oven at 400°F for 10–12 minutes until potatoes are tender.
- Seafood twist: swap chicken for halved cold-water shrimp; cook 1–2 minutes per side until pink.
FAQ (Frequently Asked Questions)
- Can I make this ahead of time?
- Yes! You can pound and dredge the chicken a few hours ahead and keep it covered in the fridge. Cook right before serving so you keep crispness. Store cooked leftovers in an airtight container for up to 3 days; reheat gently in a 350°F oven to revive the crust.
- Can I double the recipe?
- Sure thing. Use two skillets or cook in batches — don’t overcrowd. You’ll need to increase sauce quantities slightly (add an extra 1/2 cup broth per doubled batch).
- Can I substitute butter with oil?
- Technically yes, but you’ll miss that buttery magic. Use ¾ the amount of oil and finish with a tiny drizzle of high-quality olive oil if you want richness without butter.
- How do I know it’s done?
- Look for golden, crisp edges and an internal temp of 165°F. The center should feel springy, not squishy, and juices should run clear.
- What if I don’t have ingredient X?
- No capers? Use chopped green olives or a little chopped pickle for briny punch. No fresh lemon? Use 2 tbsp bottled lemon juice plus a pinch of zest if you have it.
How I Like to Serve It
I serve this with buttered noodles or jasmine rice to soak up the sauce, and a crisp green salad on the side. For cozy weeknights, pair it with roasted carrots and a glass of chilled Pinot Grigio; for a Sunday dinner, add roasted garlic mashed potatoes. It fits summer lightness and chilly comforts alike — brightening winter and shining at springtime dinners.
Notes
- Store leftovers in the fridge for up to 3 days. Reheat in a 350°F oven for 8–10 minutes to keep the crust from sogging.
- Safe cooking temp for chicken: 165°F.
Final Thoughts
Closing: Now go impress someone — or just yourself — with your homemade masterpiece!

Hi, I’m Lina, the creator of Lina Easy Recipes.Cooking has always been my passion, and I love sharing simple, homemade dishes that anyone can prepare.
Love What You See?
Join me on Pinterest and Facebook for daily cooking inspiration, new recipe ideas, and behind-the-scenes kitchen stories. Let’s cook something wonderful together!


