
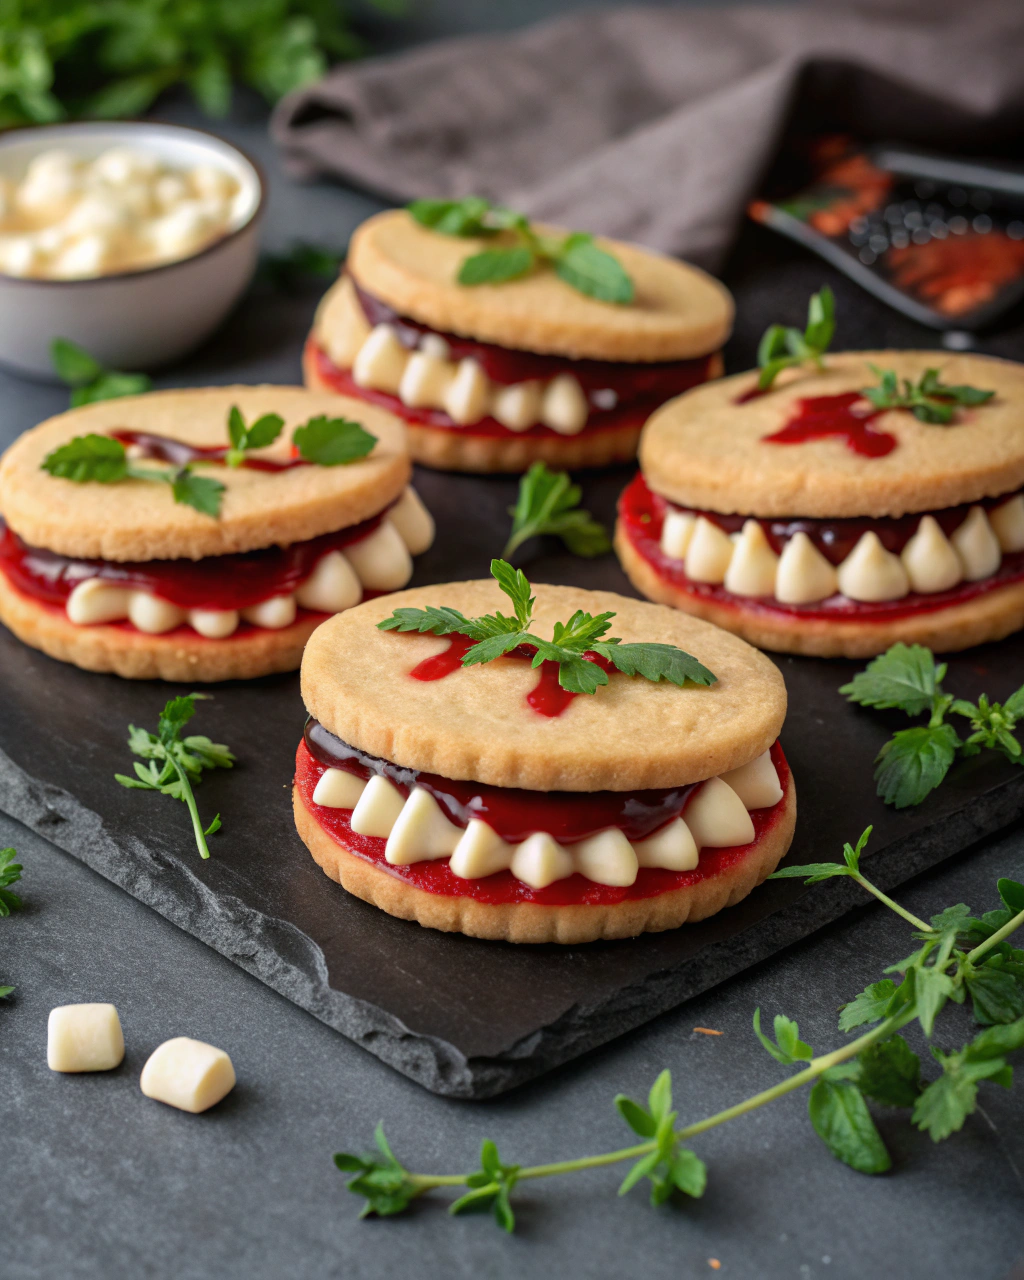
Dracula Dentures Cookies – creative Halloween cookie idea
Alright, picture this: it’s Halloween, the house is buzzing with spooky vibes, and you want a cookie that’s more than just tasty—it’s downright unforgettable. Enter these Dracula Dentures Cookies, my cheeky little creation that perfectly balances creepy and cute. I still remember the time my niece tried to bite into one and declared them “the yummiest scary teeth ever!” The crunchy almond slivers make for that perfect bite, and the bright red jam “gums” add a juicy pop right where you least expect it. If you’re ready to impress your goblins and witches with something fun and frightfully delicious, this recipe is your golden ticket (or should I say… fang ticket?). Let’s get baking!
Quick Facts
- Yield: About 24 cookies
- Prep Time: 20 minutes
- Cook Time: 12 minutes
- Total Time: 32 minutes
Ingredients
For the Main Dish:
- 1 cup (2 sticks) unsalted butter, softened
- 3/4 cup granulated sugar
- 1 large egg
- 1 tsp vanilla extract
- 2 1/2 cups all-purpose flour
- 1/2 tsp baking powder
- 1/4 tsp salt
- Almond slivers (enough for 2 teeth per cookie, about 2 for each cookie)
- Red jam or jelly (strawberry or raspberry works best)
How I Make It
Step 1:
Start by creaming together the softened butter and sugar in a large bowl until it’s light and fluffy—this usually takes about 3-4 minutes with an electric mixer. Then, beat in the egg and vanilla extract until smooth and glossy.
Step 2:
In a separate bowl, whisk together the flour, baking powder, and salt. Gradually add this dry mix to the wet ingredients, stirring gently until a smooth dough forms. The dough should be soft but not sticky—if it feels too wet, add a tiny bit more flour, like a tablespoon at a time.
Step 3:
On a lightly floured surface, roll the dough out to about 1/4-inch thickness. Using a broad, flat cookie cutter or just a knife, cut out rectangles roughly 2 inches long and 1 inch wide—these will be the “mouth” bases for your Dracula dentures!
Step 4:
Place your cutouts on a parchment-lined baking sheet. Now, line the top and bottom edges of each rectangle with almond slivers angled slightly downwards to look like sharp vampire teeth. Use a dab of dough or a little water to gently press them into place so they hold while baking.
Step 5:
Bake in a preheated 350°F oven for about 10-12 minutes, or until the edges just start to golden—keep a close eye to avoid overbaking, so your “fangs” don’t get too brown.
Step 6:
Once the cookies cool just enough, spread a thin layer of your chosen red jam along the edge between the almond teeth and cookie base for that juicy, “gummy” look. Let the jam set before serving to avoid stickiness.
Variations & Tips
- Swap almond slivers with white chocolate “fangs” for a sweeter twist.
- Use different red jams—cherry or boysenberry add deeper colors.
- If you want easier shaping, press the toppings into half-moon sugar cookie shapes instead of rectangles.
- For extra flair, dust lightly with edible glitter or red sanding sugar for a dramatic sparkle.
- Make the dough a day ahead and chill for better control when rolling out.
- Don’t press the almond slivers too deep—they bake crispier if just lightly secured.
How I Like to Serve It
I love serving these Dracula Dentures Cookies at Halloween parties alongside a big bowl of punch—bonus points if it’s dark red cranberry juice to match the gums! They make a fantastic conversation starter when kids (and adults) get a kick out of their silliness. They also pair well with hot cocoa or coffee as a whimsical after-dinner treat on chilly fall nights.
Notes
- Store these cookies in an airtight container at room temperature for up to 4 days; jam-topped edges hold up best if fully set.
- If your dough softens too much during prep, chill it for about 30 minutes before rolling out to make cutting easier.
Closing: These Dracula Dentures Cookies always steal the show because they’re quirky, tasty, and bring a little playful bite to any spooky celebration!

Hi, I’m Lina, the creator of Lina Easy Recipes.Cooking has always been my passion, and I love sharing simple, homemade dishes that anyone can prepare.
Love What You See?
Join me on Pinterest and Facebook for daily cooking inspiration, new recipe ideas, and behind-the-scenes kitchen stories. Let’s cook something wonderful together!


 - spooky Halloween cupcake idea")


