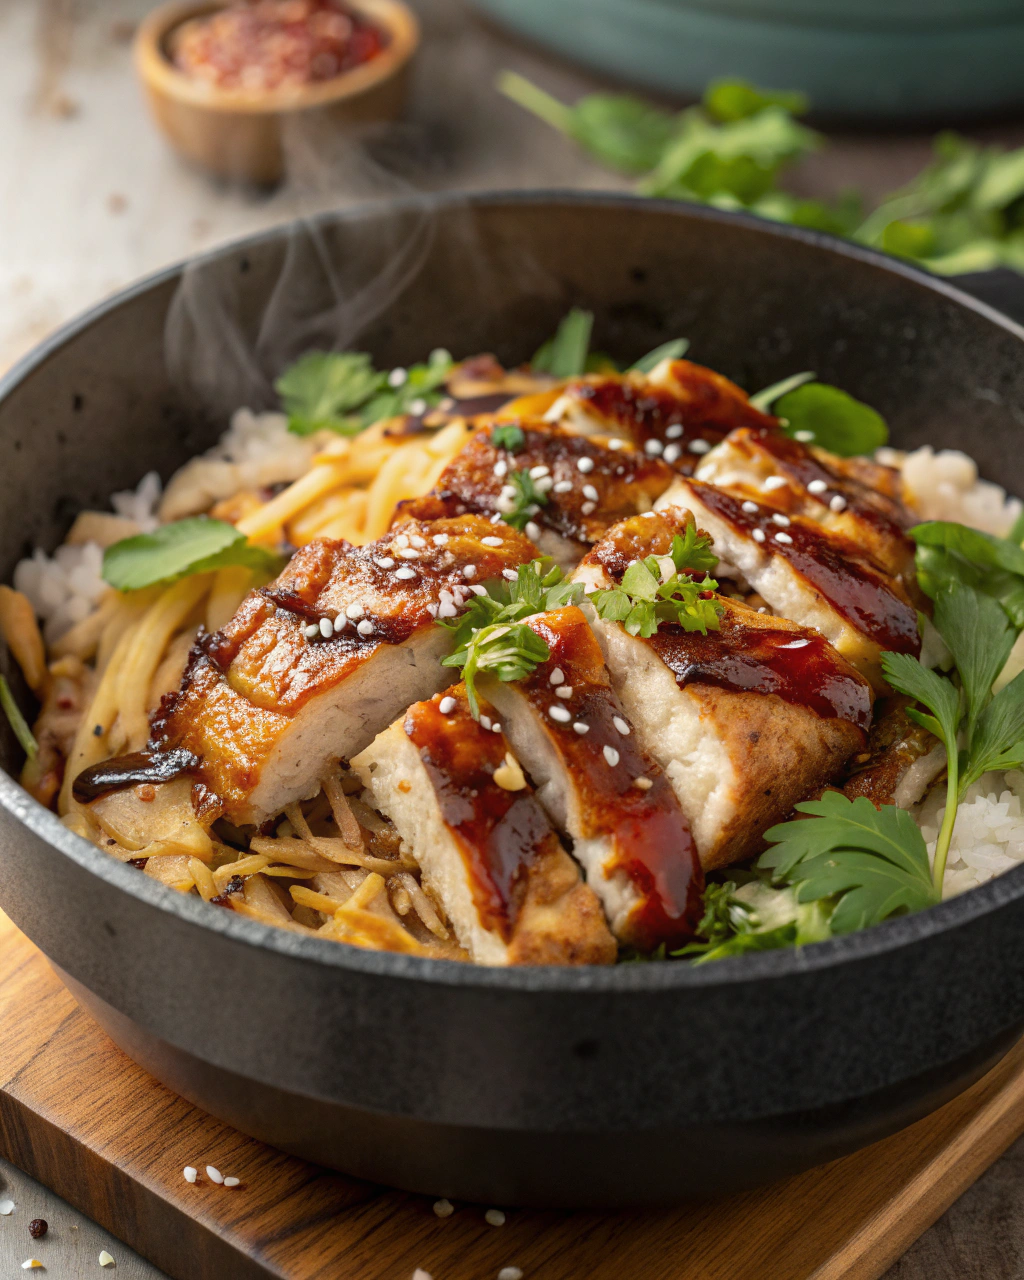
Alright, let me tell you, this gluten-free teriyaki chicken is *the* kind of meal that sneaks up on you—sweet, sticky, and packed with flavor but without any of the gluten. Picture tender chicken glazed in a rich, glossy sauce that smells like a little slice of Asian street food heaven in your own kitchen. I love how easy it is to whip up on a weeknight yet it feels special enough to serve for guests. Plus, it’s totally adaptable, so whether you’re cooking for yourself or a crowd, this recipe has got your back. Stick with me and I’ll share my best tips to keep that sauce thick and shiny every single time!
Quick Facts
Yield: Serves 4
Prep Time: 10 minutes
Cook Time: 15 minutes
Total Time: 25 minutes
Ingredients
For the Main Dish:
1.5 lbs boneless, skinless chicken thighs, cut into bite-sized pieces
1 tbsp vegetable oil (or avocado oil)
2 tsp cornstarch
Salt and pepper, to taste
For the Sauce / Garnish:
½ cup gluten-free tamari (or coconut aminos for a soy-free option)
¼ cup water
3 tbsp brown sugar or honey
2 cloves garlic, minced
1 tsp freshly grated ginger
1 tbsp rice vinegar
1 tsp toasted sesame oil
1 tbsp cornstarch mixed with 2 tbsp cold water (slurry)
Optional: toasted sesame seeds and sliced green onions for garnish
How I Make It
Step 1:
Start by seasoning the bite-sized chicken pieces with a pinch of salt, pepper, and 2 teaspoons of cornstarch. This not only adds a little lift to the chicken’s crispness when cooked but helps the sauce cling tightly later on.
Step 2:
Heat your 1 tablespoon of oil in a large skillet over medium-high heat. When it’s shimmering but not smoking, add the chicken in a single layer. Let it sizzle quietly for a few minutes before stirring—this gives you a nice golden crust that’s irresistible both in taste and texture.
Step 3:
Once the chicken is golden and nearly cooked through, pour in your pre-mixed sauce (tamari, water, brown sugar, garlic, ginger, rice vinegar, and sesame oil). It should bubble away gently, filling your kitchen with that unmistakable savory-sweet aroma.
Step 4:
As the sauce begins to simmer, slowly stir in the cornstarch slurry to thicken it. Watch carefully — it only takes a minute or two to turn glossy and luscious, clinging to each piece of chicken like a flavorful hug.
Step 5:
Turn off the heat as soon as the sauce reaches that perfect, glossy coating. Overcooking can make it too thick or start to burn the sugar—so keep your eye on it!
Step 6:
Serve up immediately, garnished with toasted sesame seeds and sliced green onions if you like. The contrast of the fresh, crunchy green onions with the sweet, sticky sauce is pure magic.
Variations & Tips
Use chicken breast for a leaner option, but don’t overcook—it dries out quickly.
For a spicy kick, toss in some red pepper flakes or a dash of sriracha.
Swap cornstarch with arrowroot powder if you want a grain-free thickener.
Add steamed broccoli or snap peas for a veggie boost.
Make extra sauce and drizzle it over rice or noodles for an extra-flavor punch.
If the sauce isn’t thickening enough, just give it another splash of slurry—but mix slurry first to avoid lumps!
How I Like to Serve It
I usually pile this up over fluffy white or brown rice, letting the sauce seep into every bite. When it’s cooler out, I love pairing it with sautéed greens like bok choy or kale to balance that sweetness. It’s also a winner for casual dinners with friends because it looks fancy but comes together so easily—perfect for impressing without the stress!
Notes
Store leftovers in an airtight container in the fridge up to 3 days; reheat gently to keep the sauce from thickening too much.
If you don’t have tamari, gluten-free soy sauce works well too—just double-check the label for gluten content.
Closing: This gluten-free teriyaki chicken has become my go-to for those nights when I want big flavor with zero fuss—trust me, it always hits the spot!
Hi, I’m Lina, the creator of Lina Easy Recipes.Cooking has always been my passion, and I love sharing simple, homemade dishes that anyone can prepare.
Spread the love
Love What You See?
Join me on Pinterest and Facebook for daily cooking inspiration, new recipe ideas, and behind-the-scenes kitchen stories. Let’s cook something wonderful together!