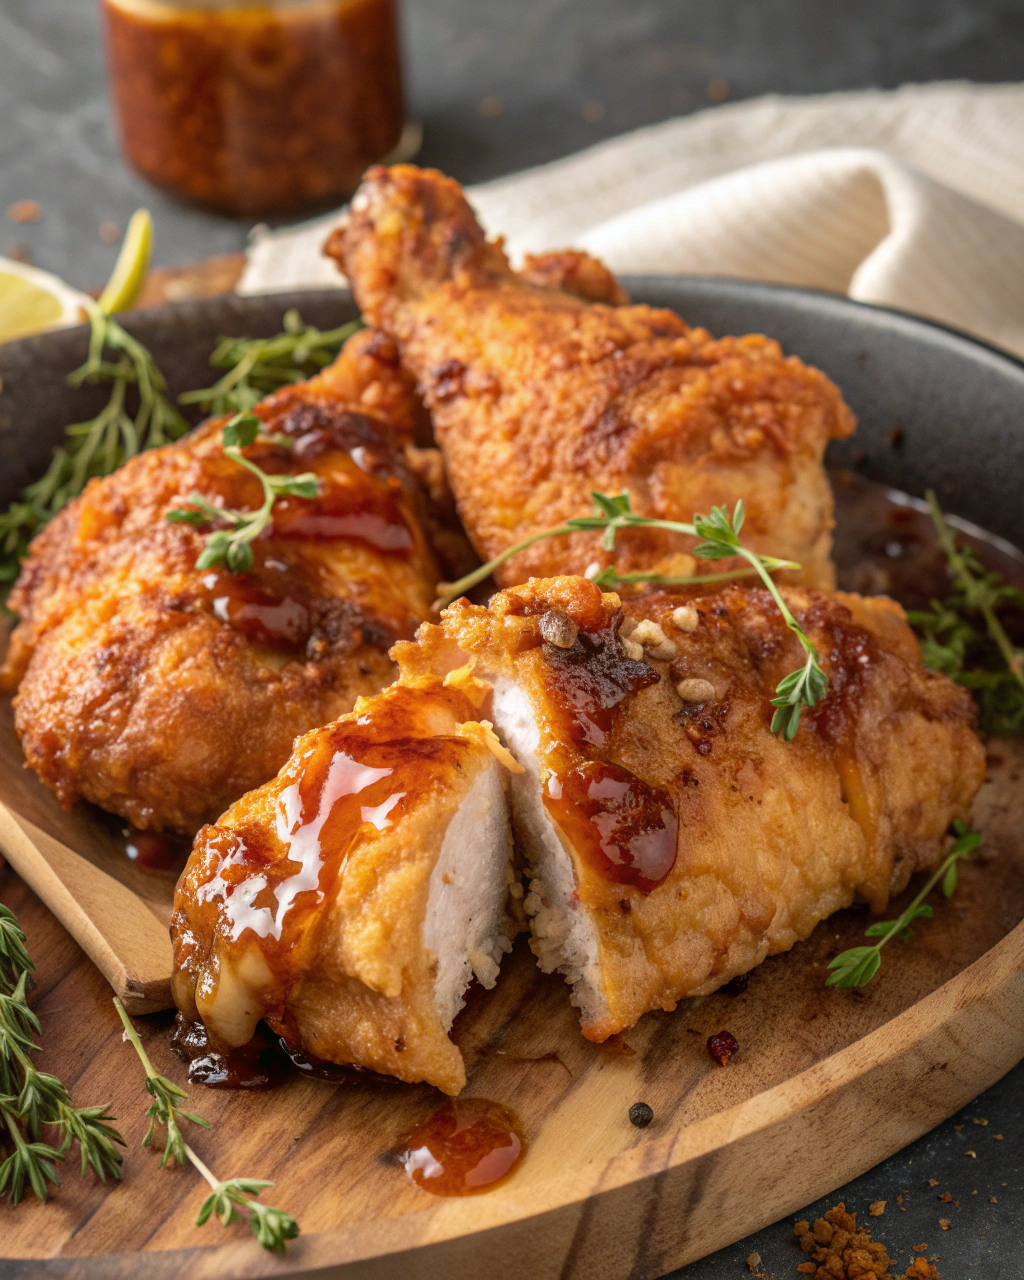
When I was a kid, my grandmother’s kitchen smelled like frying oil and warm honey — the two scents that, for me, mean “home.” I still remember perching on a stool, watching her dredge chicken in a flour-cloud, then lower it with a practiced flick until it sizzled and popped. This Honey-Glazed Easy Fried Chicken grew from those afternoons: a little nostalgia, a few shortcuts, and a glaze that streaks golden over crunchy crusts. It’s crispy, sticky, slightly spicy if you like, and forgiving for busy cooks. I promise you that once you hear the first sizzle and feel that warm honey glaze, you’ll smile the way I do every single time.
Quick Facts
Yield: Serves 4
Prep Time: 20 minutes (plus 2–4 hours marinating)
Cook Time: 25 minutes
Total Time: 45 minutes (plus marinating)
Why This Recipe is Awesome
It gives you crunchy, golden-brown fried chicken with a glossy honey finish in a home-cook-friendly way. The crust shatters with a satisfying crunch, the meat stays juicy, and the glaze balances sweet and tangy so your taste buds wake up. It’s so easy even your weeknight routine will forgive you. Who doesn’t love crispy edges brushed with sticky honey? Plus, it smells amazing — think warm honey, toasted flour, and a little char from the pan.
Ingredients
For the Main Dish:
2.5–3 lbs bone-in chicken (thighs and drumsticks work best)
2 cups buttermilk (or 2 cups milk + 2 tbsp white vinegar, let sit 5 minutes)
1 tbsp hot sauce (optional, for marinade)
2 cups all-purpose flour
1/2 cup cornstarch (for extra-crisp crust)
1 tbsp garlic powder
1 tbsp onion powder
1 tbsp smoked paprika
2 tsp kosher salt
1 tsp black pepper
Vegetable oil or canola oil for frying (about 4 cups, enough for 1–2 inches in a skillet)
For the Sauce / Garnish (if applicable):
1/2 cup honey
2 tbsp unsalted butter
1 tbsp soy sauce (or tamari)
1 tsp apple cider vinegar
Pinch of red pepper flakes (optional)
Chopped parsley or sliced green onions for garnish (optional)
How I Make It
Step 1:
I start by marinating the chicken. In a large bowl, whisk 2 cups buttermilk with 1 tbsp hot sauce if you like a tiny kick. Add the chicken, press each piece under the liquid, cover, and refrigerate for at least 2 hours or up to overnight. The buttermilk tenderizes the meat and gives the crust something to cling to.
Step 2:
When you’re ready, build your dredge. In a wide bowl, whisk together 2 cups flour, 1/2 cup cornstarch, and the spices: garlic powder, onion powder, smoked paprika, 2 tsp kosher salt, and 1 tsp black pepper. Heat oil in a heavy skillet or Dutch oven over medium heat until it reaches 350°F on a thermometer. If you don’t have one, drop a pinch of flour into the oil — it should sizzle immediately and float up.
Step 3:
Shake off excess buttermilk from the chicken and press each piece into the flour mix until well-coated. Tap off the loose flour and gently set the pieces in the hot oil. Don’t overcrowd the pan — fry in batches so the oil temperature stays near 350°F. You’ll hear that great, steady sizzle and smell the toasty crust forming. Cook dark pieces about 8–10 minutes per side until crust turns deep golden and an instant-read thermometer reads 165°F in the thickest part.
Step 4:
Drain the fried chicken on a wire rack over a baking sheet. While the last batch fries, make the glaze: melt 2 tbsp butter in a small pan over low heat, stir in 1/2 cup honey, 1 tbsp soy sauce, and 1 tsp apple cider vinegar. Warm until glossy and slightly bubbling — don’t let it boil hard or the honey will darken too much. Taste and add red pepper flakes if you want heat.
Step 5:
Brush each hot chicken piece with the honey glaze so it forms a sticky coat. The heat will make the glaze thicken slightly and cling to the crust, creating those shiny, sweet edges. Let the chicken rest 5 minutes so juices settle and the glaze sets. Garnish with parsley or green onions and serve immediately.
Pro Tips
Use a thermometer: keep oil around 350°F. Too hot will burn the crust before the center cooks; too cool makes greasy chicken.
Pat dry and press the dredge on: moisture ruins crispiness. Press the flour mixture onto the chicken for a thicker, crunchy crust.
Keep fried pieces on a wire rack, not paper towels. The rack preserves crispness by letting steam escape.
If you don’t have buttermilk, mix 2 cups milk + 2 tbsp vinegar and let it sit 5 minutes — it works like a charm.
Common Mistakes to Avoid
Skipping preheating: Classic rookie move. It changes texture and bake time.
Overmixing: Leads to dense or chewy results. Mix until just combined.
Guessing cook time: Always use visual cues or a timer, not just vibes.
Overcrowding pans: Give your food some breathing room to crisp properly.
Alternatives & Substitutions
Use boneless chicken breasts or thighs — reduce frying time to 5–7 minutes per side. The texture will be slightly different but still delicious.
For gluten-free: swap the all-purpose flour with a 1:1 gluten-free flour blend and use potato starch or extra cornstarch.
Dairy-free: replace buttermilk with 2 cups almond or soy milk plus 2 tbsp vinegar; the acidity still tenderizes.
Vegetarian option: firm tofu pressed, marinated, dredged, and pan-fried gives a crunchy, honey-glazed alternative.
Variations & Tips
Spicy Honey: add 1–2 tbsp sriracha to the glaze for a sweet-heat combo.
Lemon-Honey: add 1 tsp lemon zest and 1 tbsp lemon juice to the glaze for brightness.
Herb Crunch: mix 2 tbsp finely chopped fresh rosemary into the dredge for rustic flavor.
Korean-Inspired: swap soy sauce for gochujang in the glaze and add sesame seeds for crunch.
Kid-Friendly: leave out hot sauce and red pepper flakes for a straightforward sweet glaze that everyone will love.
Creative Twist: add a splash of bourbon (1 tbsp) to the glaze for grown-up caramel notes.
FAQ (Frequently Asked Questions)
Can I make this ahead of time?
Yes! Marinate the chicken up to 24 hours. Fry just before serving for best crispiness. Store cooled chicken in the fridge up to 3 days and re-crisp in a 400°F oven for 8–10 minutes, then brush with warm glaze.
Can I double the recipe?
Sure thing. Fry in batches and monitor oil temp between batches so it stays around 350°F. Use two skillets if you want to speed things up.
Can I substitute butter with oil?
Technically yes, but you’ll miss that buttery magic. Use ¾ the amount of oil if swapping in oil for the glaze base.
How do I know it’s done?
Look for a deep golden crust, hear a steady sizzle, and check the thickest part with an instant-read thermometer — it should reach 165°F. The juices should run clear and the meat should feel firm but springy.
What if I don’t have ingredient X?
Swap simple pantry staples: no cornstarch? Use an extra 1/2 cup flour. No soy sauce? Use a splash of Worcestershire or extra salt and a touch of molasses for color.
How I Like to Serve It
I serve this chicken with creamy coleslaw, buttery mashed potatoes, or a bright cucumber salad to cut the sweetness. For drinks, an ice-cold lemonade or a light lager pairs perfectly. It works for weeknights, backyard dinners, and potlucks — and it feels like a hug on chilly evenings or a celebration on sunny afternoons.
Notes
Store leftover chicken in an airtight container in the fridge up to 3 days. Reheat in a 400°F oven for 8–10 minutes to regain crunch.
Safe cooking temp for chicken: 165°F (USDA recommendation).
Final Thoughts
Closing: Now go impress someone — or just yourself — with your homemade masterpiece!
Hi, I’m Lina, the creator of Lina Easy Recipes.Cooking has always been my passion, and I love sharing simple, homemade dishes that anyone can prepare.
Spread the love
Love What You See?
Join me on Pinterest and Facebook for daily cooking inspiration, new recipe ideas, and behind-the-scenes kitchen stories. Let’s cook something wonderful together!