Chef’s secret time: I stumbled on this combo (yes, in my messy little kitchen at 2 a.m.) and felt like I’d hacked dinner forever. If you want a little insider: don’t overthink the herbs — bold, whole sprigs of fresh rosemary alongside smashed cloves of garlic turn a plain chicken into something that smells like a restaurant walked into your home. I’ll show you how to get crackly skin, juicy meat, and a buttery-rosemary pan sauce with minimal fuss. Follow my small, prideful shortcut and you’ll get big, impressive flavor without pretending you spent all day cooking. Trust me — this trick saves time and makes you look like you belong in those glossy food photos.
Quick Facts
Yield: Serves 4
Prep Time:15 minutes
Cook Time:35–40 minutes at 400°F
Total Time:50–55 minutes
Why This Recipe is Awesome
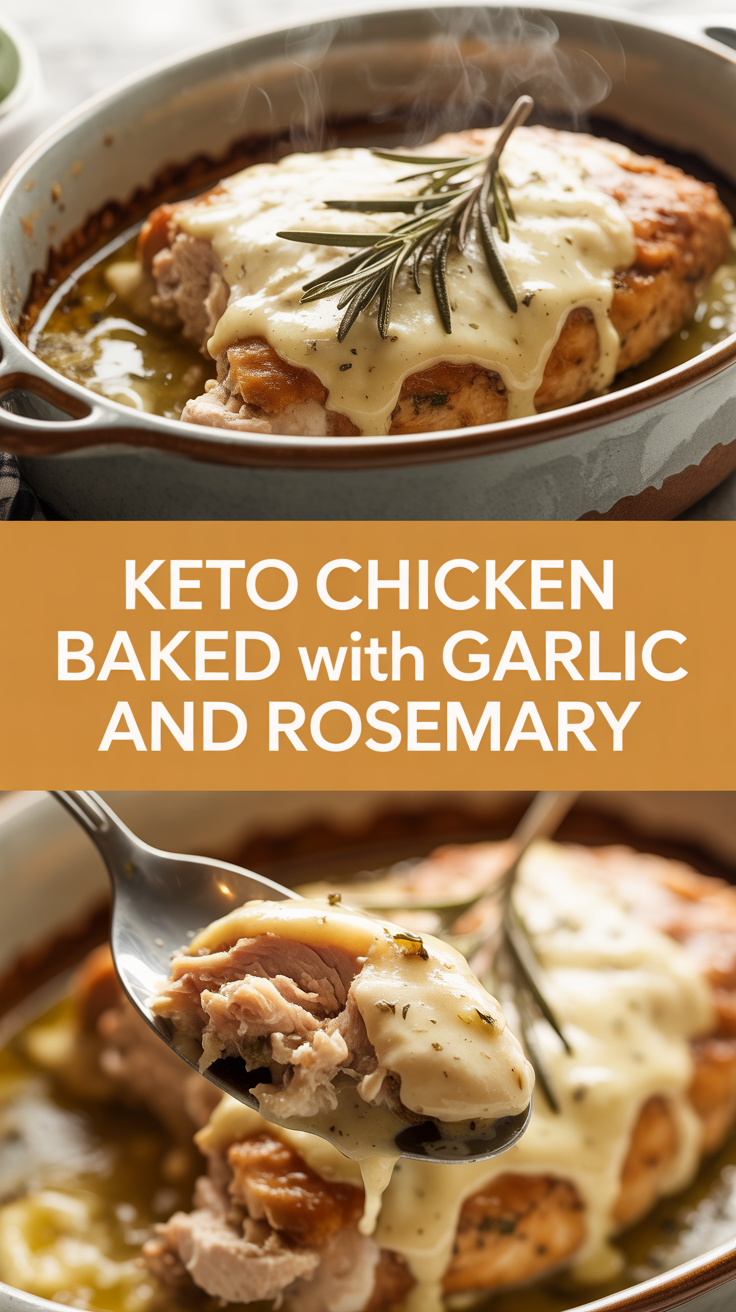
It gives you crispy, golden skin and succulent, herb-kissed meat with almost zero drama. The aroma of sizzling garlic and rosemary fills the kitchen and makes neighbors curious. Texture-wise, you’ll get a crunchy exterior and a tender, juicy interior — perfect for keto dinners because it’s rich on fat and low on carbs. Plus, it’s so forgiving that even if you chat too long at the table, the chicken still behaves.
Ingredients
For the Main Dish:
4 bone-in, skin-on chicken thighs (about 2 lbs)
1 tbsp olive oil
2 tbsp unsalted butter, softened
6 garlic cloves, 4 smashed + 2 thinly sliced
2 tbsp fresh rosemary, chopped (or 2–3 sprigs left whole)
1 tsp smoked paprika (optional)
1 tsp sea salt
½ tsp freshly ground black pepper
1 tbsp lemon juice (optional, for brightness)
1 tbsp chopped fresh parsley (for garnish)
For the Sauce / Garnish (if applicable):
Pan drippings from the bake, strained into a small skillet
1 tsp lemon juice or a pat of butter to finish the sauce
Extra rosemary sprigs and lemon wedges for serving
How I Make It
Step 1:
I preheat the oven to 400°F. While it warms, I pat the chicken thighs dry with paper towels — this little dry rub step helps the skin crisp. I toss the thighs in a bowl with olive oil, salt, pepper, and the smoked paprika. Then I tuck in most of the chopped rosemary and the smashed garlic so those aromatics sit right up against the skin. Dry skin = crunchy skin, so don’t skip the patting.
Step 2:
I heat a cast-iron skillet over medium-high heat until it sings (you’ll see a faint shimmer). I add the butter and let it foam, then place the thighs skin-side down. Sear them for about 4–5 minutes until the skin gets a deep, golden-brown crust — you’ll hear that happy sizzle and smell buttery rosemary filling the room. Don’t move them too much; let the skin build color.
Step 3:
Once the skin looks like toasted caramel, I flip the thighs and toss in the sliced garlic and a couple whole rosemary sprigs. I slide the skillet into the oven and roast at 400°F for about 20–25 minutes, then check. The garlic will turn soft and lightly browned; the pan juices will smell savory-sweet. If you use an instant-read thermometer, aim for 165°F in the thickest part of the thigh.
Step 4:
If the skin needs extra crisp, I broil for 1–2 minutes at the end while watching closely. The thighs should have golden edges and a glossy, herb-scented surface. Remove the skillet and transfer the chicken to a plate to rest for 5 minutes — that makes the juices settle so the meat stays tender, not leaking all over your cutting board.
Step 5:
I make a quick pan sauce while the chicken rests: pour off excess fat into a heatproof container (but keep a tablespoon or two), add a splash of lemon juice to the hot drippings, and warm briefly on the stove with a pat of butter and the roasted garlic. Spoon the sauce over the thighs and sprinkle chopped parsley for color. Serve with lemon wedges and enjoy the crunchy, garlicky goodness.
Pro Tips
Dry the skin well. I even chill the thighs uncovered for 10 minutes if I have time — it helps the skin crisp faster.
Use a cast-iron or other oven-safe skillet so you can sear and roast in one pan. Less cleanup = more dessert.
Check internal temp at the bone: pull at 165°F, then rest. Don’t overcook — thighs stay juicy with a little give.
If your garlic browns too fast, tuck it under the chicken or add it later in the roast so it softens rather than burns.
Common Mistakes to Avoid
Skipping preheating: Classic rookie move. It changes texture and bake time.
Overmixing: Leads to dense or chewy results. Mix until just combined.
Guessing cook time: Always use visual cues or a timer, not just vibes.
Overcrowding pans: Give your food some breathing room to crisp properly.
Alternatives & Substitutions
Swap chicken thighs for bone-in chicken breasts — increase roast time by 5–10 minutes and watch the thermometer.
For a vegetarian option, use thick tofu slabs: press, marinate, then sear and roast until golden. Texture will be firmer but still satisfying.
Replace butter with full-fat Greek yogurt in a marinade for tangy moisture (adds a slight tang and keeps it keto-friendly).
Dairy-free: use 2 tbsp extra olive oil instead of butter and finish with lemon for brightness.
Variations & Tips
Spicy kick: add ¼ tsp cayenne or a drizzle of hot honey after baking for a sweet-spicy contrast.
Herb swap: use thyme or tarragon instead of rosemary for a different herbal profile.
Sheet-pan dinner: toss brussels sprouts and cauliflower florets around the thighs and roast together for an all-in-one meal.
Lemony roast: add thin lemon slices around the chicken for a bright, citrusy aroma.
Garlic-forward: roast an extra head of garlic whole alongside the chicken and mash it into the sauce for creamy depth.
Make it smoky: use smoked sea salt or smoked paprika for a campfire vibe.
FAQ (Frequently Asked Questions)
Can I make this ahead of time?
Yes! Roast the chicken completely, cool, and store in an airtight container in the fridge for up to 3 days. Reheat in a 350°F oven for 10–12 minutes to revive the skin, or crisp under the broiler for a minute. Reheat the sauce gently on the stove and spoon over before serving.
Can I double the recipe?
Sure thing. Use two skillets or a large roasting pan so pieces don’t crowd. You might need an extra 5–10 minutes if the pan gets really full; watch the internal temp rather than relying only on time.
Can I substitute butter with oil?
Technically yes, but you’ll miss that buttery magic. Use ¾ the amount of oil.
How do I know it’s done?
Look for a deep golden-brown skin, clear juices when poked, and an internal temperature of 165°F at the thickest spot. The meat should feel tender and pull easily from the bone.
What if I don’t have ingredient X?
No rosemary? Use thyme or oregano — they change the flavor but still taste lovely. Out of fresh garlic? Use 1 tsp garlic powder in the rub and a little extra butter for richness.
How I Like to Serve It
I pair this chicken with a crisp green salad or a bed of buttery mashed cauliflower for a keto-friendly plate. It shines at weeknight dinners and behaves like a rock star at potlucks — people always ask for the recipe. For drinks, a dry white wine or sparkling water with lemon balances the richness. In summer I serve it with grilled zucchini; in colder months I tuck it beside roasted root vegetables.
Notes
Store leftover chicken in an airtight container in the fridge for up to 3 days. Reheat in the oven to keep skin palatable.
Safe internal temp for chicken: 165°F. Use an instant-read thermometer for best results.
Final Thoughts
Closing: Now go impress someone — or just yourself — with your homemade masterpiece!
Hi, I’m Lina, the creator of Lina Easy Recipes.Cooking has always been my passion, and I love sharing simple, homemade dishes that anyone can prepare.
Spread the love
Love What You See?
Join me on Pinterest and Facebook for daily cooking inspiration, new recipe ideas, and behind-the-scenes kitchen stories. Let’s cook something wonderful together!