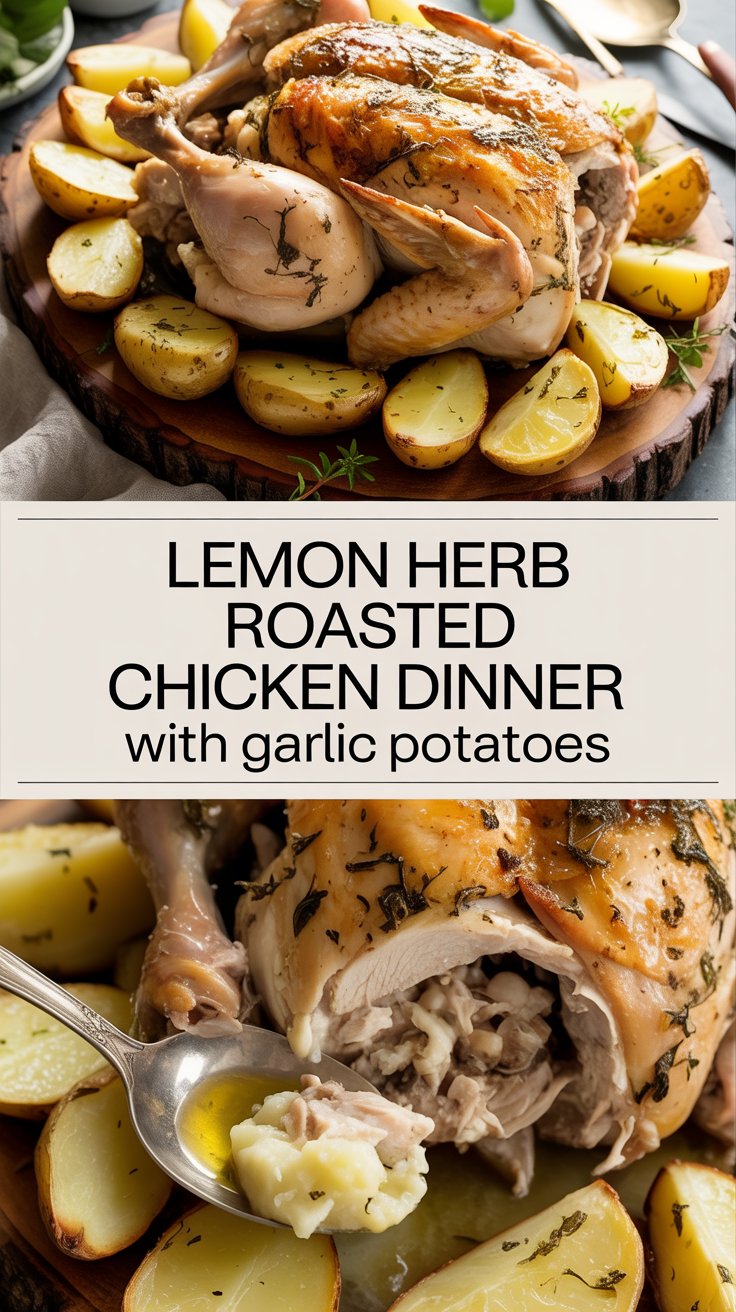
Lemon Herb Roasted Chicken Dinner with Garlic Potatoes
Spread the love
Here’s a little chef’s secret I’ve kept too long: roast chicken tastes like restaurant-level comfort when you treat the skin like a star and the juices like treasure. I learned this trick standing on a stool in a busy kitchen once — salt early, high heat, and lemon tucked under the skin. That combo makes the skin crackle, the herbs perfume the meat, and the whole kitchen smell like Sunday afternoons. This Lemon Herb Roasted Chicken with Garlic Potatoes gives you golden, crispy skin, tender, juicy meat, and potatoes that soak up every garlicky drop. I’ll walk you through the simple steps, share my little fixes for common slip-ups, and promise it’s easier than it looks.
Quick Facts
Yield: Serves 4–6
Prep Time:20 minutes
Cook Time:1 hour 20 minutes
Total Time:1 hour 40 minutes
Why This Recipe is Awesome
This recipe gives you a crisp, golden skin and juicy chicken with minimal fuss. The **lemon** and **fresh herbs** brighten the rich, savory notes while garlic-roasted potatoes soak up every flavorful drip. It smells incredible — like citrus and thyme hitting butter and hot metal — and the contrast between crunchy edges and tender centers makes you want to take a bite before it even rests. It’s so straightforward even your oven can’t mess it up (but I’ll still tell you how to avoid the few mistakes people make).
1 lb baby potatoes (about 20 small potatoes), halved if large
4 cloves garlic, left whole and smashed for the potatoes
For the Sauce / Garnish (optional):
2 tbsp fresh parsley, chopped
1 tbsp lemon juice (from the squeezed halves)
How I Make It
Step 1:
I preheat the oven to 425°F so it reaches temperature while I prep — that initial heat gives the skin instant sizzle. Pat the chicken dry with paper towels (this helps the skin crisp), then gently loosen the skin over the breasts with your fingers. Mix the softened **butter**, **lemon zest**, **minced garlic**, **thyme**, **rosemary**, **salt**, **pepper**, and **paprika**. Rub most of this herby butter under the skin and the rest all over the skin. Tuck the lemon halves and a couple of smashed garlic cloves into the cavity.
Step 2:
In a large bowl, toss the **baby potatoes** with **2 tbsp olive oil**, the remaining smashed garlic cloves, a pinch of salt, and a few thyme sprigs. Spread the potatoes in the bottom of a roasting pan or rimmed baking sheet in a single layer. Place the seasoned chicken on top of the potatoes (breast-side up). The potatoes will roast in the chicken juices and get beautifully caramelized.
Step 3:
Roast in the preheated oven at 425°F. After 20 minutes, tip the pan slightly and baste the chicken and potatoes with the pan juices (use a spoon). You’ll start to smell citrus and garlic blooming — that’s the kitchen telling you things are going right. If the chicken browns too quickly, loosely tent it with foil but keep the oven hot so the potatoes still crisp.
Step 4:
Continue roasting until the chicken reaches an internal temperature of 165°F in the thickest part of the thigh and the juices run clear, about 1 hour to 1 hour 10 minutes total for a 4-lb bird (timing varies by size). The potatoes should show golden edges and a soft center when pierced. Look for a deep, golden skin and a little jiggle in the legs that gives you a juicy center — not wobble; that means underdone.
Step 5:
Remove the chicken and potatoes from the oven. Tent the chicken loosely with foil and rest for at least 10–15 minutes so the juices redistribute — that keeps every slice juicy. Chop the lemon-rosemary pan juices and drizzle a splash of lemon juice and chopped parsley over the potatoes. Carve the chicken and serve alongside the garlicky potatoes while everything still smells like dinner victory.
Pro Tips
Salt the chicken at least 30 minutes before roasting (or overnight in the fridge) for deeper flavor and crispier skin.
Use a thermometer: I don’t guess doneness — I rely on 165°F in the thigh. It saves me from dry bites every time.
If you want extra-crispy skin, crank the oven to 450°F for the last 5–8 minutes, watching closely so it doesn’t burn.
Short on fresh herbs? Use 1 tsp dried herbs but add them earlier so they rehydrate and release flavor.
Common Mistakes to Avoid
Skipping preheating: Classic rookie move. It changes texture and bake time.
Overmixing: Leads to dense or chewy results. Mix until just combined.
Guessing cook time: Always use visual cues or a timer, not just vibes.
Overcrowding pans: Give your food some breathing room to crisp properly.
Alternatives & Substitutions
Swap the whole chicken for bone-in chicken thighs (about 6–8 pieces); roast time drops to ~35–45 minutes and you still get great flavor.
Replace butter with olive oil for a dairy-free option (use 2 tbsp oil); the flavor shifts slightly but stays delicious.
For a lighter option, use skinless chicken and finish the potatoes with an extra drizzle of olive oil and herbs.
Gluten-free? This recipe already fits — no wheat required.
Variations & Tips
Spicy twist: add 1 tsp chili flakes to the herb butter and a dash of cayenne to the potatoes.
Kid-friendly: skip the paprika and reduce garlic to suit picky palates.
Herb swap: try sage and tarragon for a fallier, more anise-like flavor profile.
One-pan dinner: add carrot chunks and onion wedges to roast with the potatoes for extra veggies.
Creative twist: finish with a spoonful of honey and a squeeze of lemon for a sweet-tangy glaze.
FAQ (Frequently Asked Questions)
Can I make this ahead of time?
Yes! Roast the chicken and potatoes, cool completely, and store in airtight containers for up to 3 days. Reheat covered at 350°F for 15–20 minutes or until heated through. For best texture, re-crisp skin under the broiler for 2–3 minutes.
Can I double the recipe?
Sure thing. Use two pans or a very large roasting pan so you don’t overcrowd. You may need a few extra minutes if the chickens sit close together, but avoid stacking — that kills crispiness.
Can I substitute butter with oil?
Technically yes, but you’ll miss that buttery magic. Use ¾ the amount of oil (so about 2 tbsp oil for this recipe) and add a touch more lemon for brightness.
How do I know it’s done?
Look for a deep golden-brown skin, clear juices when the thigh is pierced, and an internal temp of 165°F. The legs should wiggle easily — that’s a good sign.
What if I don’t have ingredient X?
Out of fresh herbs? Use 1 tsp dried. No baby potatoes? Use Yukon Golds cut into 1-inch pieces. No lemon? Use 1 tbsp white wine vinegar plus a little extra butter for balance.
How I Like to Serve It
I serve this with a simple green salad and a chilled glass of white wine for a weeknight that feels fancy. For a cozy Sunday, add roasted Brussels sprouts or buttered green beans. It works for potlucks, too — people fight over the potatoes. In summer, lighten it with extra lemon; in winter, let the rosemary and garlic lean into slow comfort.
Notes
Store leftovers in the fridge for up to 3 days. Reheat in a 350°F oven until warm; re-crisp skin under the broiler briefly if desired.
Safe cooking temp for chicken: 165°F measured at the thickest part of the thigh.
Final Thoughts
Closing: Now go impress someone — or just yourself — with your homemade masterpiece! Don’t be surprised if the house smells like you staged a restaurant — that’s the point.
Hi, I’m Lina, the creator of Lina Easy Recipes.Cooking has always been my passion, and I love sharing simple, homemade dishes that anyone can prepare.
Spread the love
Love What You See?
Join me on Pinterest and Facebook for daily cooking inspiration, new recipe ideas, and behind-the-scenes kitchen stories. Let’s cook something wonderful together!