
No-Bake Chocolate Coconut Pie
Okay, pulling off a no-bake pie that tastes this rich and indulgent? It almost feels like I’m sneaking dessert past the universe! This No-Bake Chocolate Coconut Pie is my go-to when I want something that looks fancy but doesn’t require firing up the oven. Imagine biting into a silky, chocolatey slice laced with toasted coconut crunch—without sweating over a hot kitchen. It’s almost suspiciously easy, but the layers of flavor make it feel like a dessert you’d find at a charming countryside cafe. Plus, no-bake means you can prep it in a flash and let the fridge do the magic while you kick back. Trust me, your friends will think you’re some kind of dessert wizard!
Quick Facts
- Yield: Serves 8
- Prep Time: 20 minutes
- Cook Time: 0 minutes
- Total Time: 4 hours (including chilling)
Ingredients
For the Main Dish:
- 1 ½ cups graham cracker crumbs
- ½ cup shredded sweetened coconut (plus extra for garnish)
- 6 tbsp unsalted butter, melted
- 8 oz cream cheese, softened
- 1 cup powdered sugar
- 1 ½ cups heavy cream, cold
- 7 oz bittersweet or semi-sweet chocolate, melted and slightly cooled
How I Make It
Step 1:
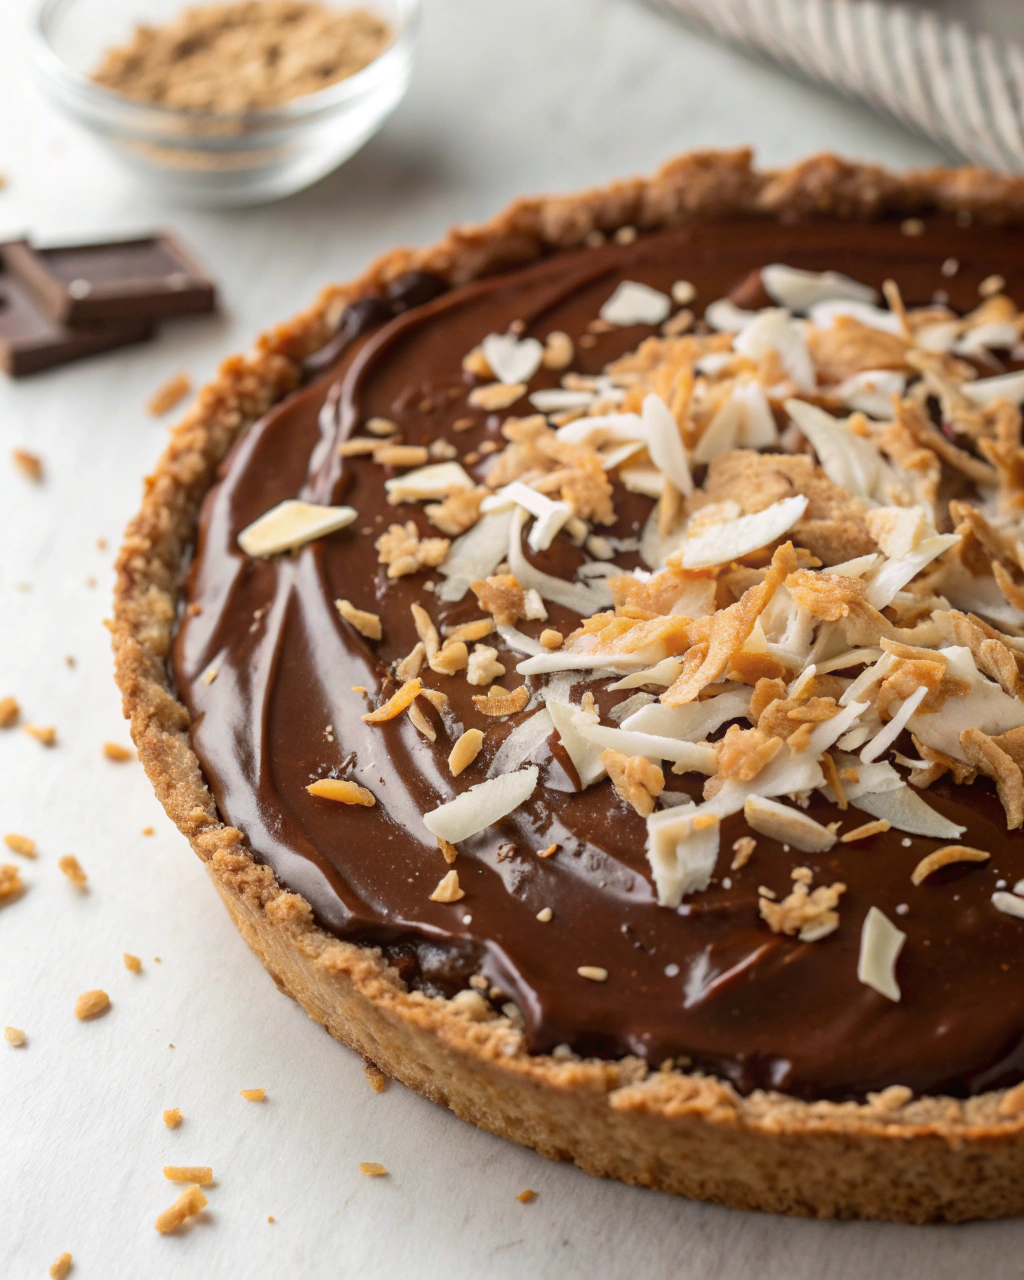
Start by making the crust. In a bowl, stir together the graham cracker crumbs, ½ cup shredded coconut, and melted butter until everything looks like damp sand. Press this mixture firmly into the bottom of a 9-inch pie plate. I like using the bottom of a glass to get it nice and compact! Pop it in the fridge to chill while you whip up the filling.
Step 2:
In a large bowl, beat the cream cheese and powdered sugar together until smooth and creamy—no lumps allowed! This gives the pie a luscious, silky base that sets it apart from regular chocolate pies.
Step 3:
Next, whip the cold heavy cream until you get stiff peaks. This is your secret for the light, fluffy texture that makes the pie feel almost like a cloud. Gently fold the whipped cream into the cream cheese mixture, taking care not to deflate those precious peaks.
Step 4:
Carefully fold in the melted chocolate. Make sure it’s cool enough so it doesn’t melt your whipped cream but still pourable enough to swirl in beautifully. The result? A silky chocolate filling with just the right balance of richness and lightness.
Step 5:
Spoon the filling into your chilled crust and spread it evenly. Sprinkle some extra shredded coconut on top for that toasty crunch and a pop of texture. Cover with plastic wrap and let the pie chill in the fridge for at least 4 hours or overnight.
Step 6:
When you’re ready to serve, grab a sharp knife to slice through that creamy goodness, and watch the layers hold perfectly together. The coconut garnish adds a lovely aroma and a little surprise crunch with every bite.
Variations & Tips
- Swap graham crackers for gluten-free cookies or crushed pretzels for a salty twist.
- Use dark chocolate for a more intense, richer chocolate flavor.
- Toast the coconut in a dry skillet until golden brown to amplify the nutty aroma.
- For extra creaminess, fold in a tablespoon of coconut cream.
- Feeling fancy? Add a pinch of sea salt to the filling to balance the sweetness.
- If your filling feels too loose, refrigerate a bit longer or add an extra tablespoon of softened cream cheese next time.
How I Like to Serve It
This pie is perfect chilled, straight from the fridge, with a hot cup of coffee or a cold glass of milk. It’s a great make-ahead dessert for summer barbecues or a tropical twist for holiday dinners. I also love how the toasted coconut makes it feel beachy and indulgent, so it’s basically a mini escape in every slice.
Notes
- Store leftovers covered in the fridge for up to 3 days—just be sure to let it sit at room temp for 10 minutes before serving for the best texture.
- You can freshen up the pie’s top by adding freshly toasted coconut right before serving if it loses its crispness.
Closing: This No-Bake Chocolate Coconut Pie always wows without the work, proving that the best desserts don’t have to come from a hot oven!

Hi, I’m Lina, the creator of Lina Easy Recipes.Cooking has always been my passion, and I love sharing simple, homemade dishes that anyone can prepare.
Love What You See?
Join me on Pinterest and Facebook for daily cooking inspiration, new recipe ideas, and behind-the-scenes kitchen stories. Let’s cook something wonderful together!


