
No-Bake White Chocolate Raspberry Bars
Alright, let’s be honest: sometimes life gets busy, and the oven feels like an impossible commitment. Enter these no-bake white chocolate raspberry bars—a dessert so effortless and luscious it almost feels like cheating. Imagine the creamy sweetness of white chocolate melting into your mouth, perfectly balanced by the bright, tangy burst of fresh raspberries. The base? Crunchy, buttery, and just a little crumbly, giving every bite a wonderful texture contrast. Whether you’re craving a quick treat or need a last-minute dessert to impress your friends, this recipe is your new go-to. Plus, it’s so simple—even if you’ve never made bars before, you’ll walk away feeling like a kitchen rockstar. Trust me, these bars are going to be your summer snack daydream!
Quick Facts
- Yield: Serves 9–12
- Prep Time: 15 minutes
- Cook Time: 0 minutes
- Total Time: 2 hours (including chilling)
Ingredients
For the Main Dish:
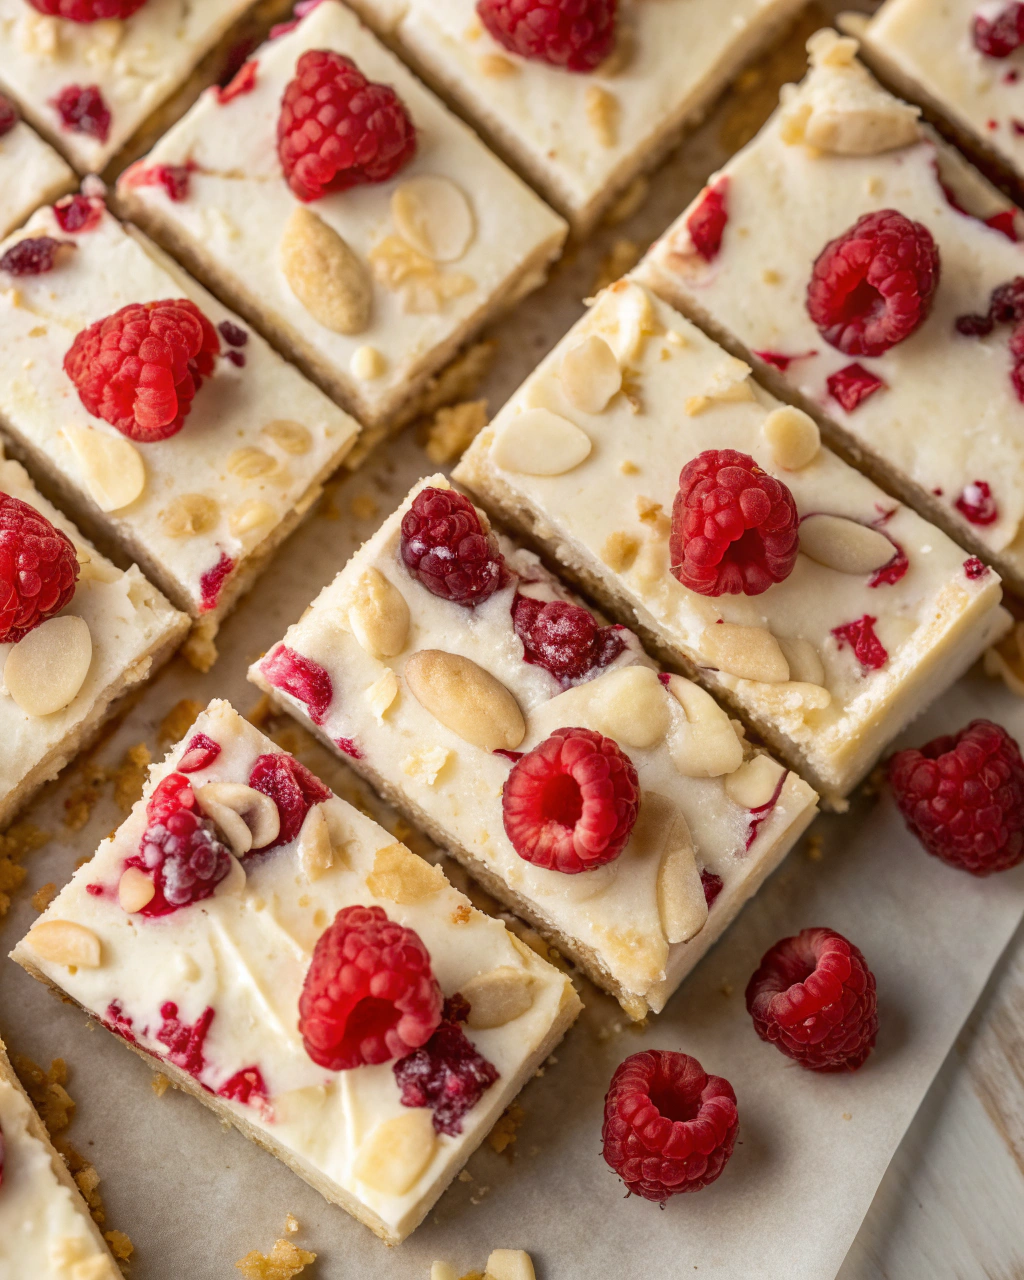
- 1 ½ cups graham cracker crumbs
- ½ cup unsalted butter, melted
- 2 tablespoons granulated sugar
- 8 ounces white chocolate chips or chopped white chocolate
- 1 cup heavy cream
- 1 ½ cups fresh raspberries (plus extra for garnish, if desired)
- 1 teaspoon vanilla extract
- Pinch of salt
How I Make It
Step 1:
Start by combining the graham cracker crumbs, melted butter, and sugar in a medium bowl. Stir until the mixture resembles wet sand. Press this evenly into the bottom of an 8×8-inch pan lined with parchment paper or lightly greased. Use the back of a spoon or your fingers to pack it down firmly. This will give you that satisfying crunch in every bite.
Step 2:
Next, it’s time for the white chocolate layer. Bring the heavy cream just to a simmer in a small saucepan or microwave-safe bowl. Pour it over the white chocolate chips in a heatproof bowl. Let it sit for a minute, then stir gently until smooth and glossy. Stir in the vanilla extract and a pinch of salt to amp up the flavors.
Step 3:
Gently fold the fresh raspberries into the melted white chocolate mixture. Be careful not to break the berries too much—you want those bright pops of color and flavor to peek through.
Step 4:
Pour this creamy, fruity mixture over your pressed graham cracker crust. Smooth the top into an even layer with a spatula or the back of a spoon.
Step 5:
Sprinkle a few whole raspberries on top for a pretty, inviting look. Pop the pan into the refrigerator and chill for at least 2 hours, or until the bars are firm enough to cut cleanly.
Step 6:
When you’re ready to serve, use a sharp knife warmed under hot water to slice the bars. This helps prevent cracking and sticking. Enjoy the cool, creamy texture and vibrant raspberry bursts right away!
Variations & Tips
- Swap raspberries with fresh strawberries or blueberries for different fruity twists.
- For a nutty crunch, sprinkle chopped toasted almonds or pistachios on top before chilling.
- If you want extra tartness, stir in a teaspoon of lemon zest with the vanilla extract.
- Use gluten-free graham cracker crumbs to make this dessert friendly for gluten-free diets.
- To make it even creamier, add a handful of cream cheese whipped into the melted chocolate mixture.
How I Like to Serve It
These bars are perfect for a sunny picnic or a quick summer dessert after dinner. They pair beautifully with a cup of iced tea or even a glass of crisp white wine. For holiday parties, dress them up with a dusting of powdered sugar and a sprig of mint—it’ll look like you spent hours making these, even though they took practically no effort.
Notes
- Store leftovers in an airtight container in the refrigerator for up to 3 days.
- If the bars soften too much in the fridge, just pop them into the freezer for 10 minutes before serving for a firmer texture.
Closing: Seriously, these no-bake bars are proof that sometimes the best desserts come together without even heating up your kitchen.

Hi, I’m Lina, the creator of Lina Easy Recipes.Cooking has always been my passion, and I love sharing simple, homemade dishes that anyone can prepare.
Love What You See?
Join me on Pinterest and Facebook for daily cooking inspiration, new recipe ideas, and behind-the-scenes kitchen stories. Let’s cook something wonderful together!


