
The kitchen smells like a Saturday morning at my grandmother’s house — warm corn tortillas and a little cilantro breeze through the open window. I grew up watching her fold quesadillas with the kind of calm that made the whole house slow down; she never measured, she just felt the cheese stretch and knew when the edges browned. This Veggie Quesadilla with Fresh Salsa reminds me of those quiet, cozy moments: a crispy, golden tortilla, melty cheese, bright pockets of tomato and lime, and the little crunch of charred peppers. It feeds the soul and shows up fast on a weeknight when you want something comforting but lively. You’ll hear the sizzle, smell the garlic, and smile when you bite in.
Quick Facts
- Yield: Serves 3–4 (makes 6 quesadillas)
- Prep Time: 15 minutes
- Cook Time: 15 minutes
- Total Time: 30 minutes
Why This Recipe is Awesome
This recipe gives you crunchy, buttery-edged quesadillas with a melty, savory center and a fresh, zesty salsa to cut the richness. It’s fast enough for a weeknight, colorful enough for company, and forgiving if you overstuff the tortilla (we’ve all done it). The contrast between the crispy outside and the gooey cheese inside keeps every bite interesting — and the salsa adds that bright pop that makes you go back for seconds.
Ingredients
For the Main Dish:
- 6 large flour tortillas (10-inch)
- 2 tbsp olive oil, divided
- 2 tbsp butter
- 1 medium red bell pepper, thinly sliced (about 1 cup)
- 1 medium zucchini, diced (about 1 cup)
- 1/2 medium red onion, thinly sliced (about 1/2 cup)
- 1 cup corn kernels (fresh or thawed frozen)
- 1 can (15 oz) black beans, rinsed and drained
- 1 tsp ground cumin
- 1/2 tsp chili powder
- Salt and black pepper, to taste
- 2 cups shredded cheese (cheddar, Monterey Jack, or a blend)
- 1 lime, cut into wedges
- Fresh cilantro, chopped, for garnish
- Optional: 1 jalapeño, thinly sliced (for heat)
For the Sauce / Garnish (Fresh Salsa):
- 2 medium tomatoes, seeded and diced (about 1 1/2 cups)
- 1/4 cup red onion, finely chopped
- 1/4 cup fresh cilantro, chopped
- 1 tbsp lime juice (about 1 lime)
- 1/4 tsp Kosher salt (adjust to taste)
- Optional: 1/2 avocado, diced for creamier salsa
How I Make It
Step 1:
I heat a large skillet over medium-high heat until it feels hot (about 1–2 minutes). I add 1 tbsp olive oil and toss in the sliced bell pepper, zucchini, and red onion. I sprinkle with 1 tsp cumin, 1/2 tsp chili powder, and a pinch of salt and pepper. I stir and cook for 4–5 minutes until the vegetables soften and get those little brown spots — you’ll hear tiny pops and smell the sweetness coming out of the peppers.
Step 2:
I stir in the corn and black beans and cook another 2 minutes to warm through. Taste and adjust seasoning. Tip: if your veggies release too much water, lift the pan off heat for a moment and let steam escape; that helps avoid soggy quesadillas.
Step 3:
I wipe the skillet clean, lower the heat to medium, and melt 1 tbsp butter plus a drizzle of olive oil. I lay a tortilla in the pan, sprinkle about 1/3 cup cheese on half, add a generous spoonful of the veggie-bean mix, and top with another 1/4 cup cheese. Cheese on both sides acts like glue. I fold the tortilla over and press gently with a spatula.
Step 4:
I cook the quesadilla for 2–3 minutes per side until it turns golden and crisp and the cheese melts — you’ll hear a satisfying sizzle and see golden spots bloom on the tortilla. Flip carefully; a thin metal spatula helps. If the outside browns before the cheese melts, reduce heat to low and cover the pan for 30–60 seconds.
Step 5:
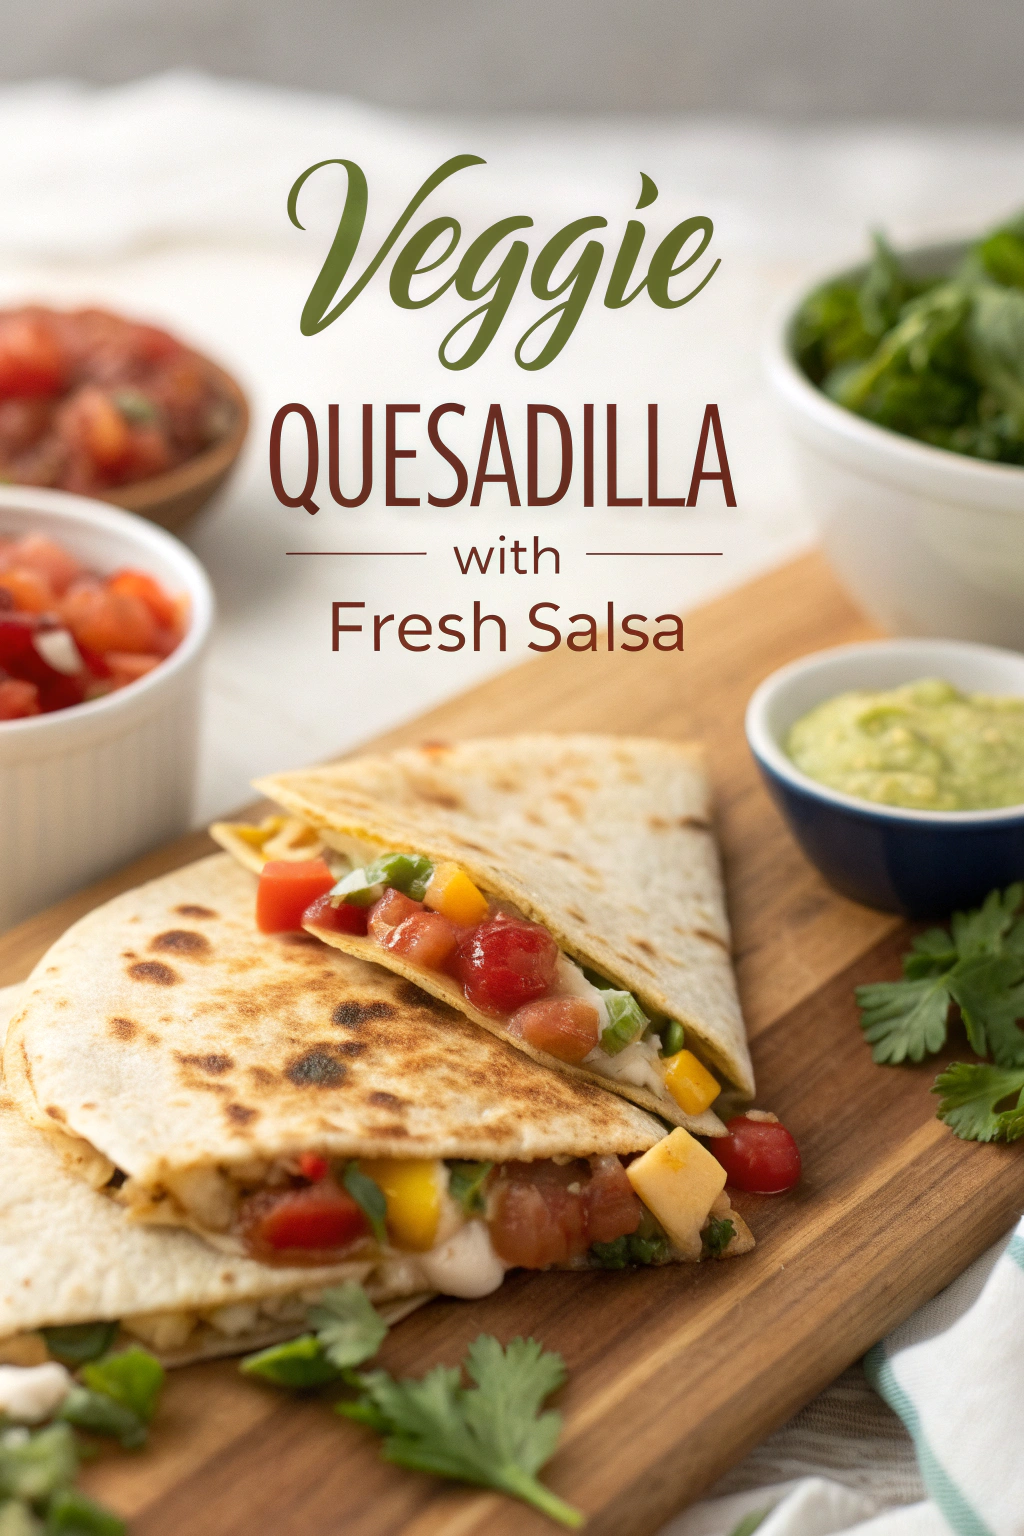
I transfer finished quesadillas to a cutting board and let them rest for 1 minute so the cheese sets slightly (no molten-cheese explosions). I slice into wedges and top with the fresh salsa — bright red tomatoes, crunchy onion, and a hit of lime. Finish with chopped cilantro and a squeeze of lime.
Pro Tips
- Use a mix of cheddar and Monterey Jack for flavor and stretch — cheddar gives sharpness, Jack gives melt. Trust me, both matter.
- If tortillas puff or bubble, press gently with the spatula; that helps distribute cheese and fill the whole surface.
- To reheat without sogginess, warm quesadillas in a dry skillet over medium-low for a minute per side; the skillet brings back crispiness better than the microwave.
- For extra charred flavor, finish quesadillas on a hot cast-iron pan for that nutty, toasty aroma.
Common Mistakes to Avoid
- Skipping preheating: Classic rookie move. It changes texture and bake time.
- Overmixing: Leads to dense or chewy results. Mix until just combined.
- Guessing cook time: Always use visual cues or a timer, not just vibes.
- Overcrowding pans: Give your food some breathing room to crisp properly.
Alternatives & Substitutions
- Swap black beans for shredded rotisserie chicken or cubed tofu — chicken adds protein and a familiar flavor; tofu soaks up spices and makes it vegetarian-friendly.
- Use corn or whole wheat tortillas, or gluten-free tortillas if needed; gluten-free tortillas may break more easily, so handle gently.
- Swap cheese for dairy-free shredded cheese to make it vegan; note the flavor and melt will differ slightly.
- Replace butter with oil if you must — use ¾ the amount of oil for the same richness and to avoid greasiness.
Variations & Tips
- Spicy version: add chopped chipotle in adobo or a few dashes of hot sauce to the veggie mix.
- Kid-friendly: skip the jalapeño and use mild salsa; dice veggies smaller so little hands don’t fuss.
- Breakfast twist: add scrambled eggs and swap black beans for breakfast sausage.
- Autumn harvest: swap zucchini for roasted sweet potato and add a pinch of smoked paprika for depth.
- Create a “loaded” version: top with dollops of sour cream, pickled onions, and sliced avocado.
- Creative twist: mix in crumbled queso fresco and chopped roasted pineapple for a sweet-savory bite.
FAQ (Frequently Asked Questions)
- Can I make this ahead of time?
- Yes! Prep the veggie-bean filling and salsa up to 24 hours ahead and refrigerate separately. Assemble and cook quesadillas just before serving for best texture. To store cooked quesadillas, wrap in foil and refrigerate up to 3 days. Reheat in a skillet for crispiness.
- Can I double the recipe?
- Sure thing. Use two skillets or cook in batches — don’t overcrowd the pan or tortillas will steam instead of crisp. Keep finished quesadillas warm at 200°F in the oven while you finish the rest.
- Can I substitute butter with oil?
- Technically yes, but you’ll miss that buttery magic. Use ¾ the amount of oil and expect a slightly different flavor and browning behavior.
- How do I know it’s done?
- Look for a golden-brown exterior and a little bit of cheese peeking out at the edges. Listen for a steady sizzle and feel a slight resistance when you press the quesadilla — that tells you the cheese has melted and the filling warmed through.
- What if I don’t have ingredient X?
- No stress — swap tomatoes for canned fire-roasted tomatoes, bell pepper for another sweet pepper, or black beans for pinto beans. Keep the spice balance and you’ll still have a great quesadilla.
How I Like to Serve It
I pile wedges on a big platter with the salsa in a bowl and lime wedges on the side. Add a cold beer or a tangy margarita for grown-up company, or pair with a simple green salad and iced tea for a family meal. These quesadillas work for picnic plates, quick lunches, or cozy movie nights — they always feel a little celebratory.
Notes
- Store cooked quesadillas in the fridge up to 3 days. Reheat in a skillet for best results.
- If you add meat, cook it to safe temps (chicken to 165°F) before adding to the quesadilla.
Final Thoughts
Closing: Now go make a mess of your kitchen, fill up some tortillas, and share these warm, crunchy, bright bites — or keep them all to yourself. You’ve got this!

Hi, I’m Lina, the creator of Lina Easy Recipes.Cooking has always been my passion, and I love sharing simple, homemade dishes that anyone can prepare.
Love What You See?
Join me on Pinterest and Facebook for daily cooking inspiration, new recipe ideas, and behind-the-scenes kitchen stories. Let’s cook something wonderful together!


